Setup guide
Pick your role below.
Five minutes to set up. Done once, works at every RinsePay wash — bays, vacuums, and vending machines.
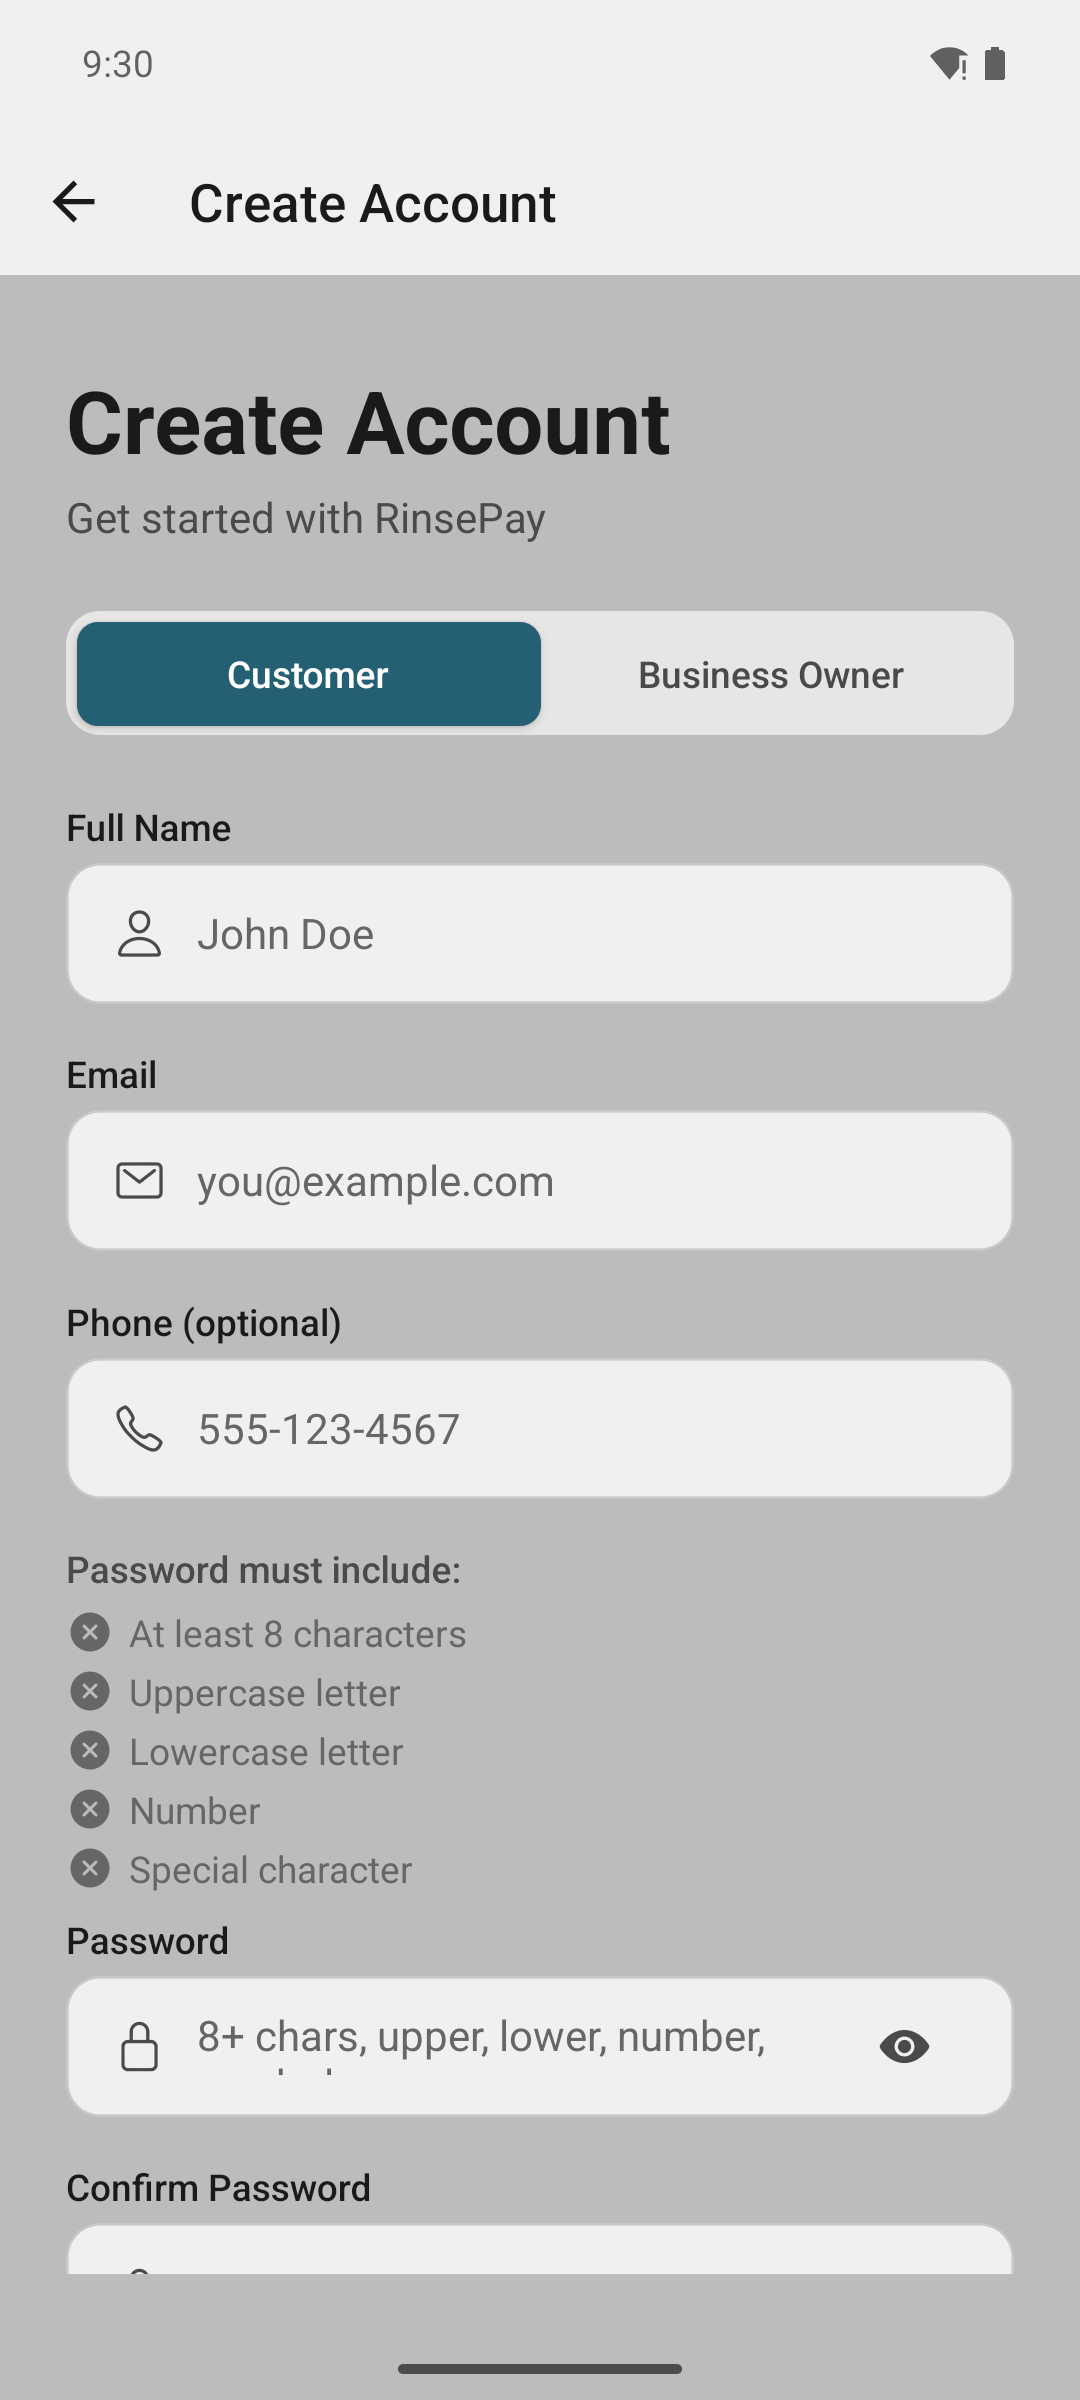
Download RinsePay from the App Store or Google Play. Create an account with your email and phone number.
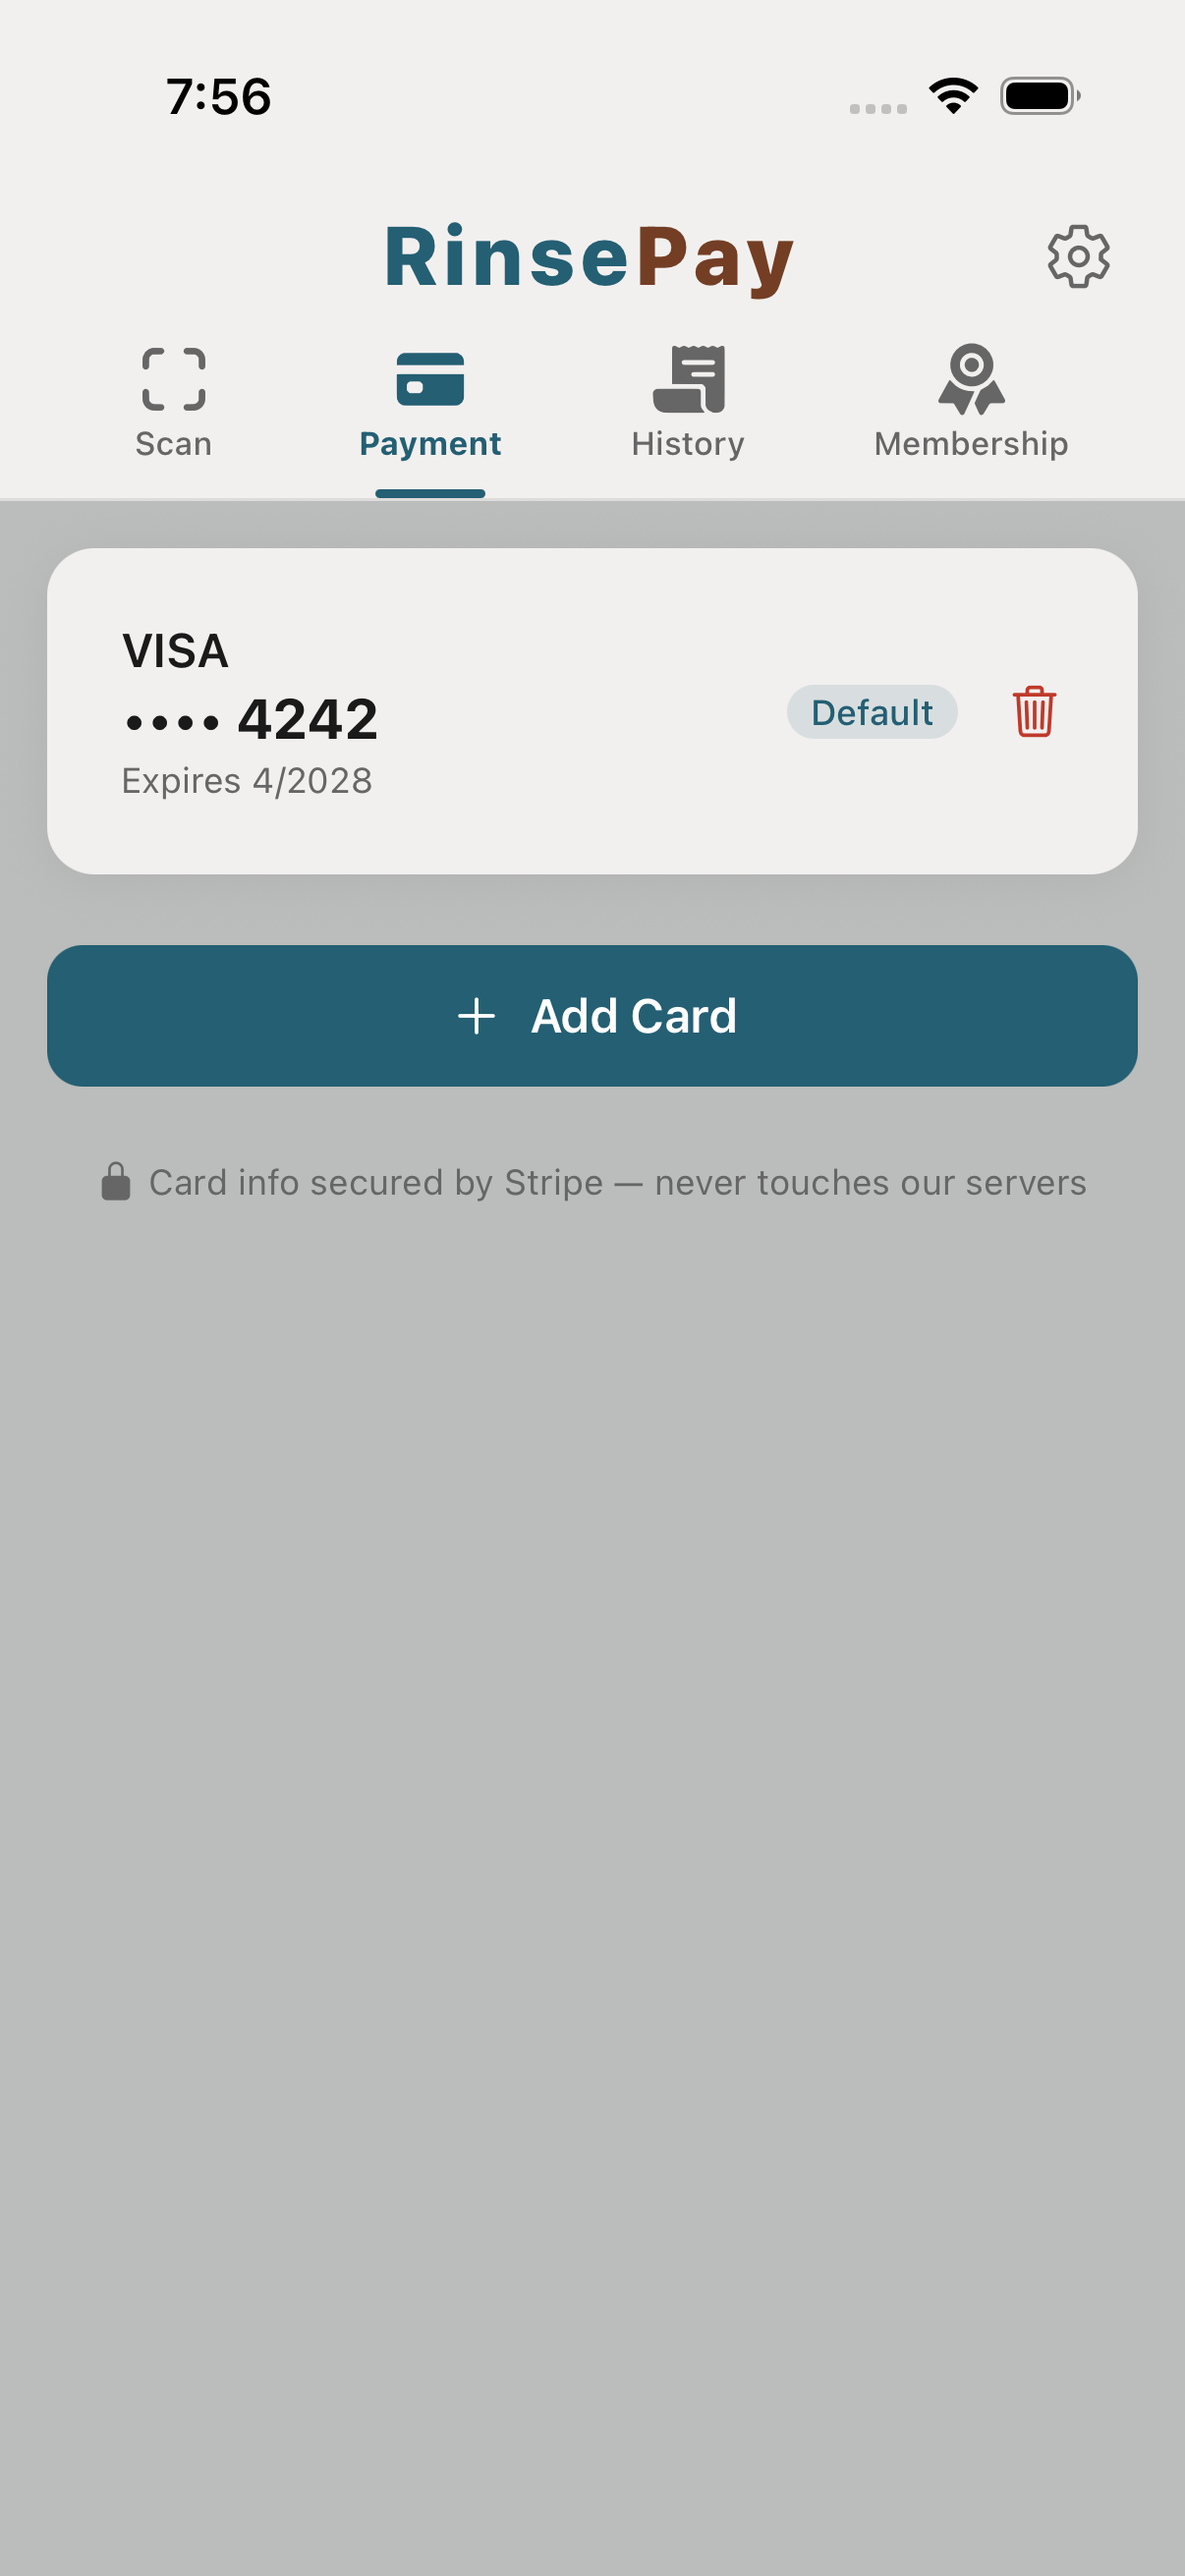
Open the Payment tab and add a credit card, Apple Pay, or Google Pay. This is saved securely with Stripe — you'll only enter it once.
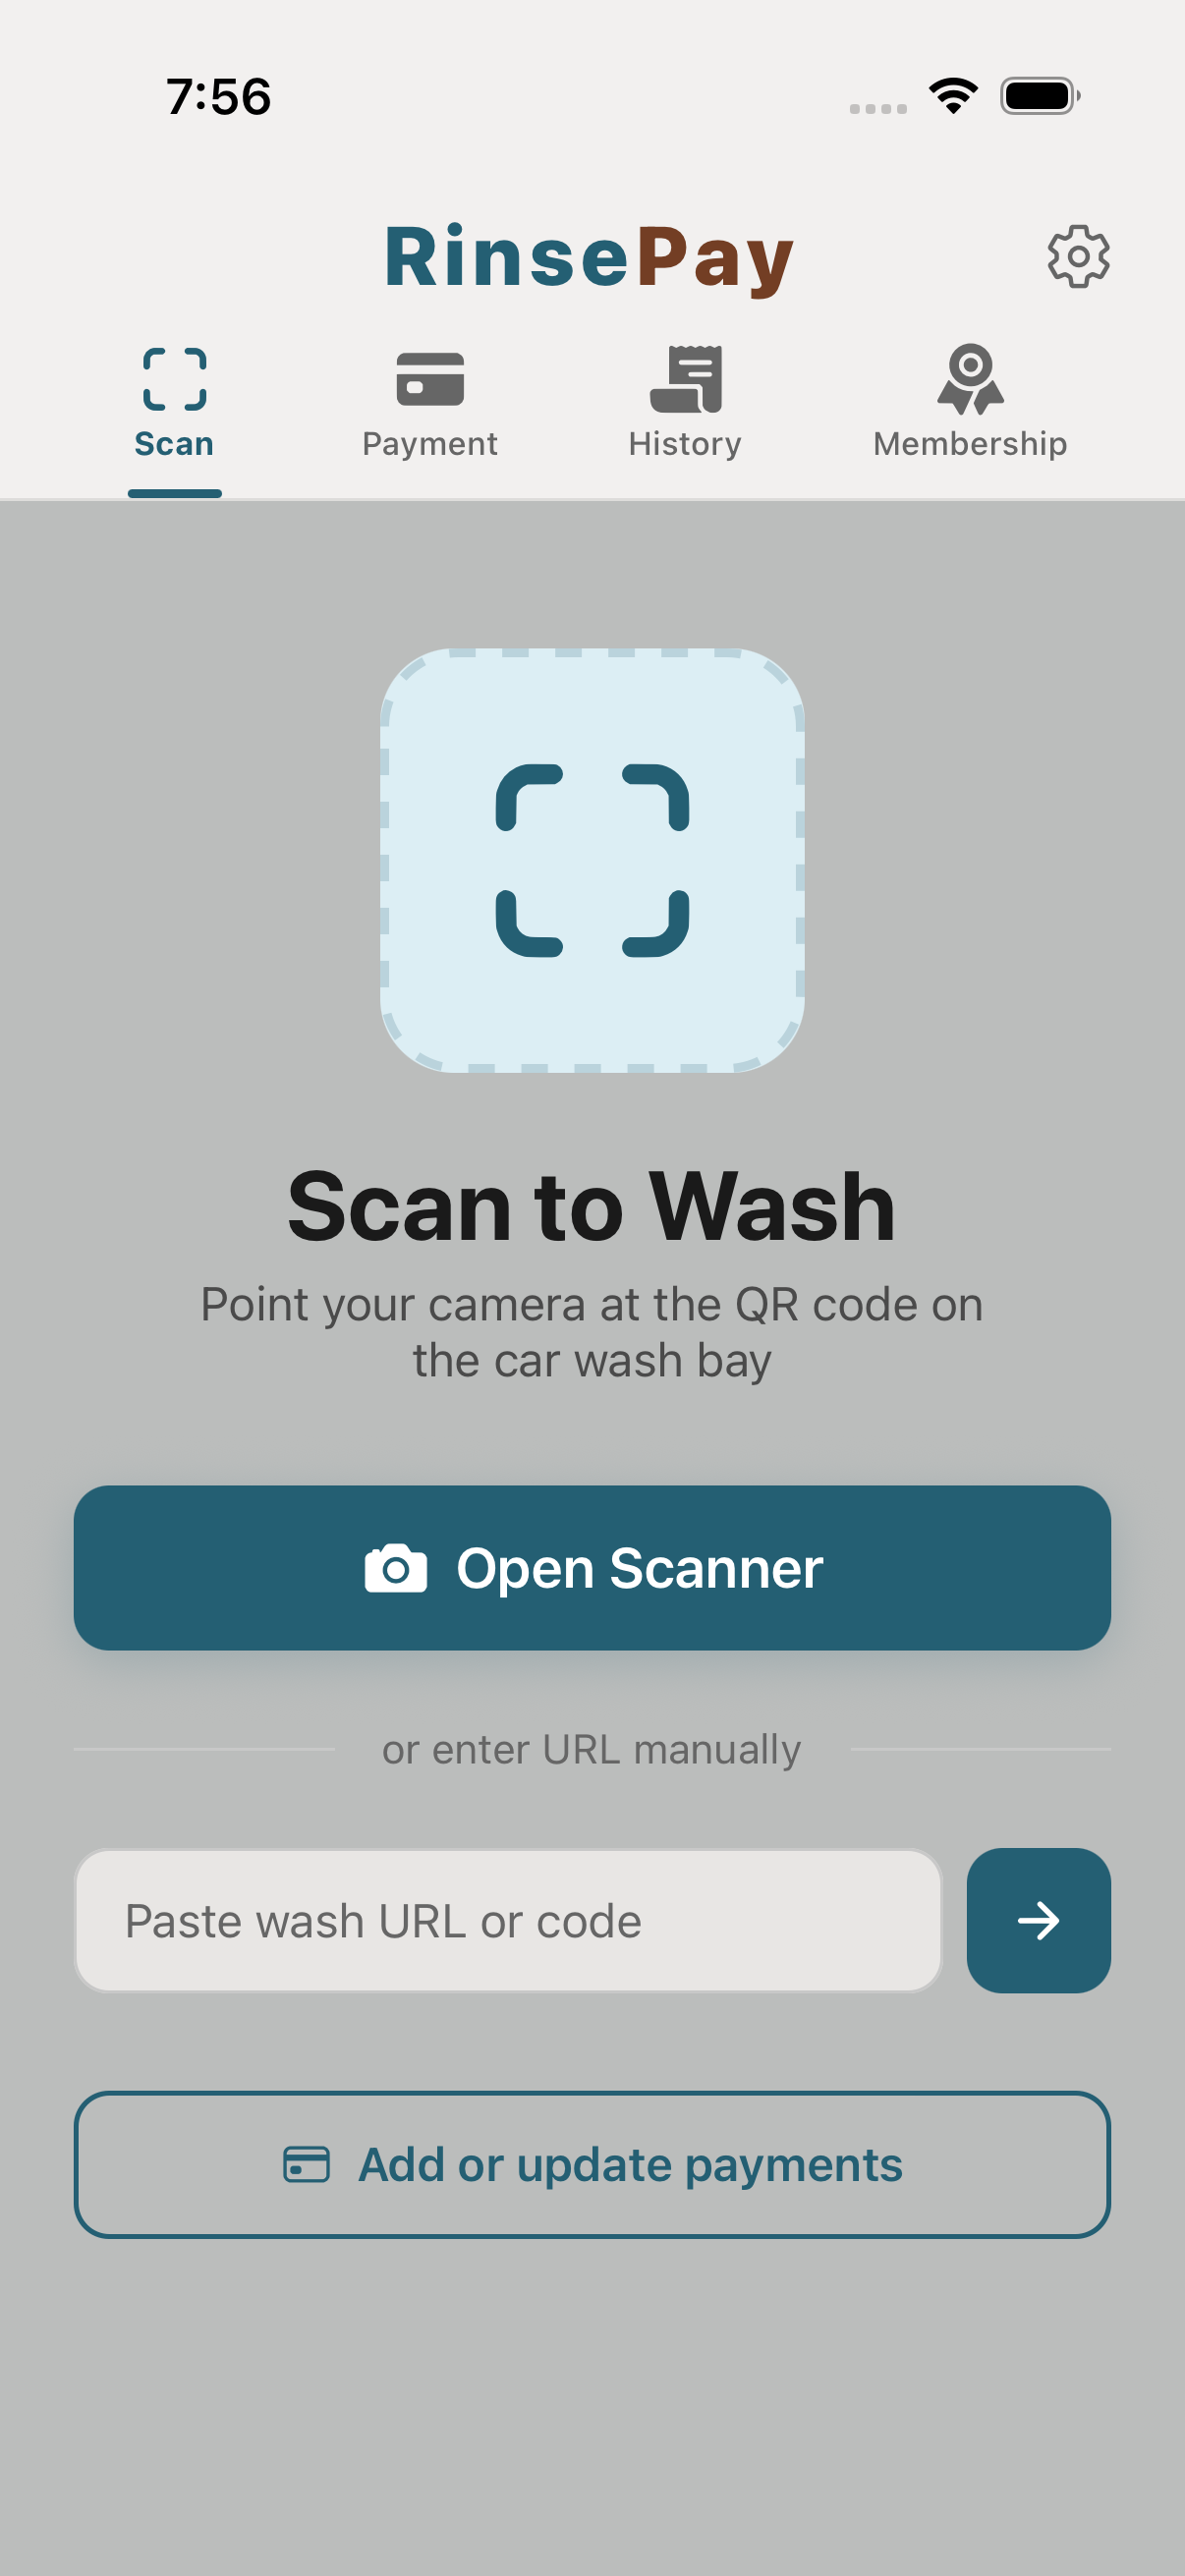
Every piece of RinsePay-enabled equipment has its own QR sticker — wash bays, vacuums, and vending machines alike. The sticker is your start button: tap Scan in the app and point your camera at it. Not sure where the nearest RinsePay wash is? The Map tab shows them near you.
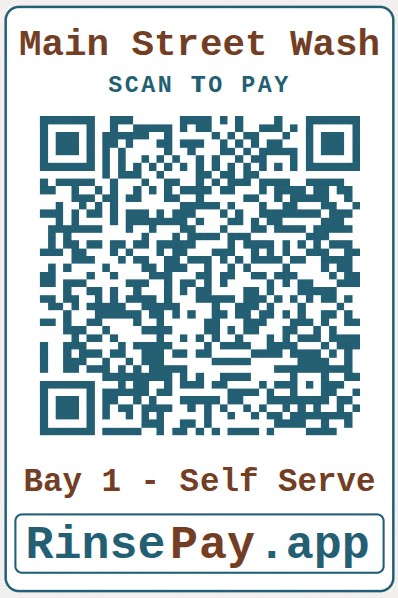
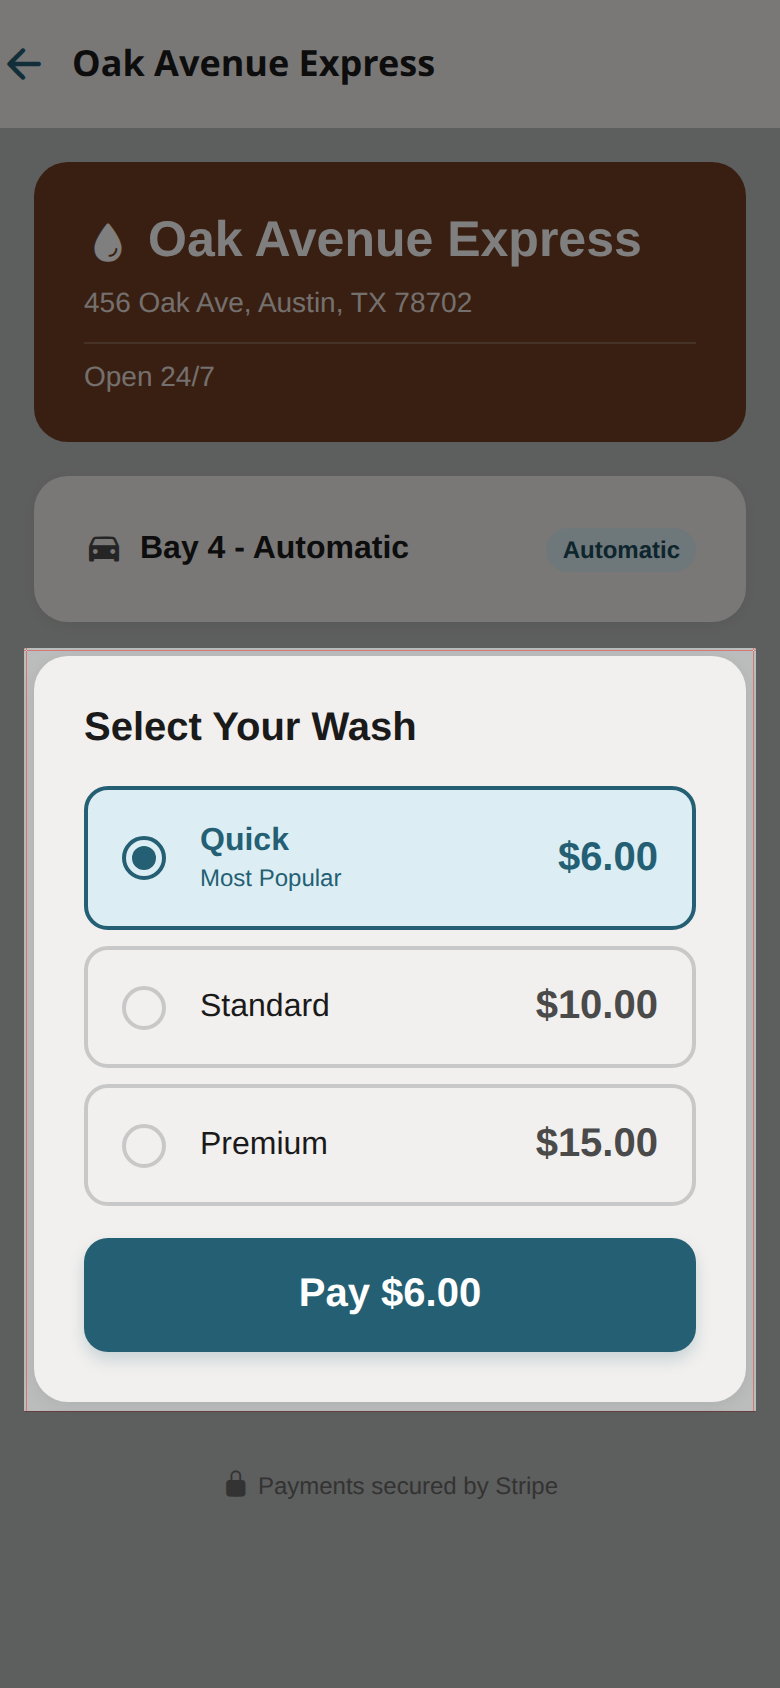
Pick your wash option — pay-per-minute self-serve, an automatic wash tier, a prepaid bundle, or a membership — and tap Start. Water flows immediately. Your phone runs the clock. Bundles can include more than washes: many locations sell combos with vacuum minutes and vending credit built in, and the app draws from them automatically.
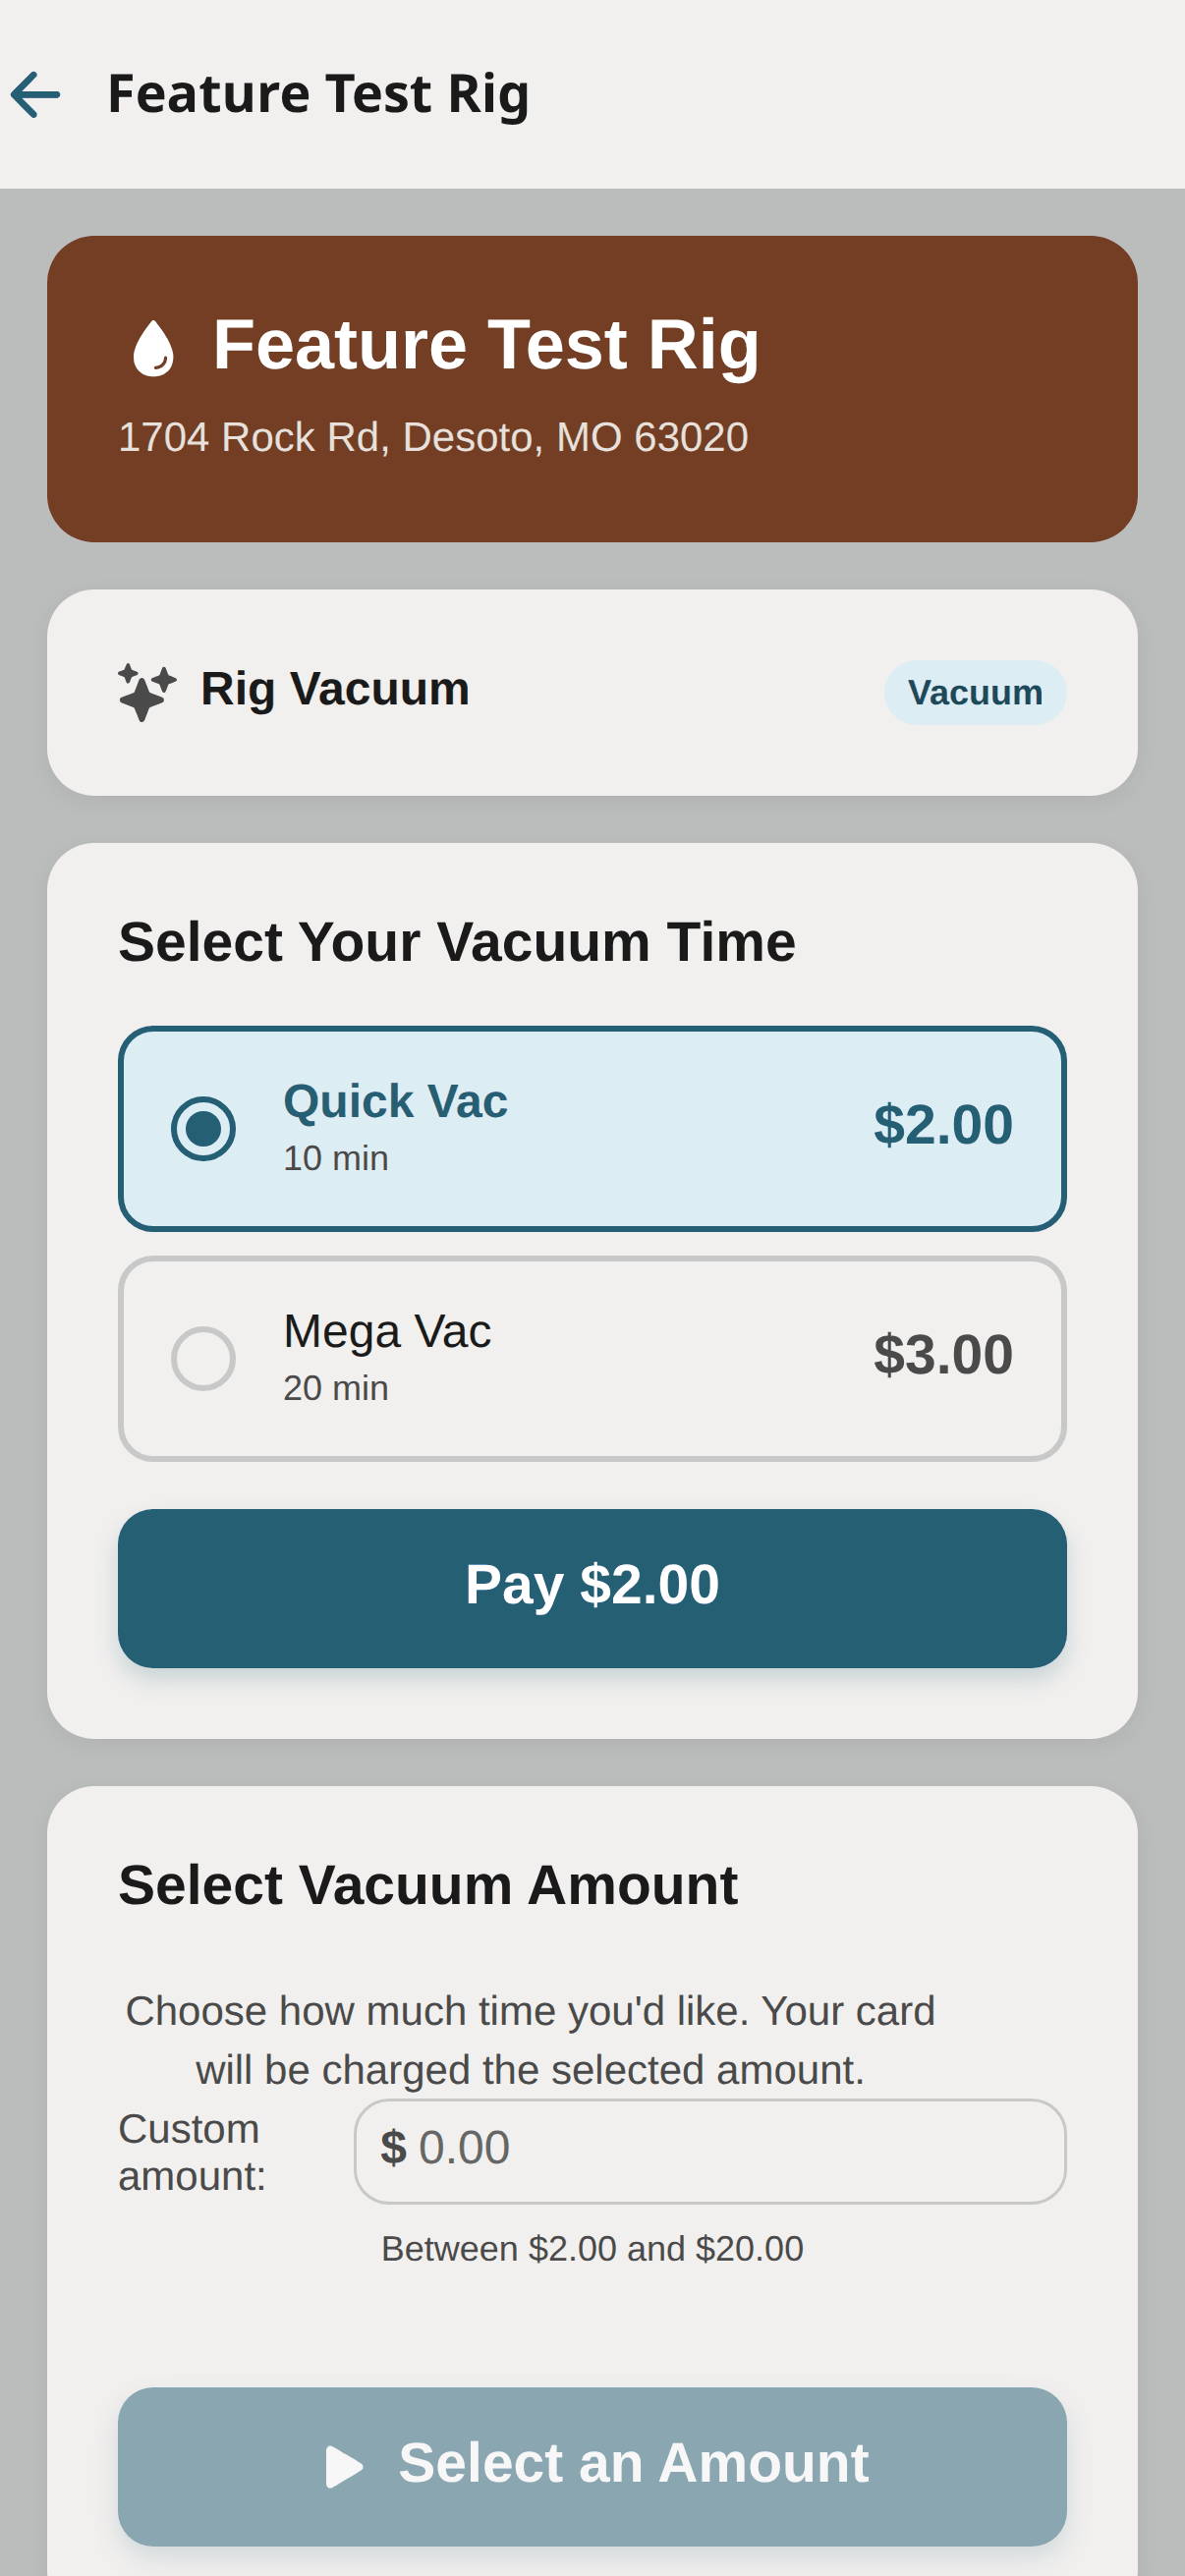
Scan the QR on the vacuum and pay the way that vac is set up: some sell timed packages (a block of minutes at a set price) or let you enter a custom amount, others run metered sessions — start it, vacuum as long as you need, stop it in the app and pay only for the time you used. You can stop any session from your phone — the app warns you first if a minimum charge or minute deduction applies — and if you navigate away mid-session, a "Vacuum in Progress" banner on every screen takes you straight back. Bought a wash that includes free vacuum minutes? The app shows "Free vacuum available" at the vac — redeem it in one tap, no charge (stop early and unused free minutes are gone, so vacuum first). Membership and bundle vacuum minutes apply the same way.
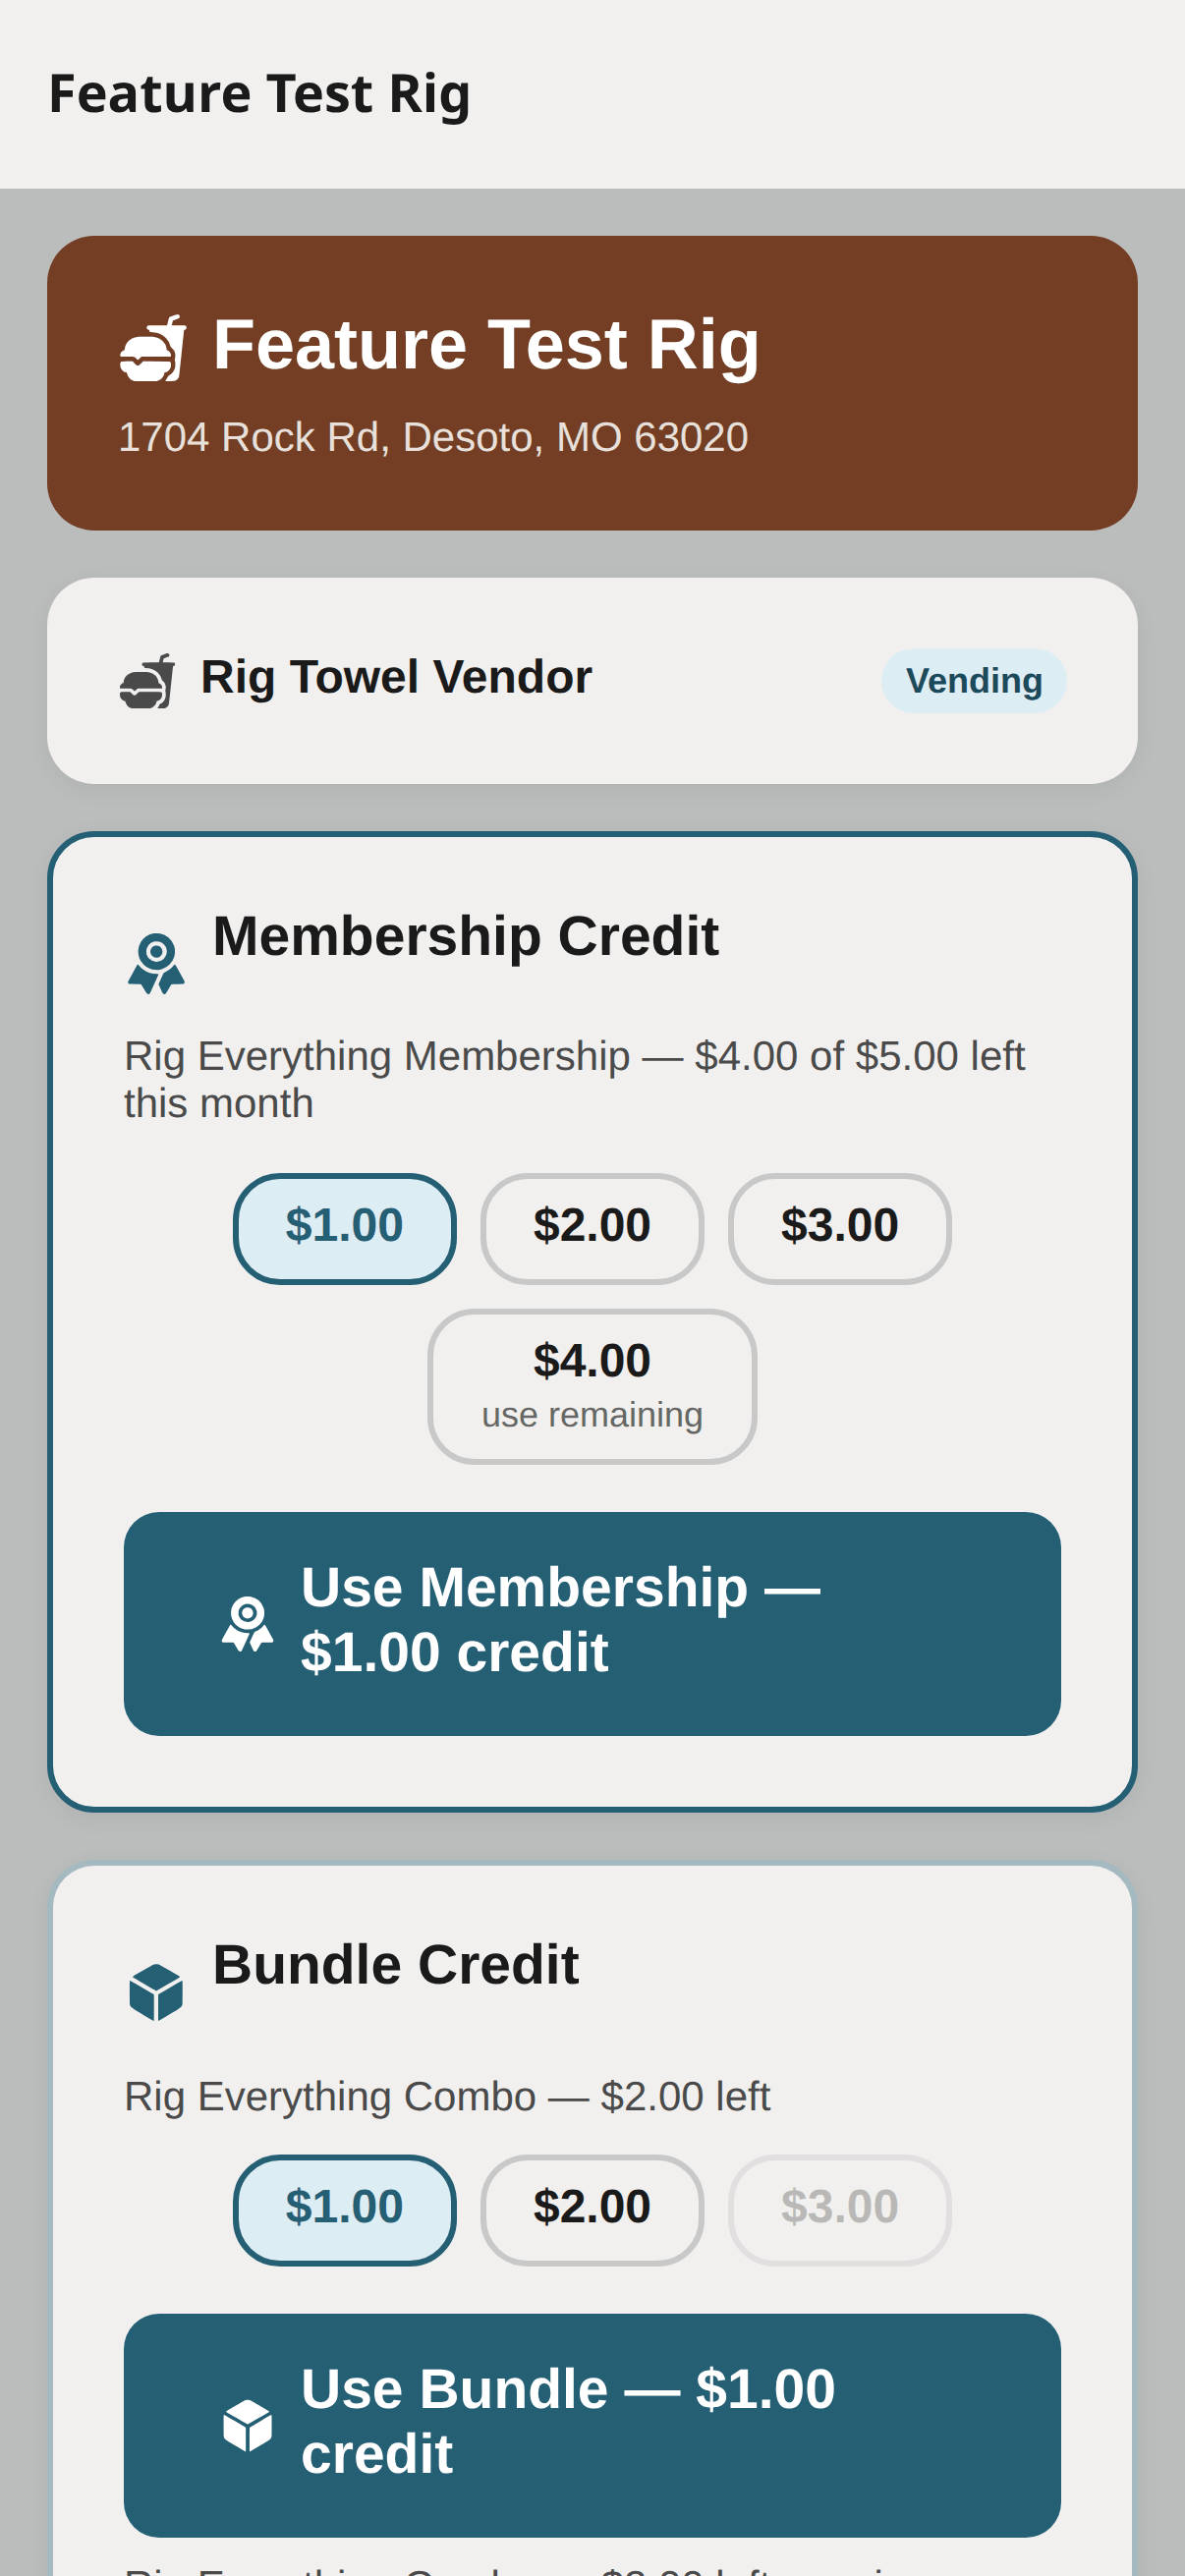
Scan the QR on a RinsePay-enabled vending machine, pick a credit amount, and pay. The machine is credited instantly — exactly as if you'd dropped coins in — then you make your selection at the machine as usual. Vouchers, membership vending credit, and bundle vending credit all apply here too — membership and bundle spends can use any of the machine's amounts, and a "use remaining" option drains an odd balance exactly. If your item doesn't vend, open the purchase in your history and tap "Item didn't vend" — the owner sees it right away and can make it right.
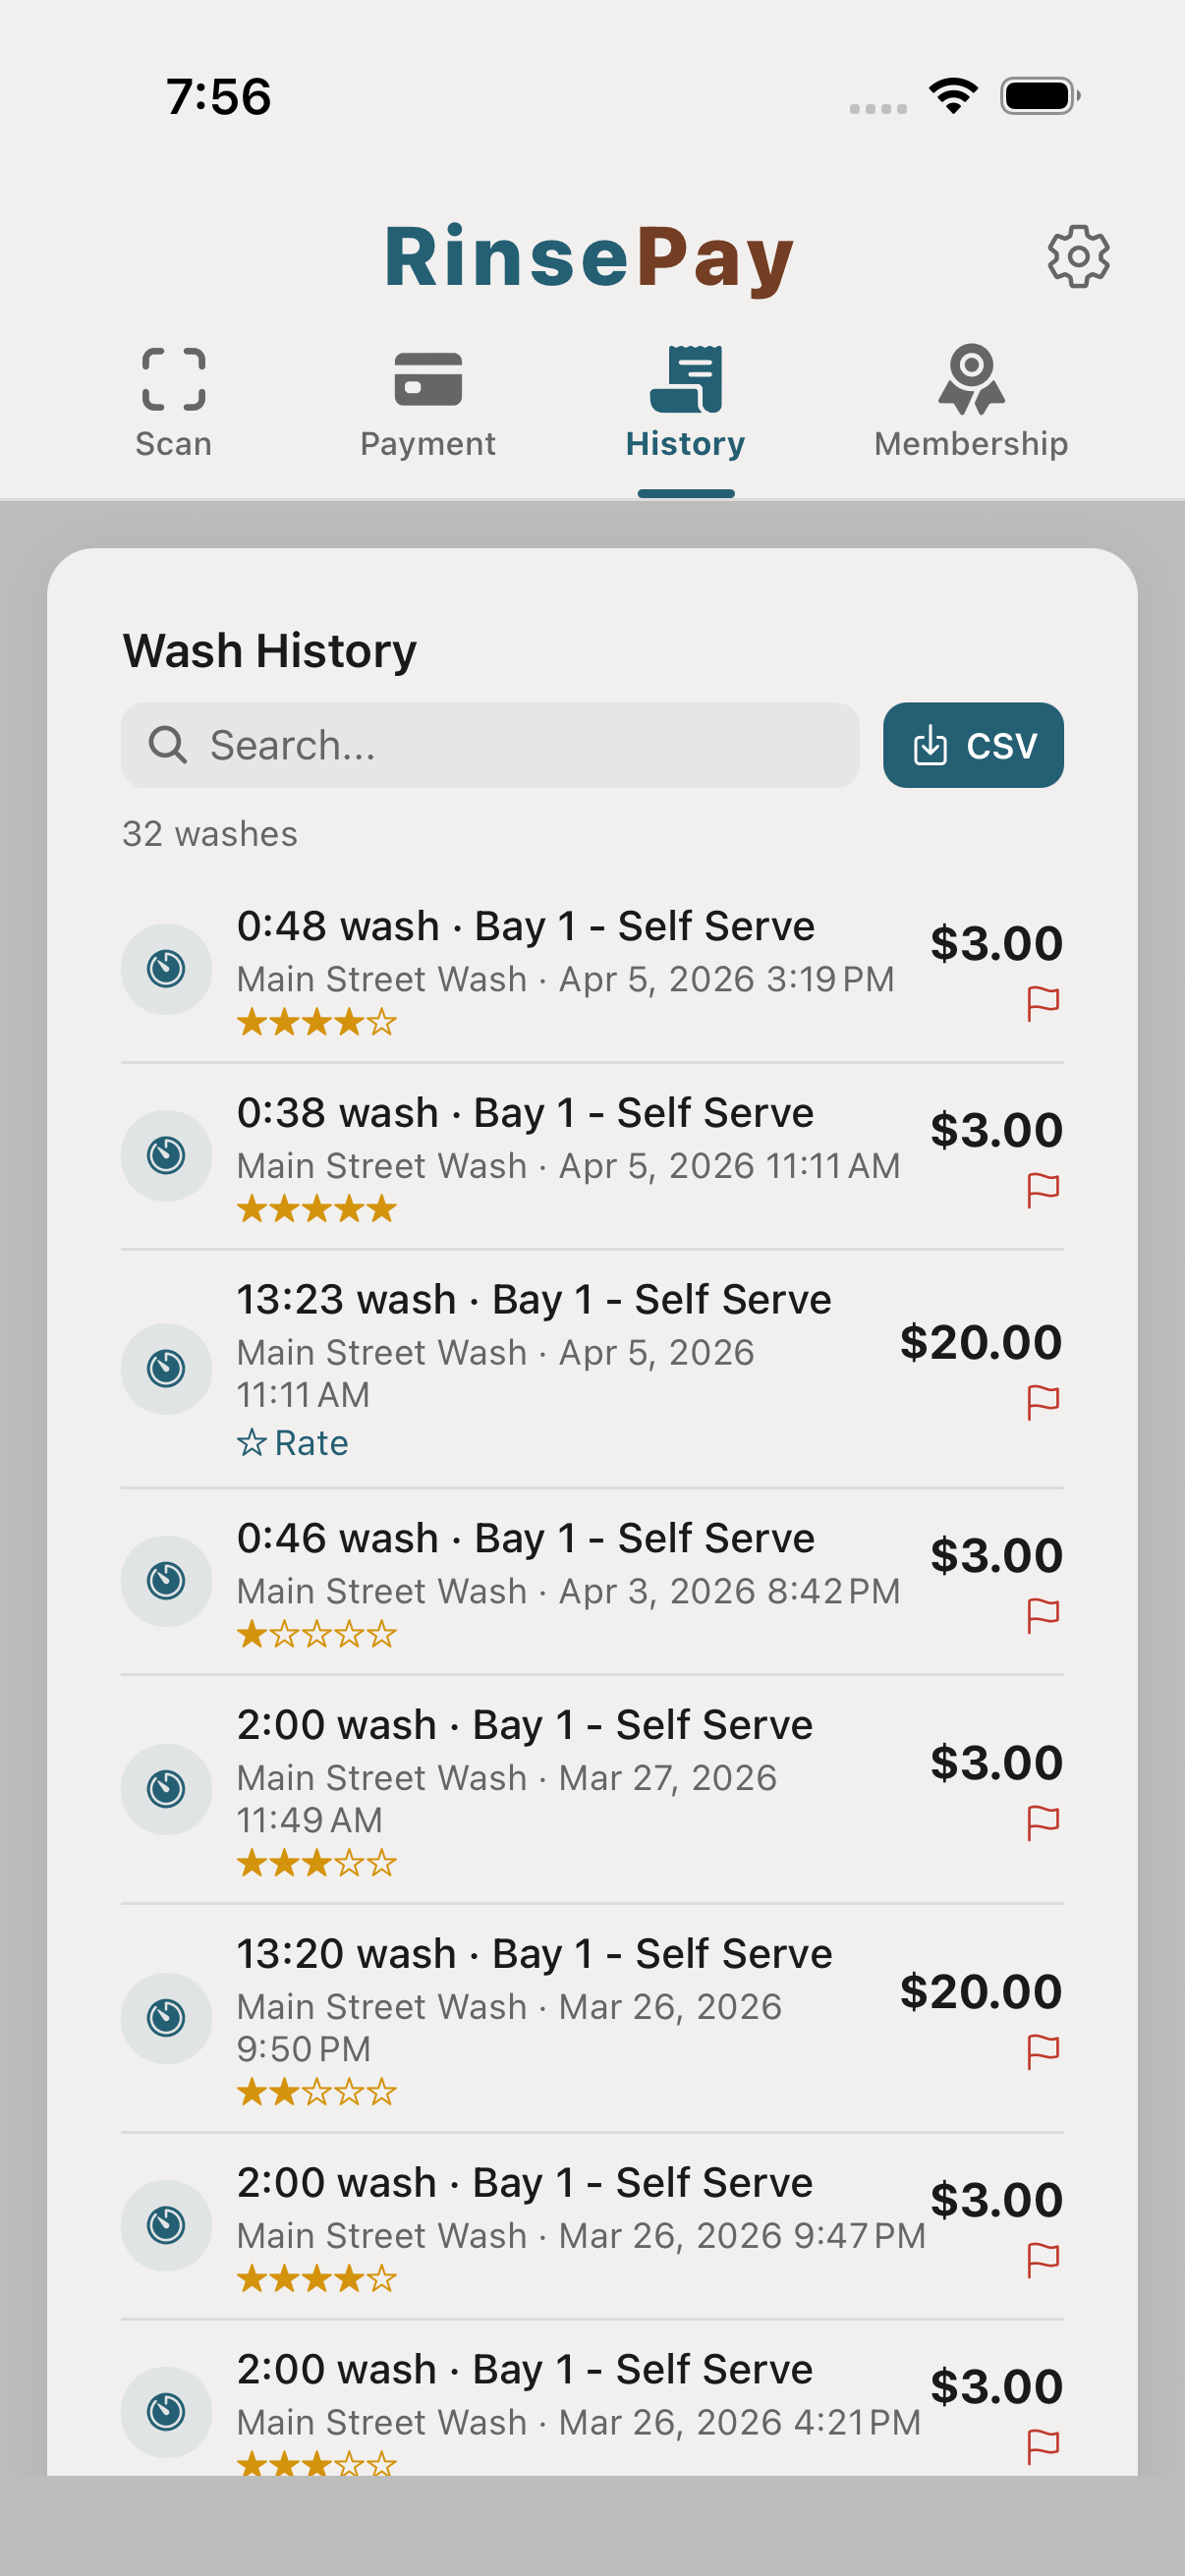
When the wash ends, the app asks for a rating. Good experience? Tap the stars. Something broken — bay out of soap, card reader down, weird smell? Tap Report a problem from the history screen and the owner sees it fast.
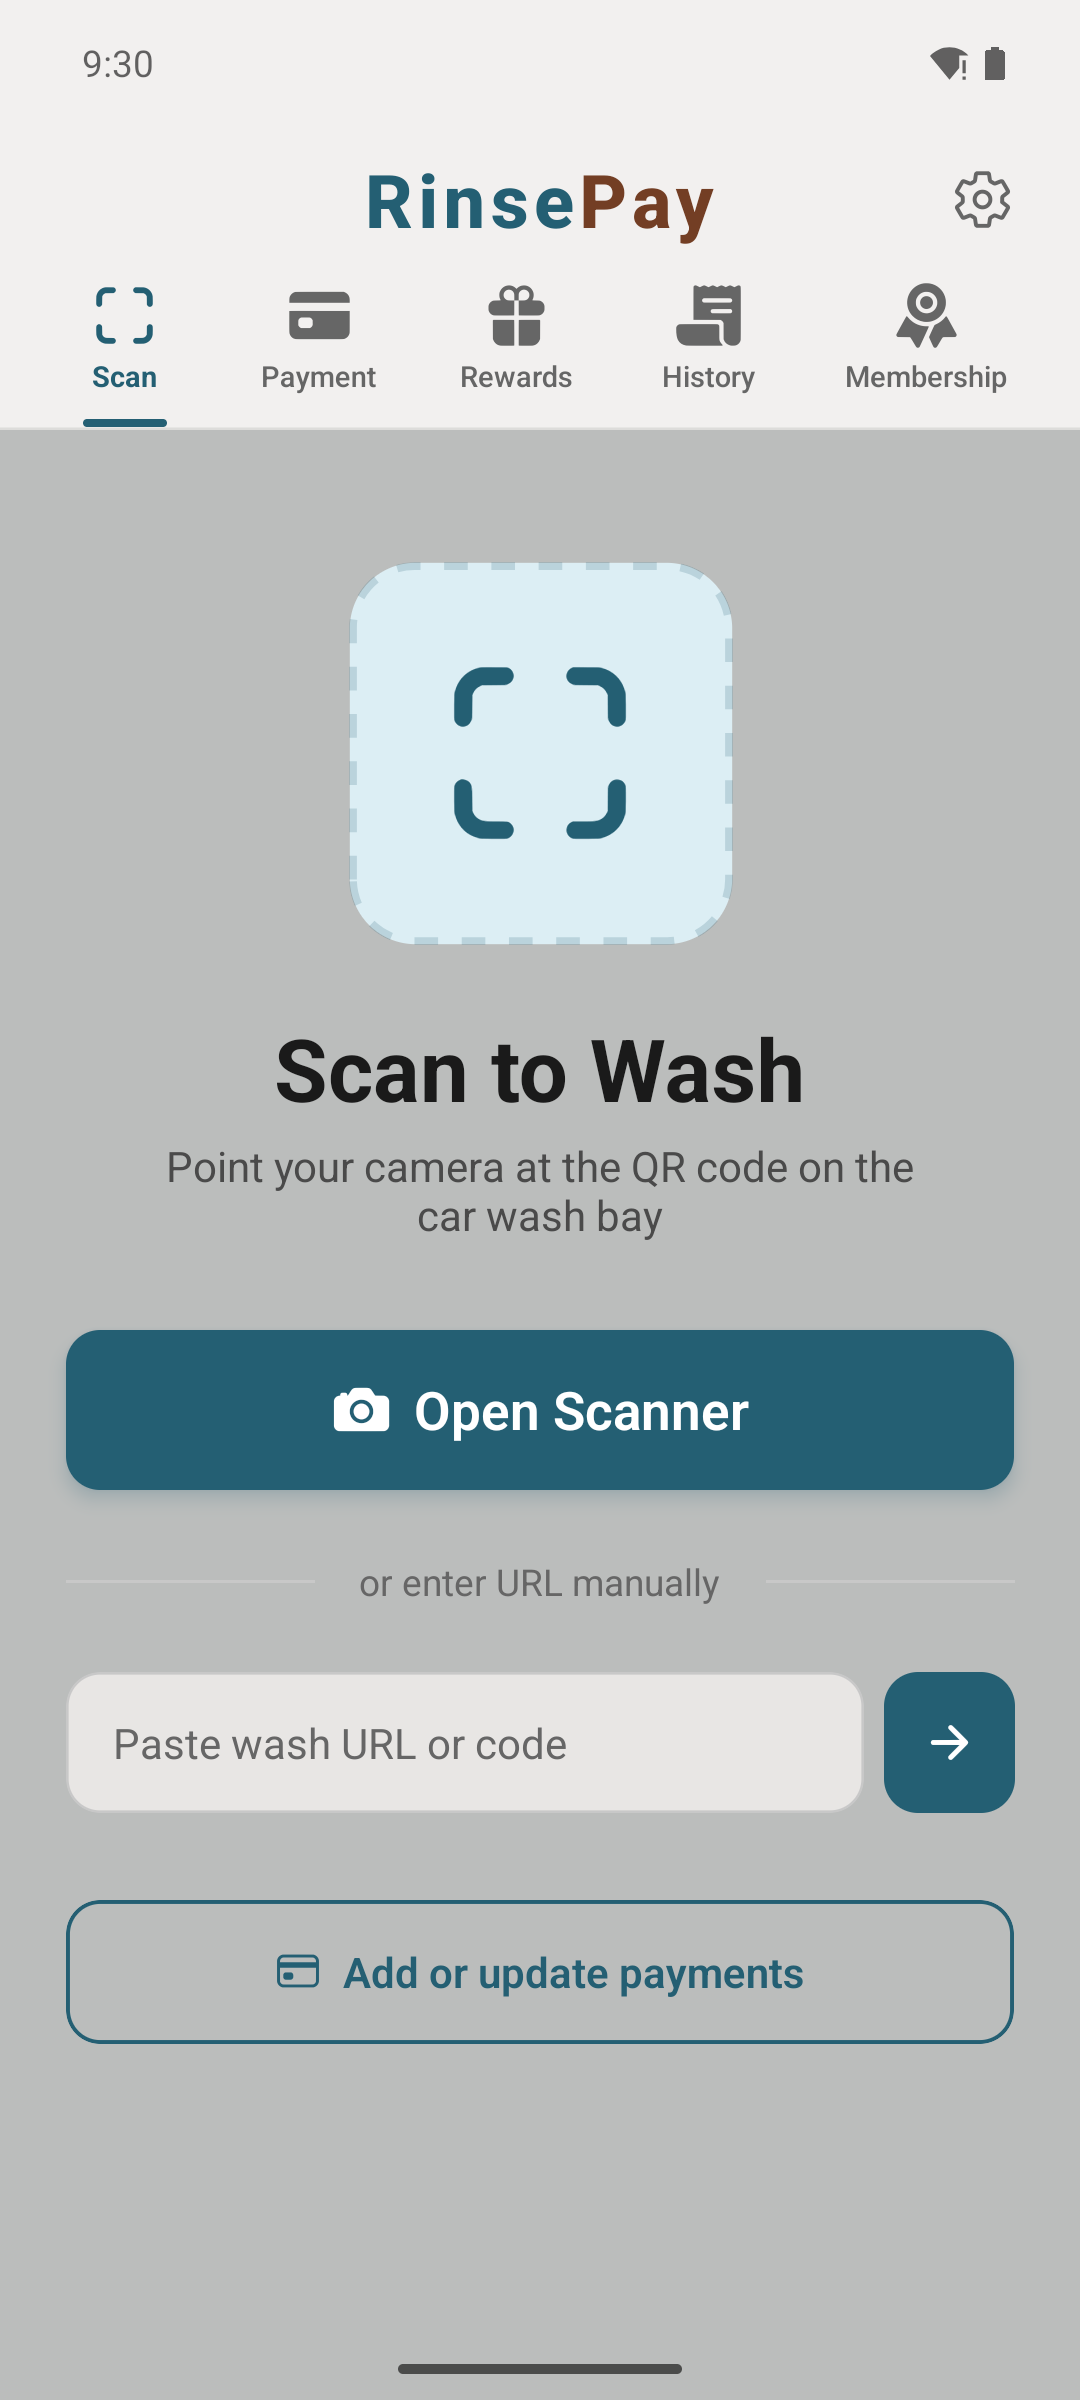
Got a gift link or a promo code? Tap the link to add it to your account, or paste the code into "Paste wash URL or code" on the Scan tab. Offers come in several flavors — free washes, percent off, free self-serve or vacuum minutes, free vending credit, and instant account credit — and each shows automatically on the pay screen wherever it applies: bays, vacuums, or vending machines. Free-wash gifts even carry the tier's free vacuum minutes with them.
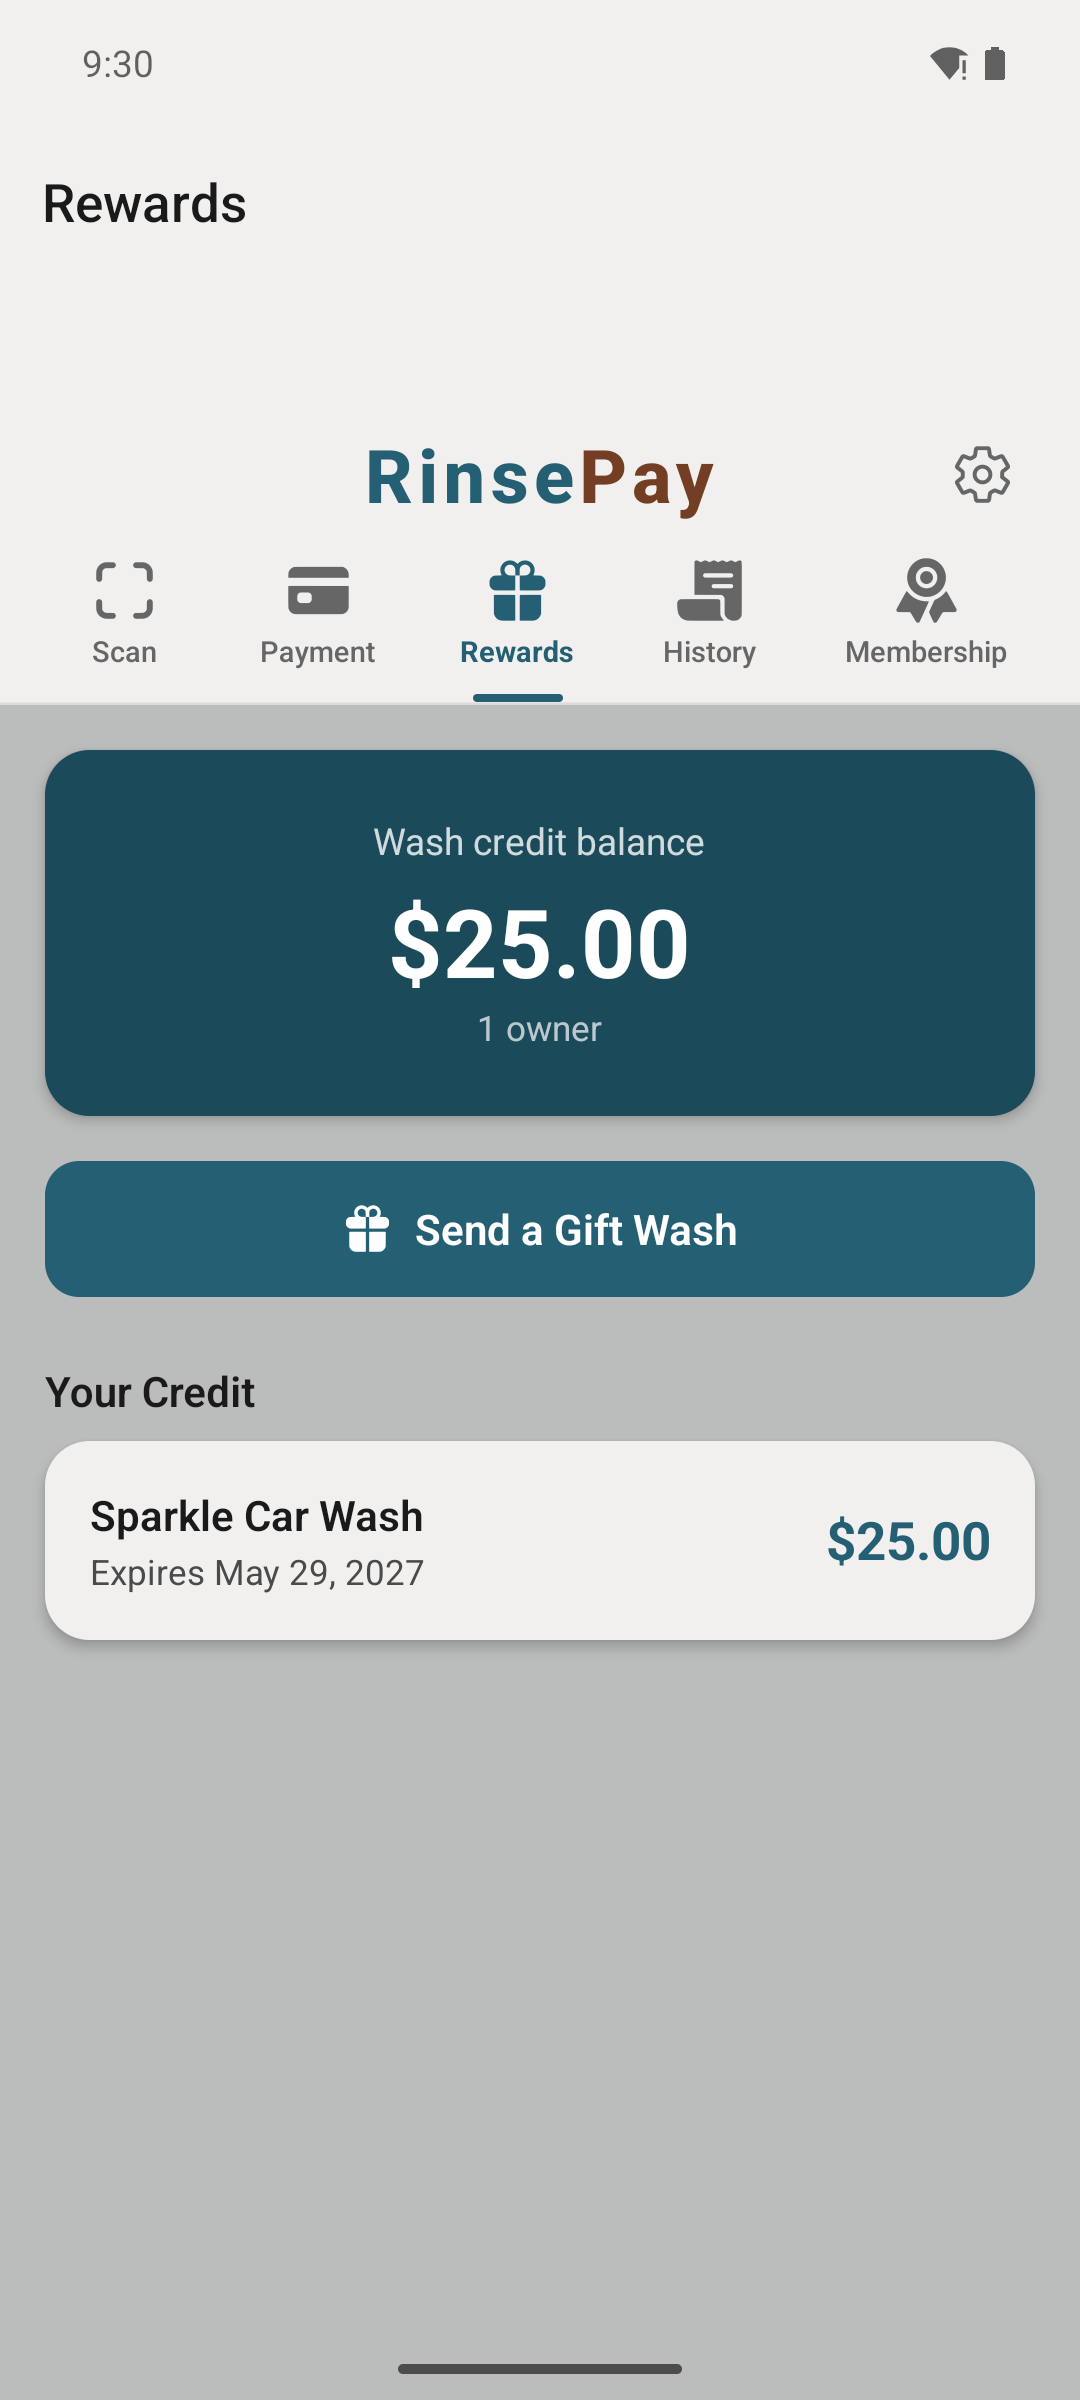
Every paid purchase earns points you can redeem. Depending on the location, redemptions can be free washes, self-serve minutes, vacuum minutes, or vending credit. Your Rewards tab shows your points, any wash credit you've been sent, and lets you gift a wash to a friend. Credit and rewards apply automatically at checkout.
Stand up a wash, add equipment — automatic and self-serve bays, vacuums, vending machines — order hardware, run fleets, sell bundles and memberships, combine visits into one charge, run gifts, promos and rewards, send win-backs, and export P&L, sales-tax and payroll reports.
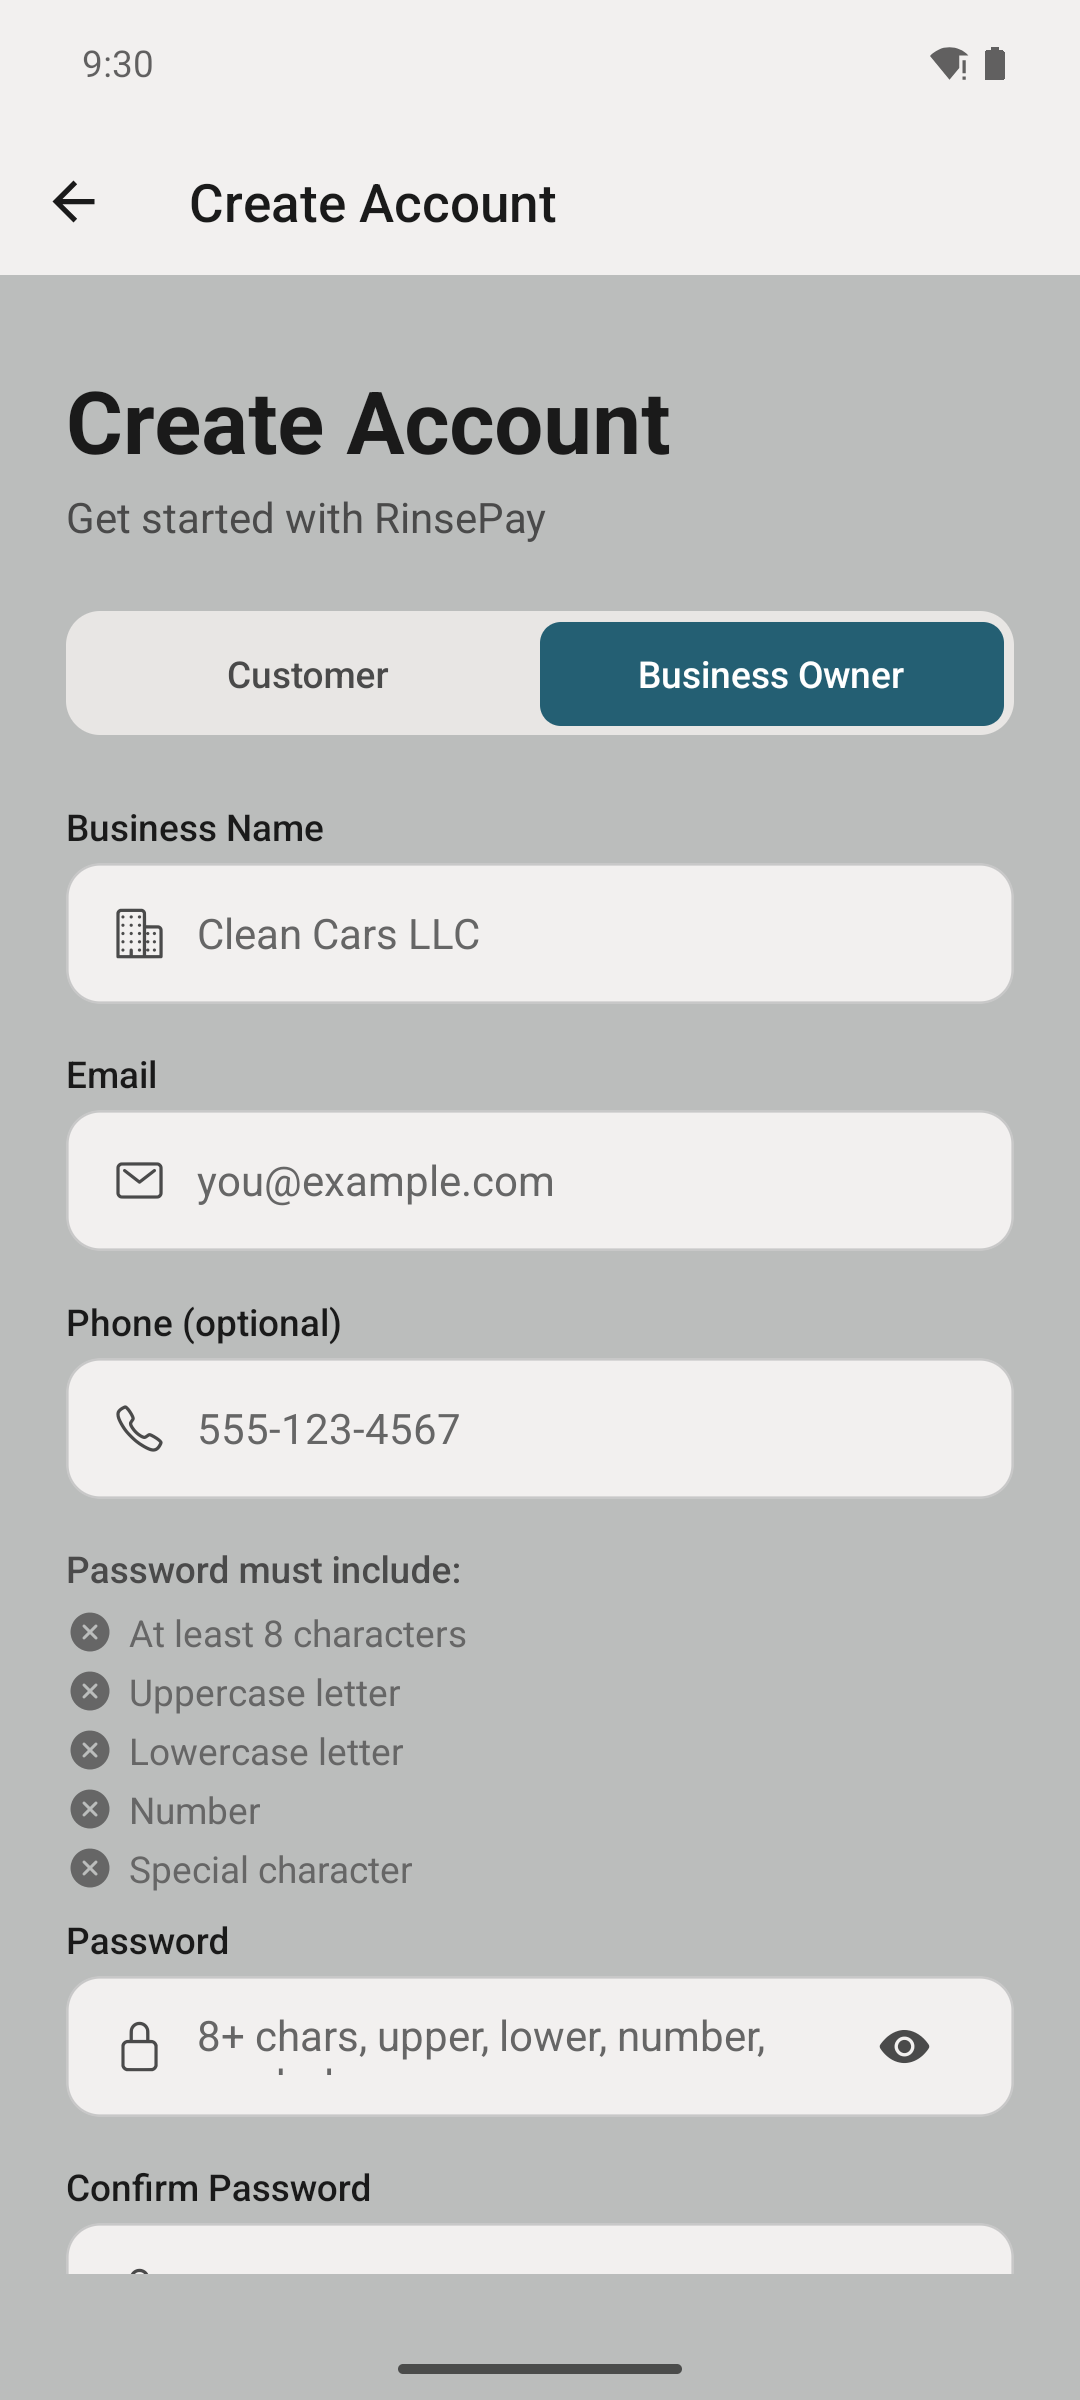
Sign up at rinsepay.app with the business email you want Stripe payouts to land under. Verify your email, then continue below to set up your first location.
Each bay, vacuum, and vending machine needs its own RinsePay controller, so get the order in early — the RinsePay team pre-flashes and ships every board, plug-and-play when it arrives, and you can set up everything below while it's on the way.
Ordering happens right in the app: open the Hardware tab and tap Need Hardware? to pick your controllers and check out. Wiring diagrams and install walk-throughs for every bay type live at hardware.rinsepay.design.
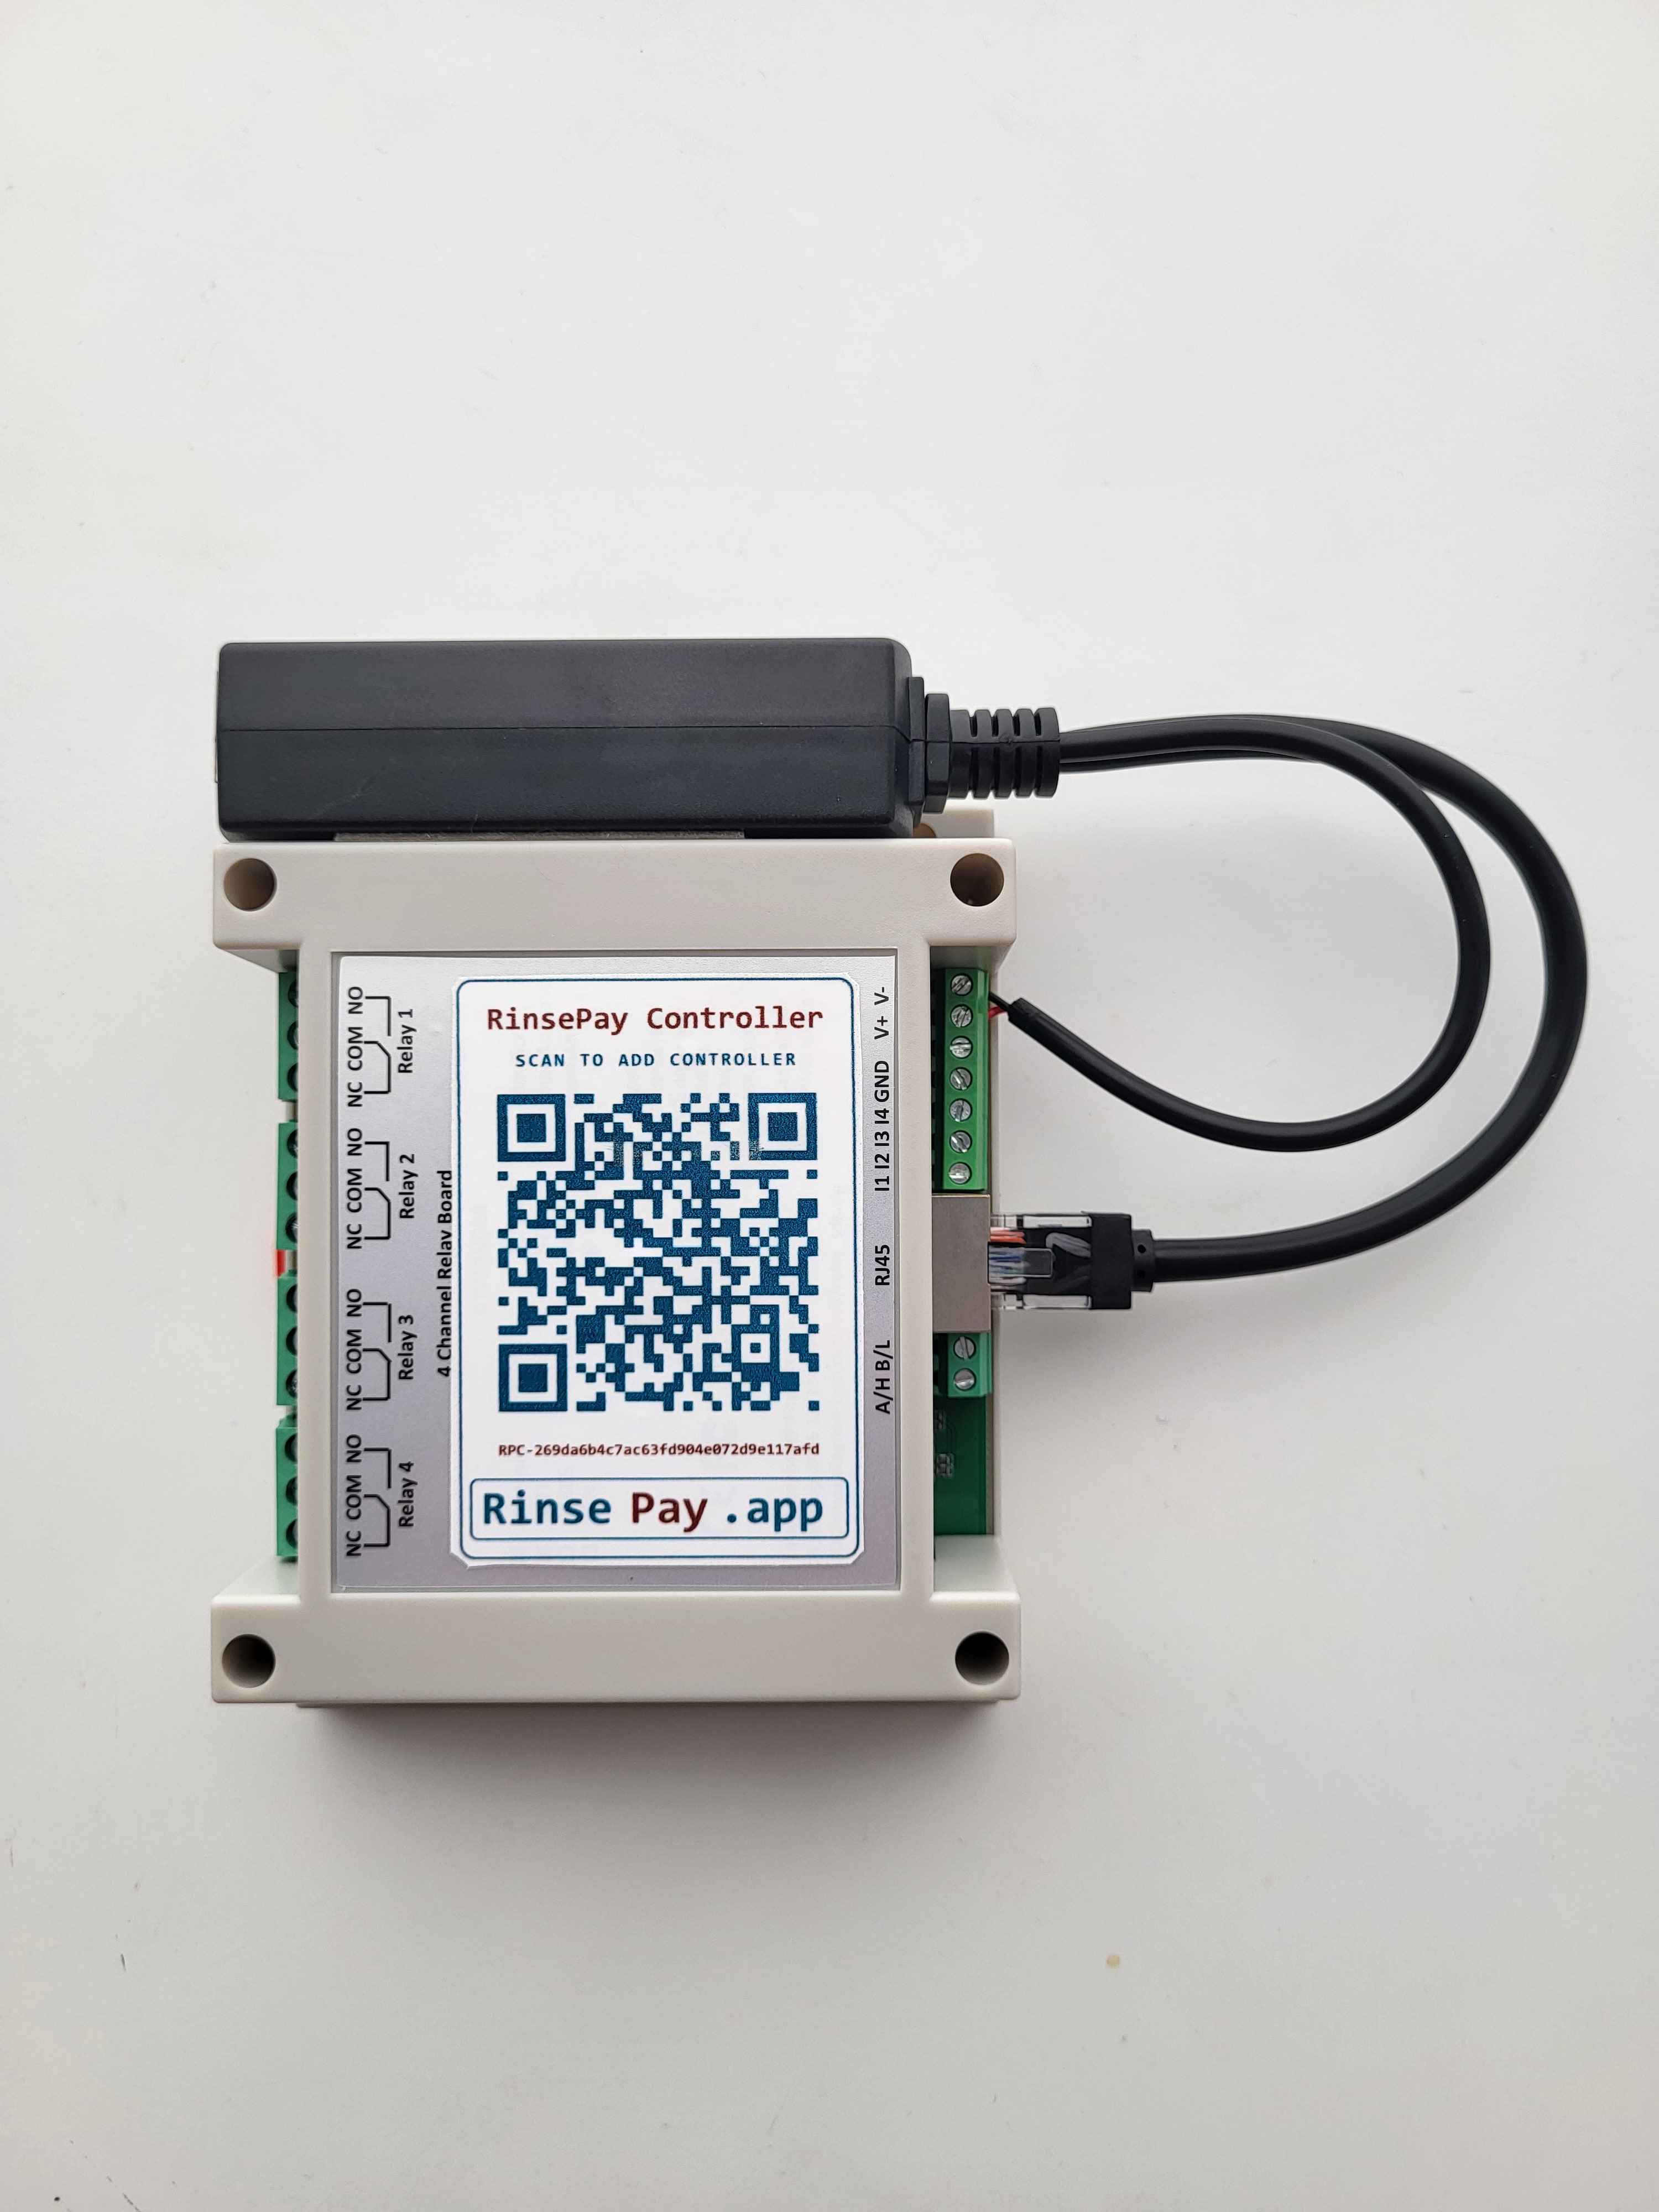
Stripe Connect handles payouts directly to your bank. Click Connect Stripe, complete the 10-minute onboarding (EIN, bank account, ID verification), and you're live for payouts.
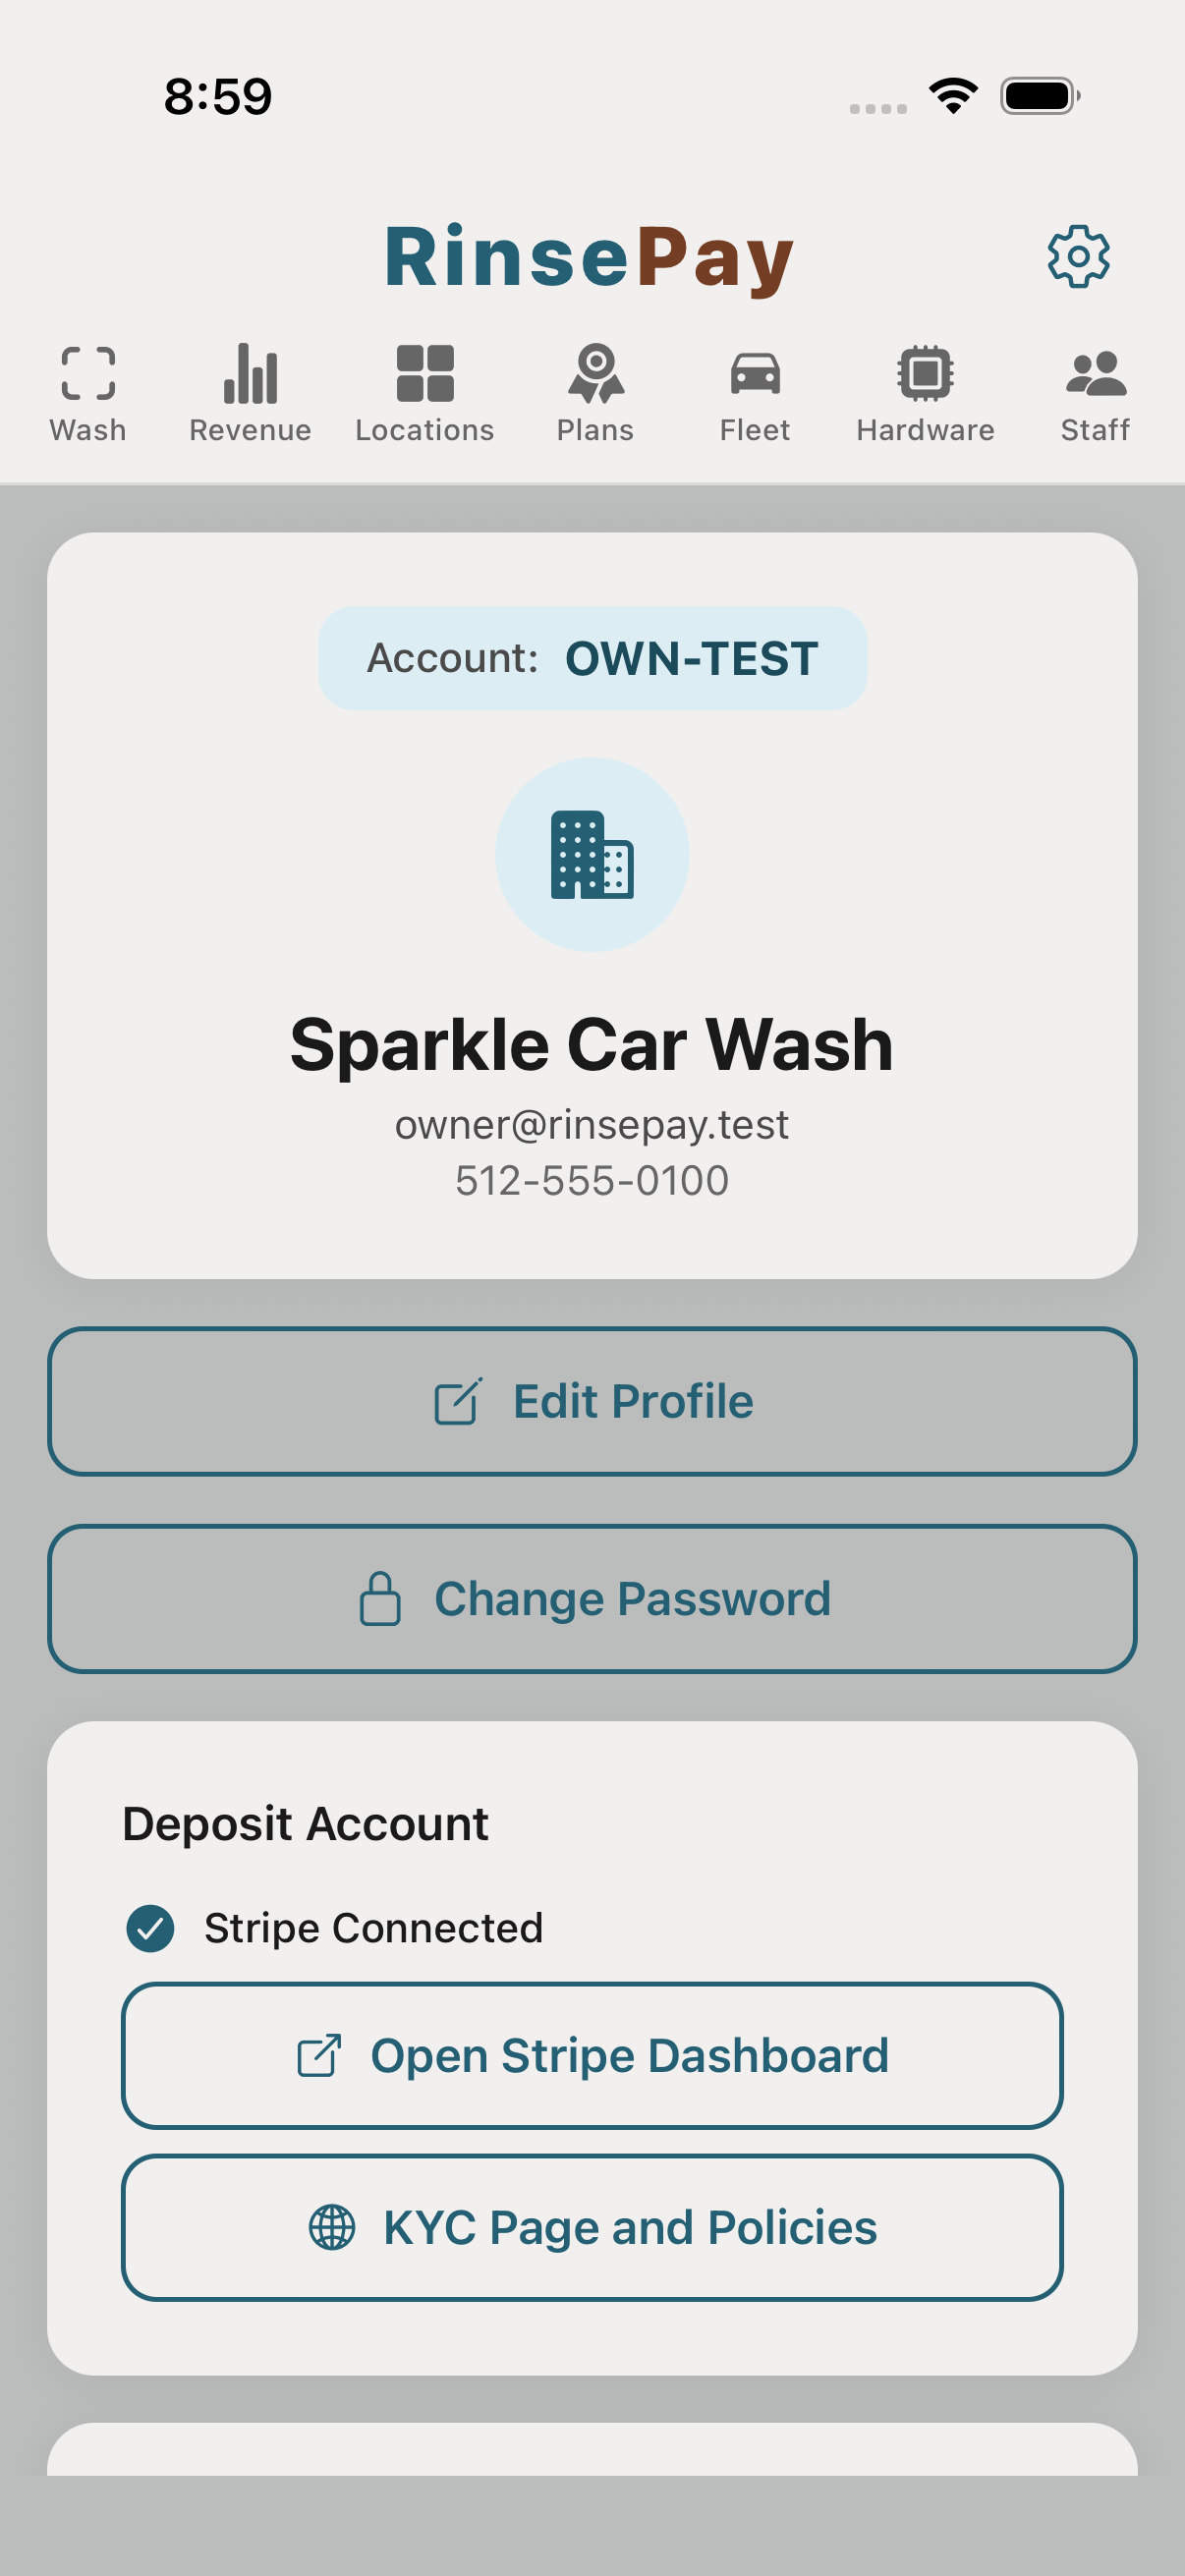
Go to Locations, tap +, and give your wash a name and address. Customers see this on their receipt and on the bay QR signs.
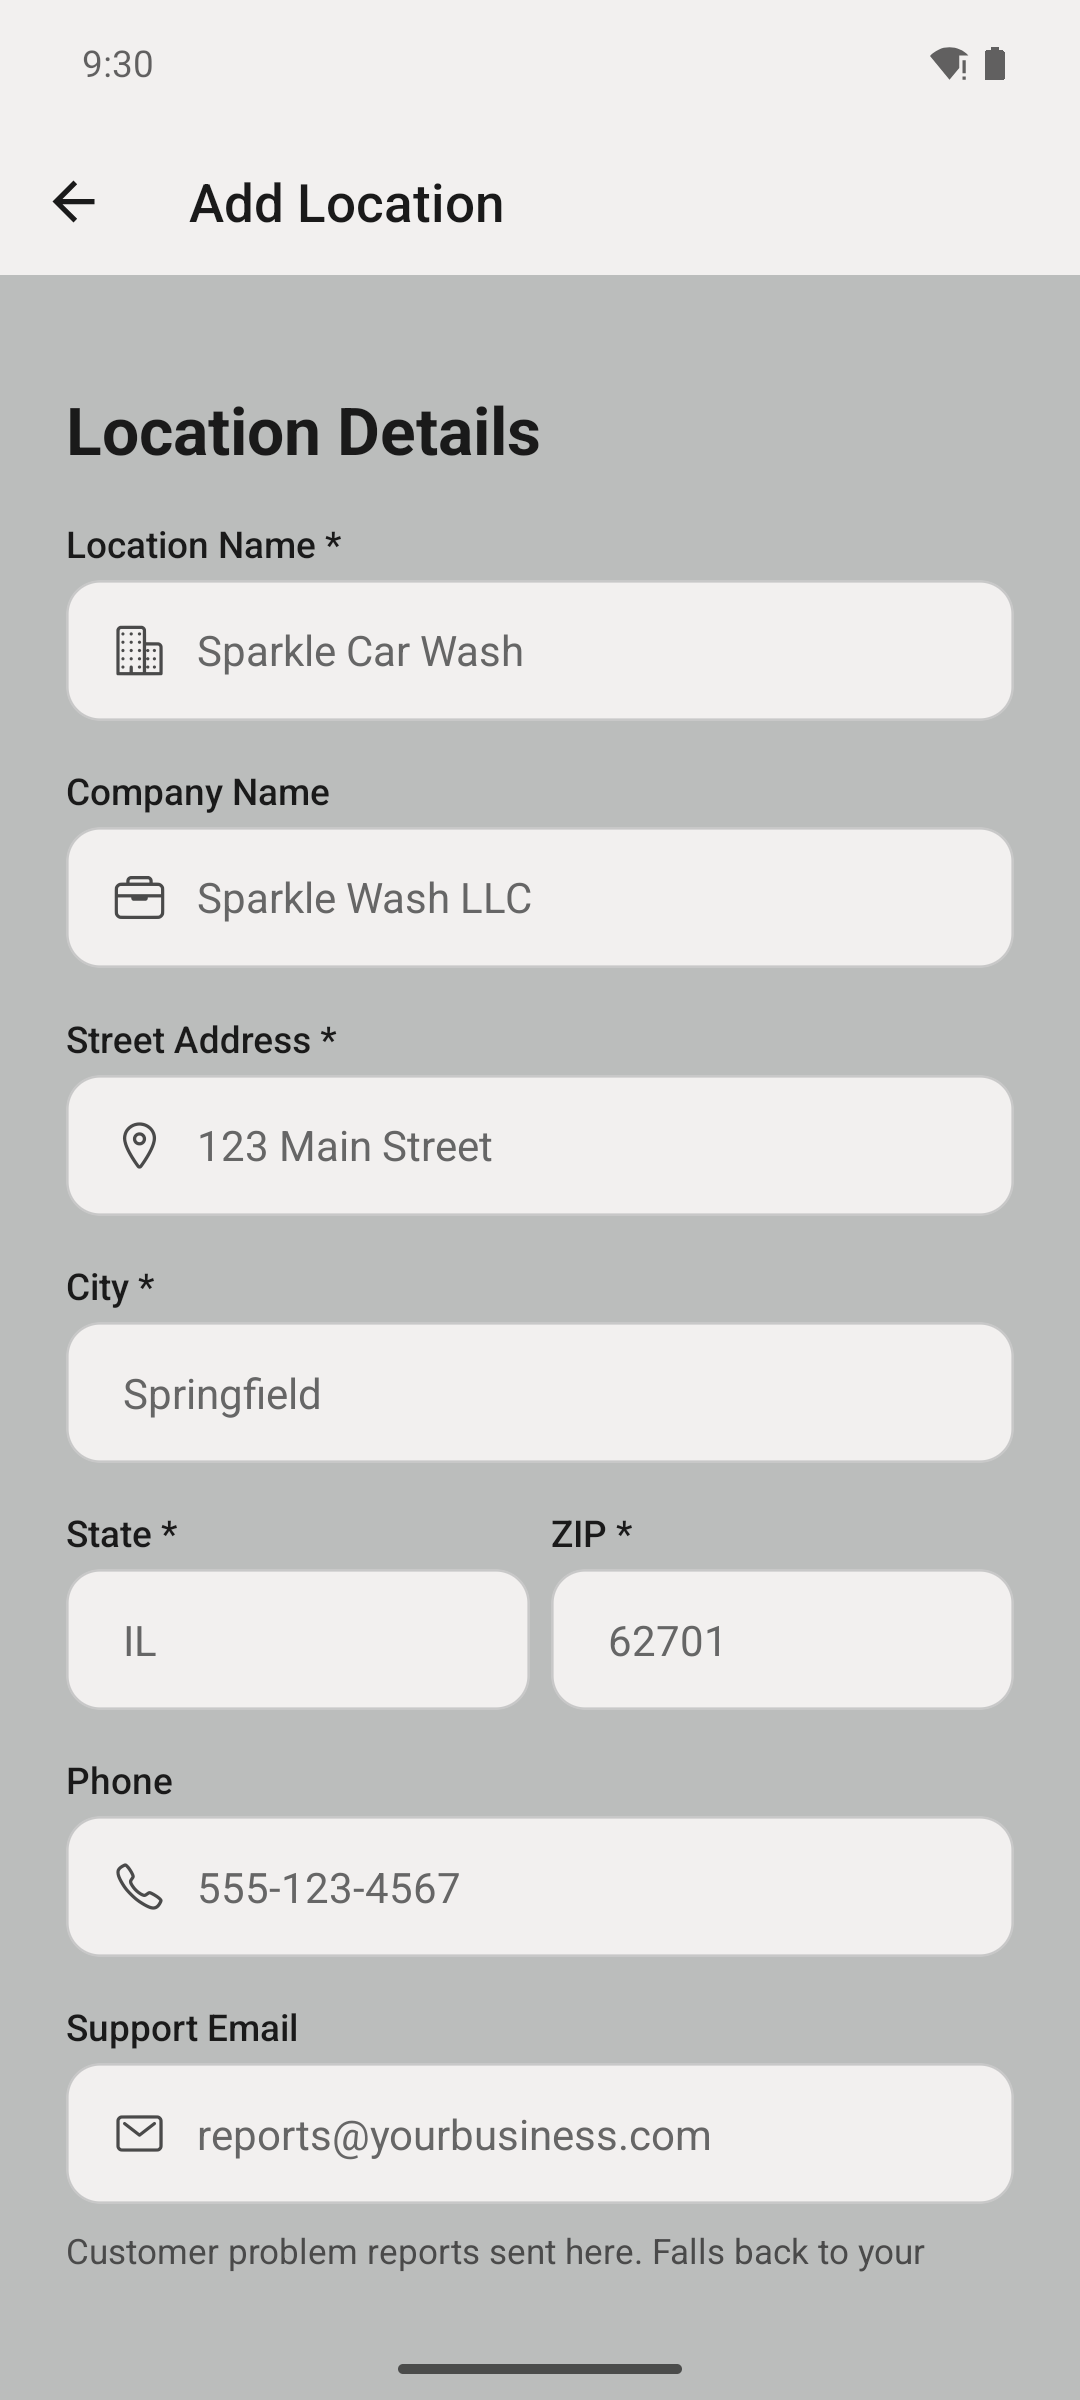
Tap Add Equipment and pick the type at the top — everything payable at your wash is added from this one flow:
Give each unit a name customers will see — it shows at scan and on receipts.
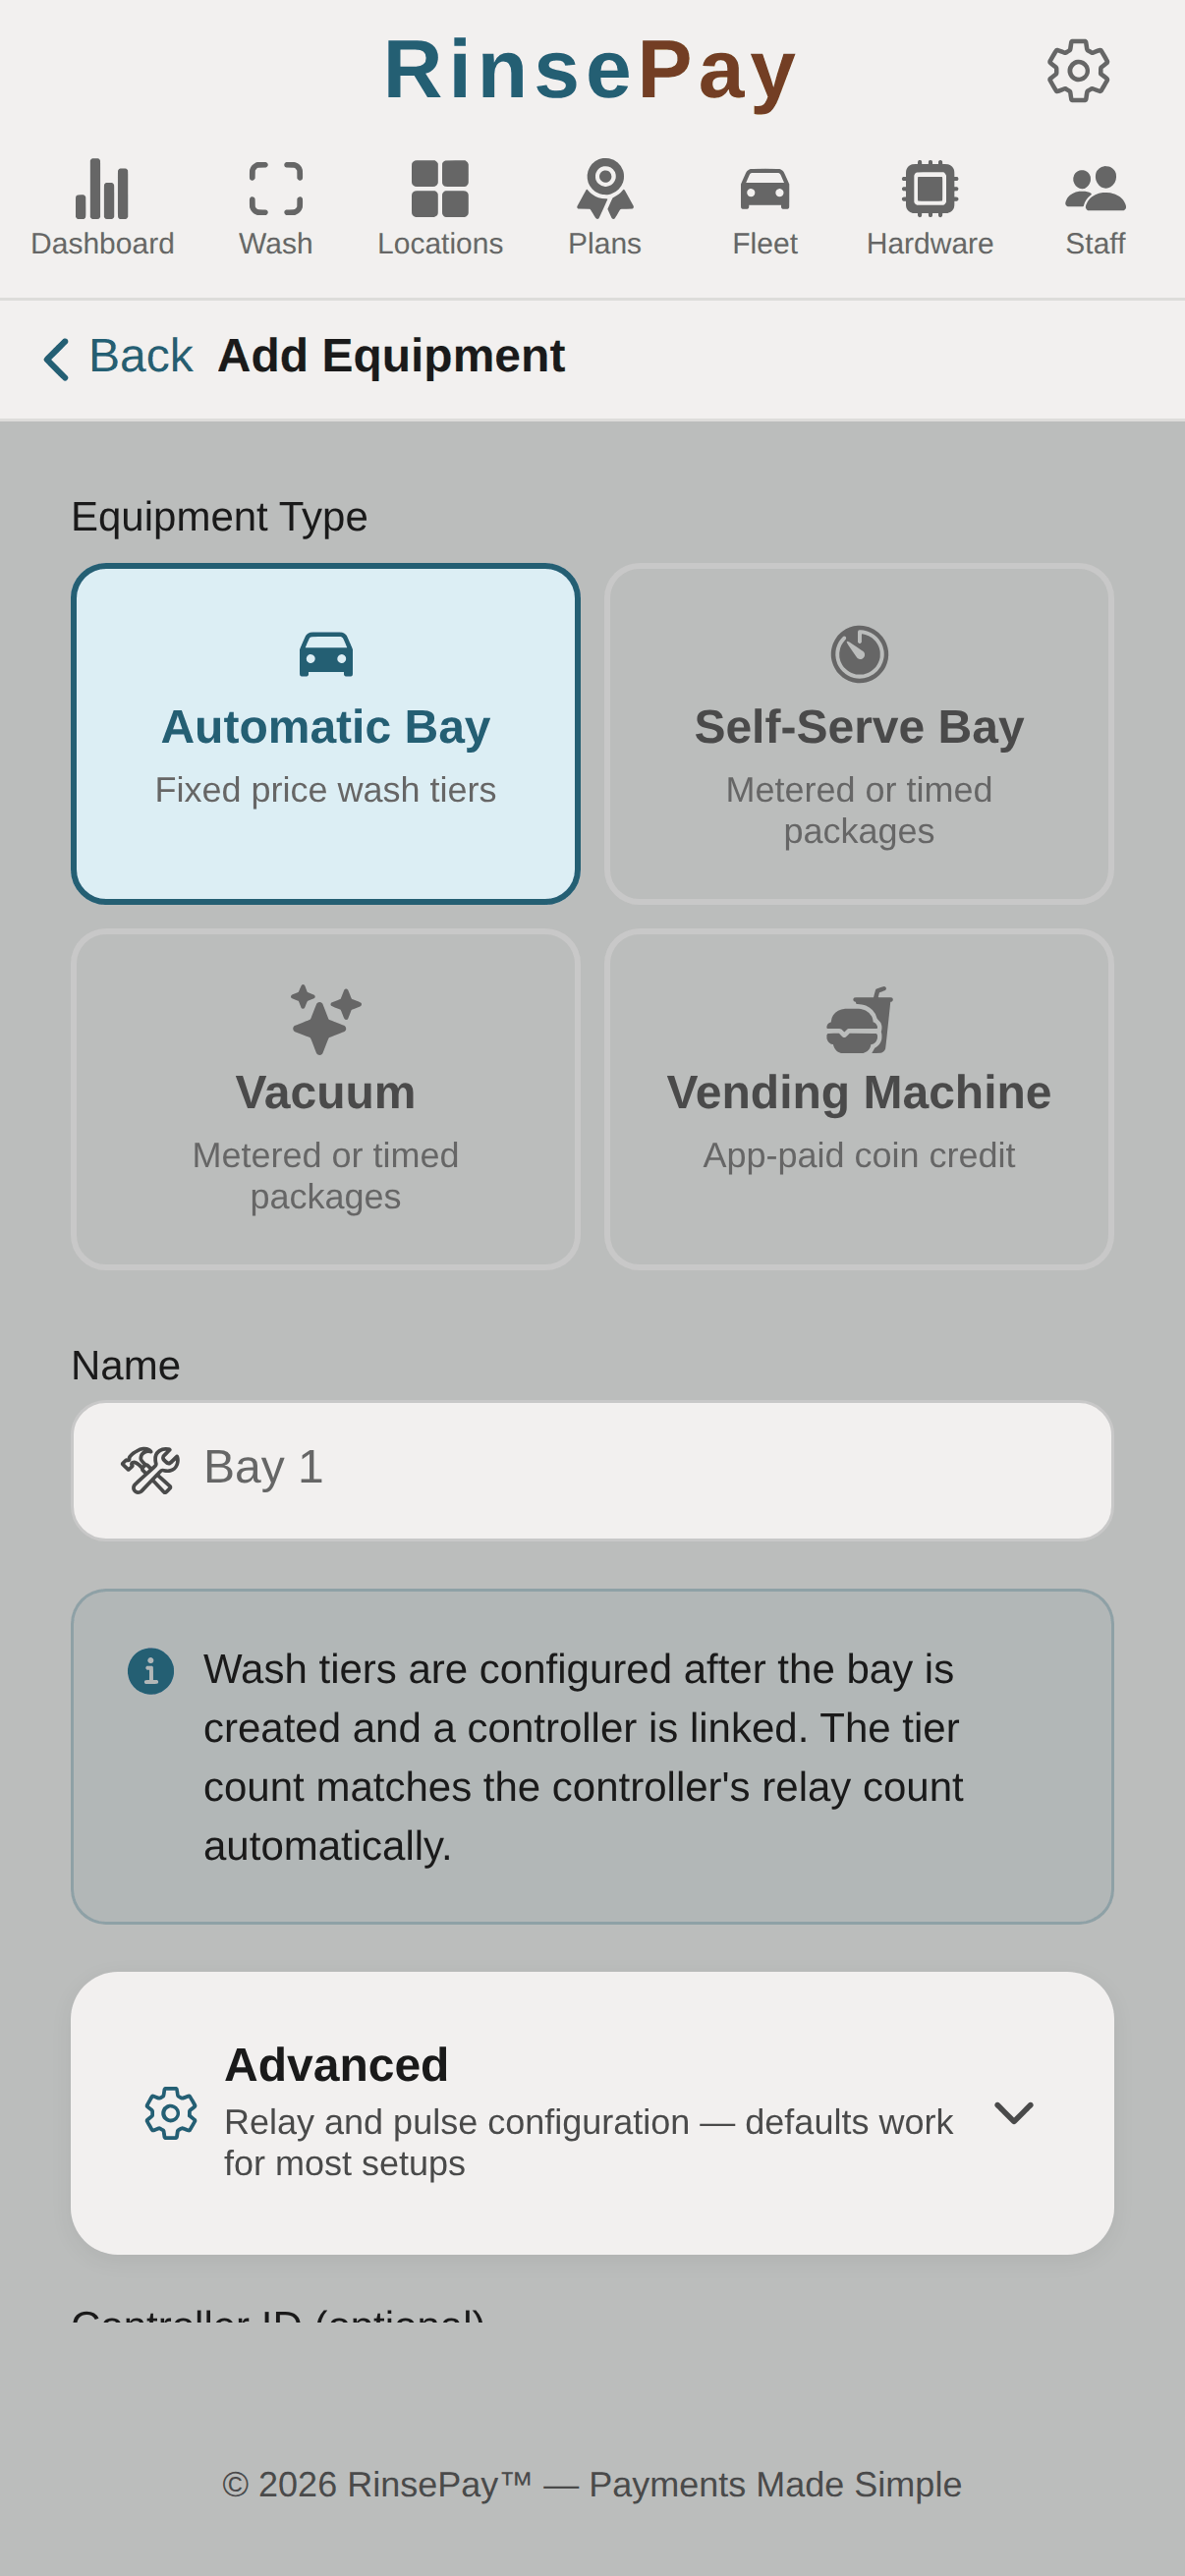
Pricing is set right in the equipment editor:
Relay and pulse timing for every type lives under the collapsed Advanced section — the defaults work for most setups, so you rarely need to open it.
Every bay, vacuum, and vending machine gets its own QR code. Print it any size you want — postcard, full bay-wall poster, vinyl decal — and mount it where customers will see it. The QR scales without losing resolution.
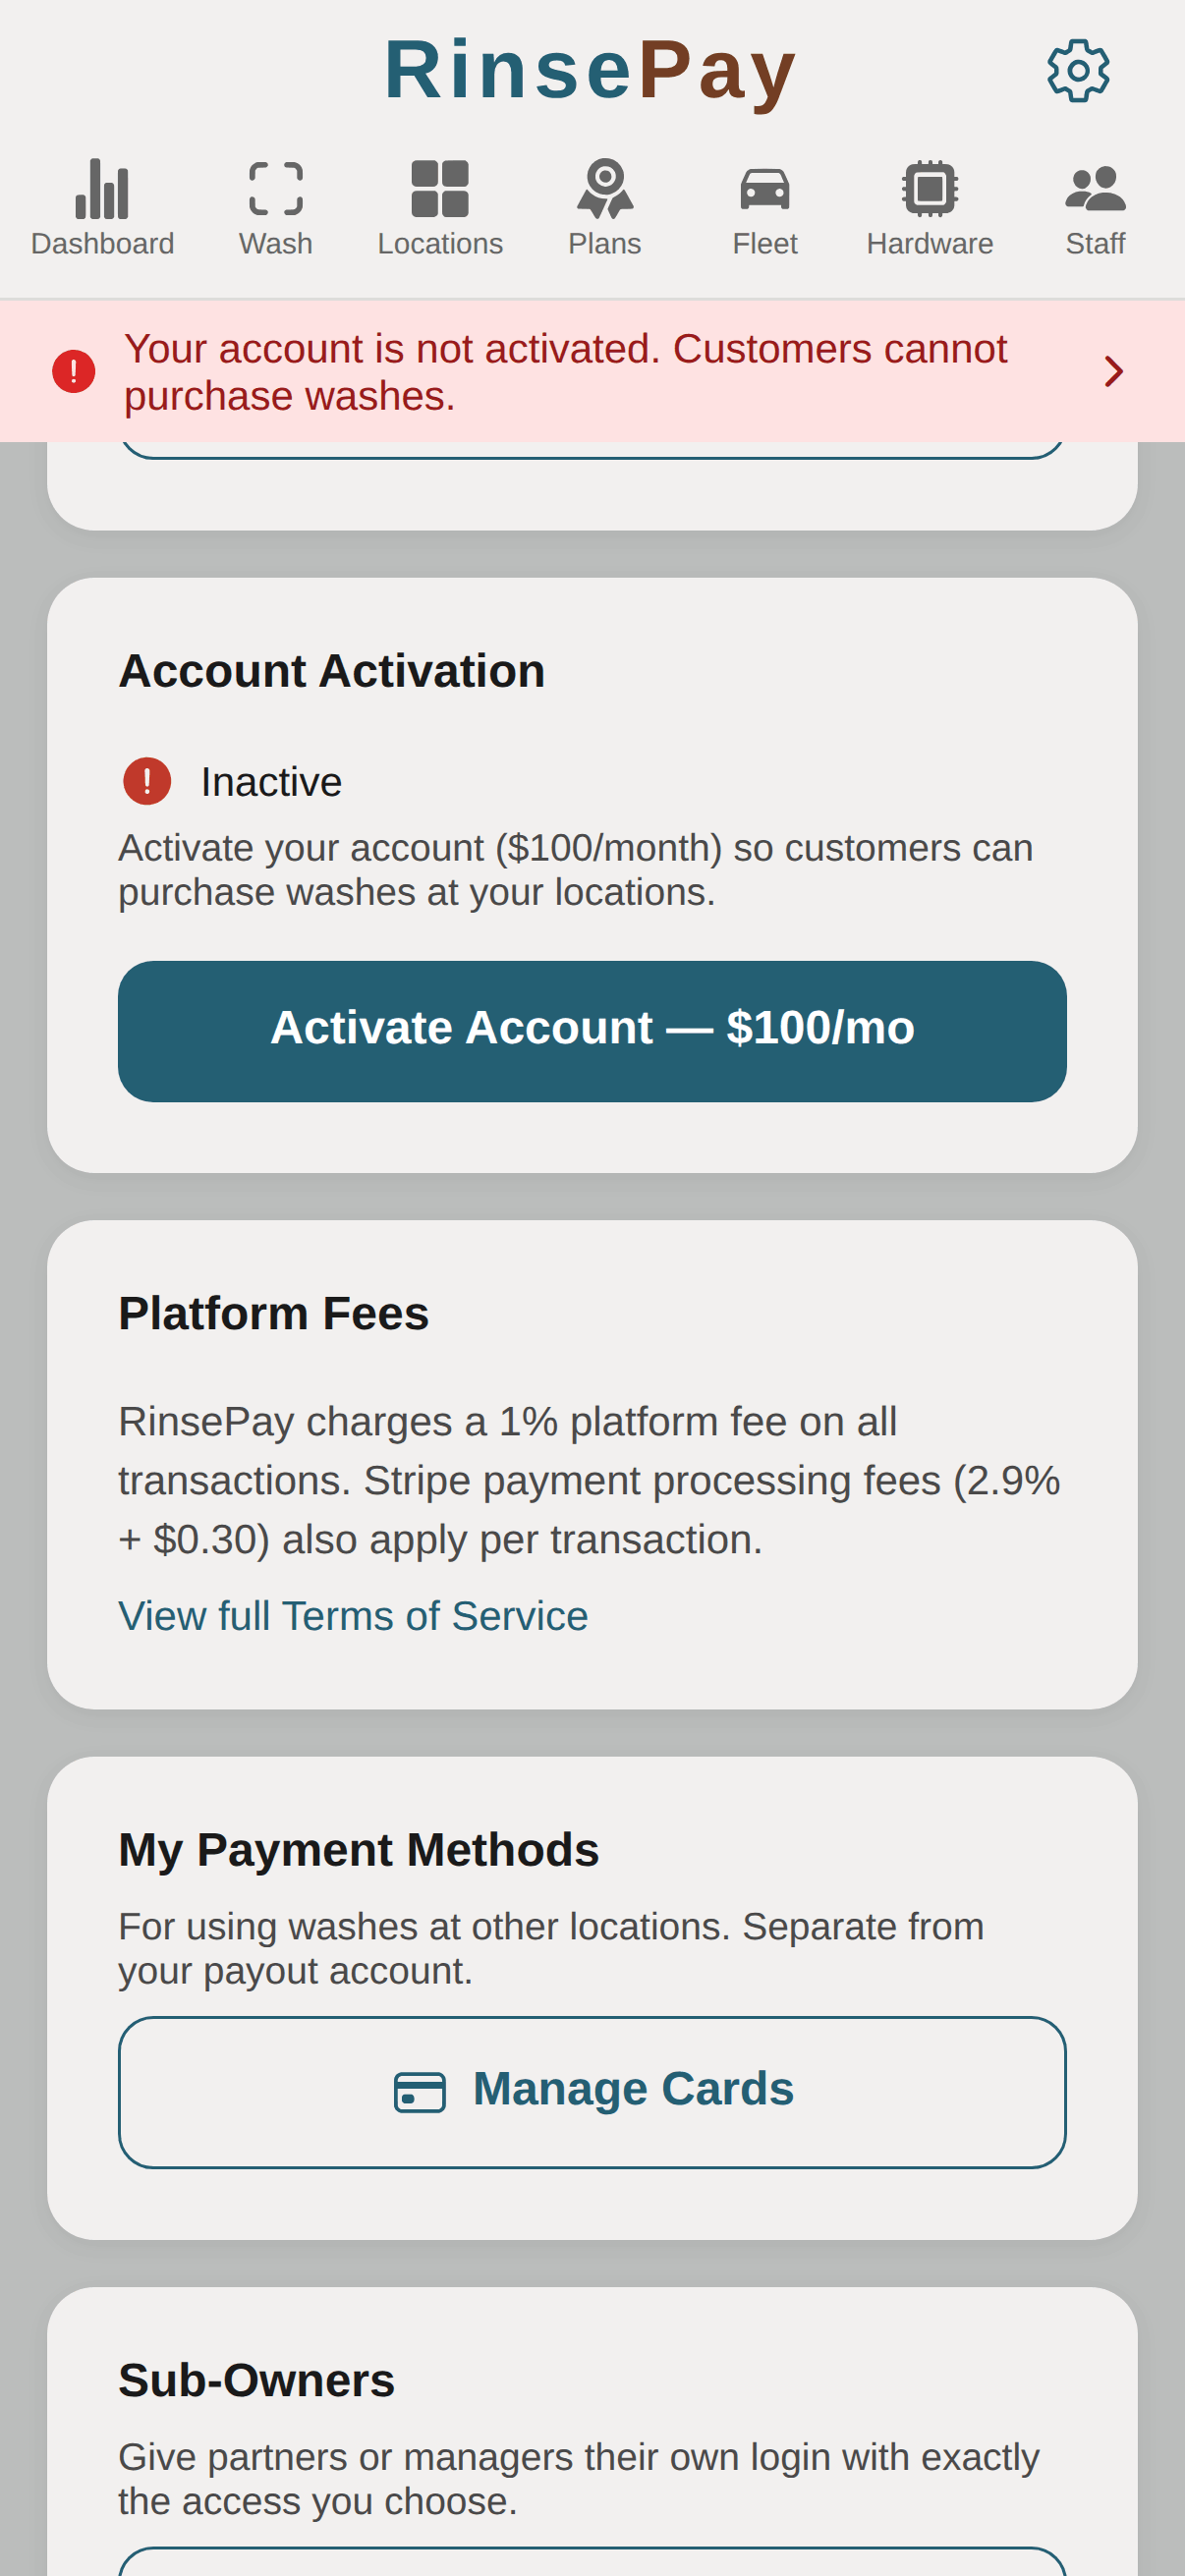
One switch turns your wash on for customers. In the app, open Settings (the account gear) → Account Activation and tap Activate — that starts your RinsePay platform subscription and lets customers purchase washes at your locations. Until the account is active, customers who scan can see your equipment but can't pay.
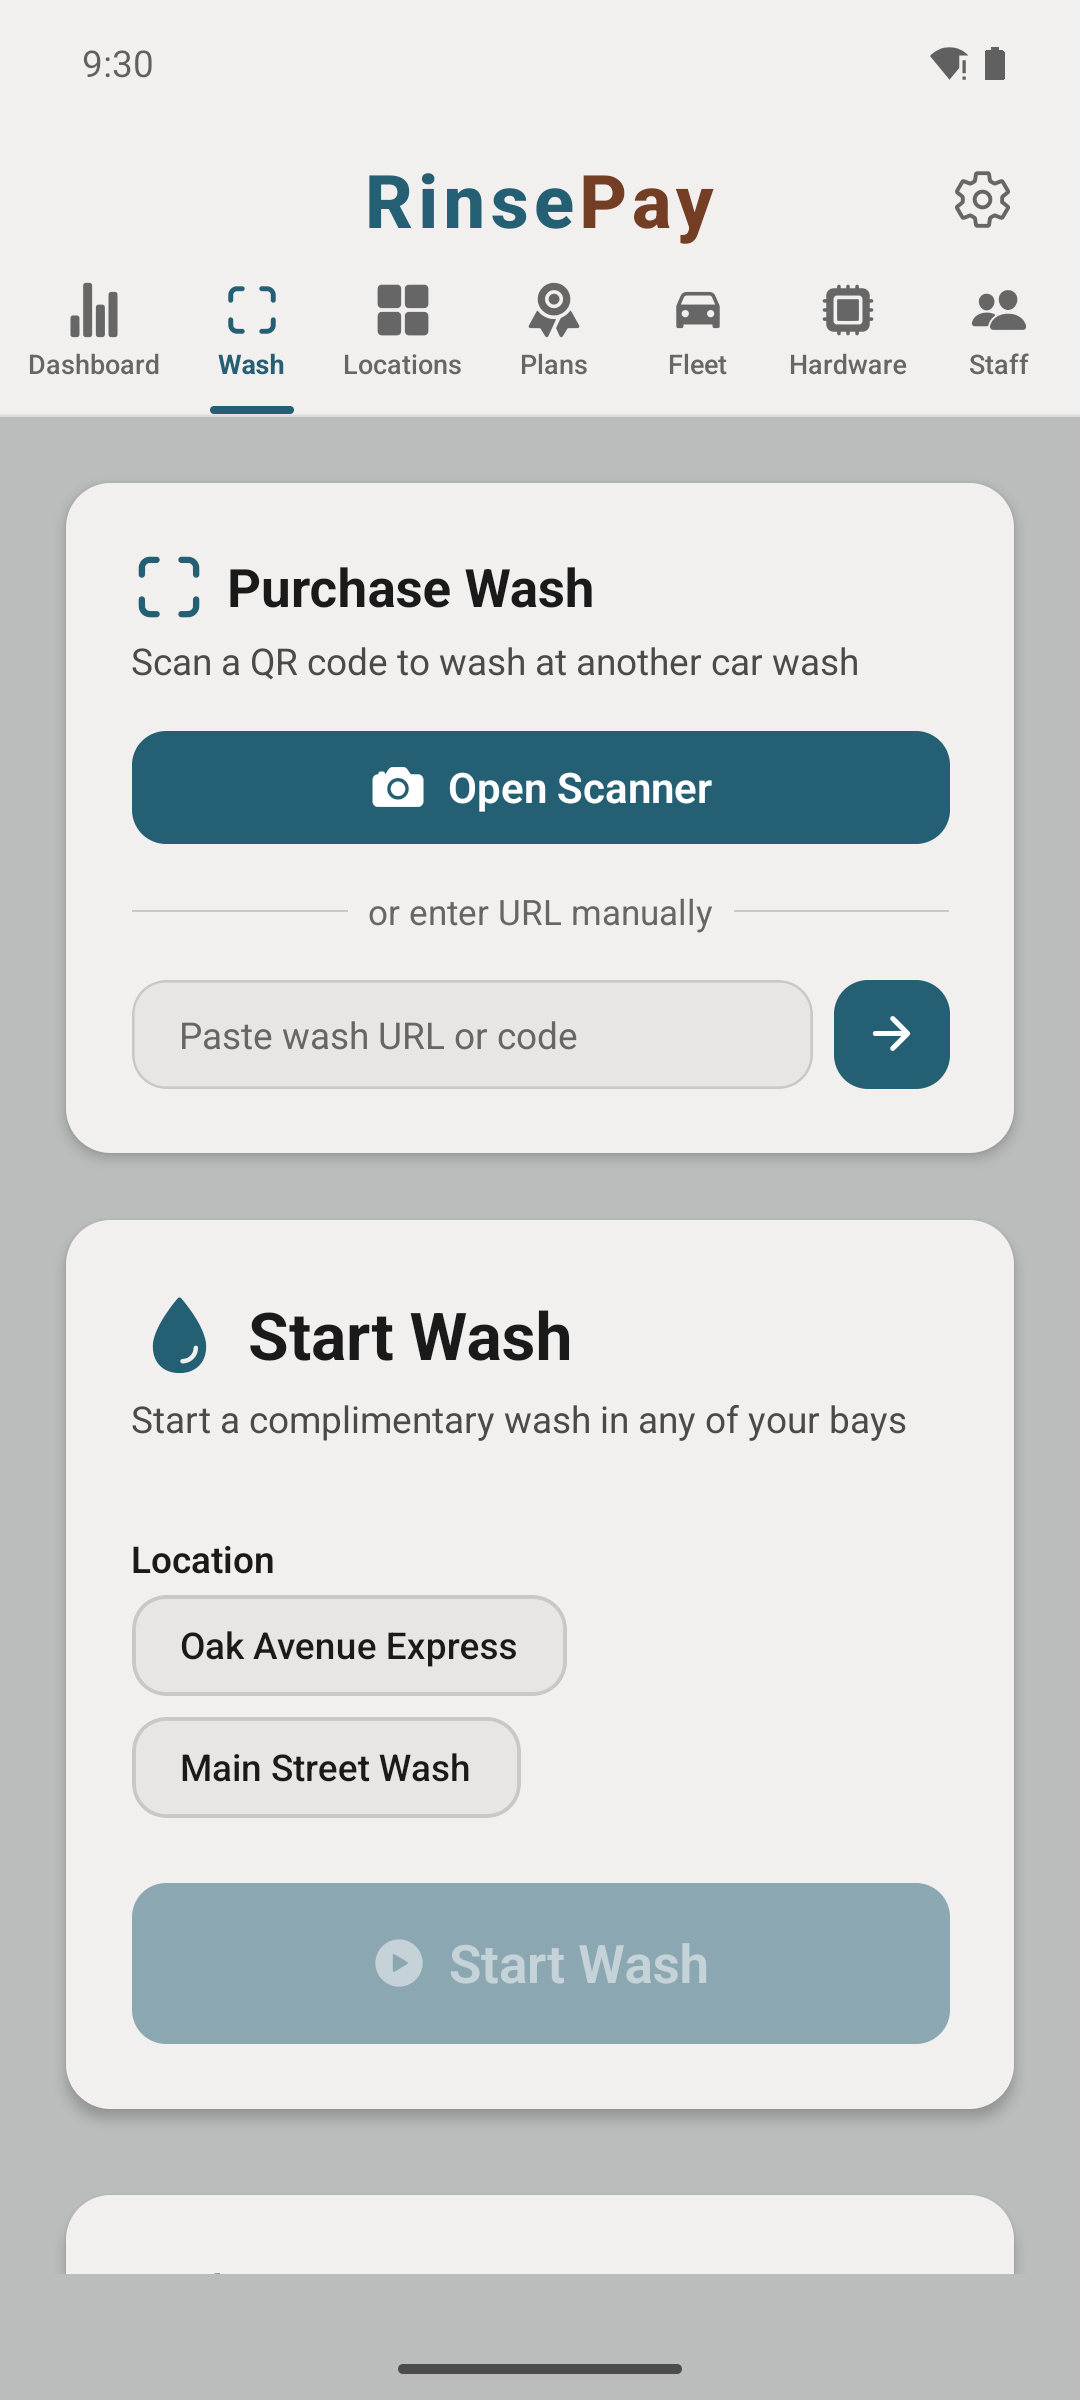
Open the owner Scan tab. The Start Wash panel lets you pick a location and bay from a dropdown and start a free test wash — no QR scan needed. Confirm water flows, then check the dashboard for the $0 owner-testing entry.
Every RinsePay controller ships pre-flashed and ready to install. You don't touch firmware — that's on us.
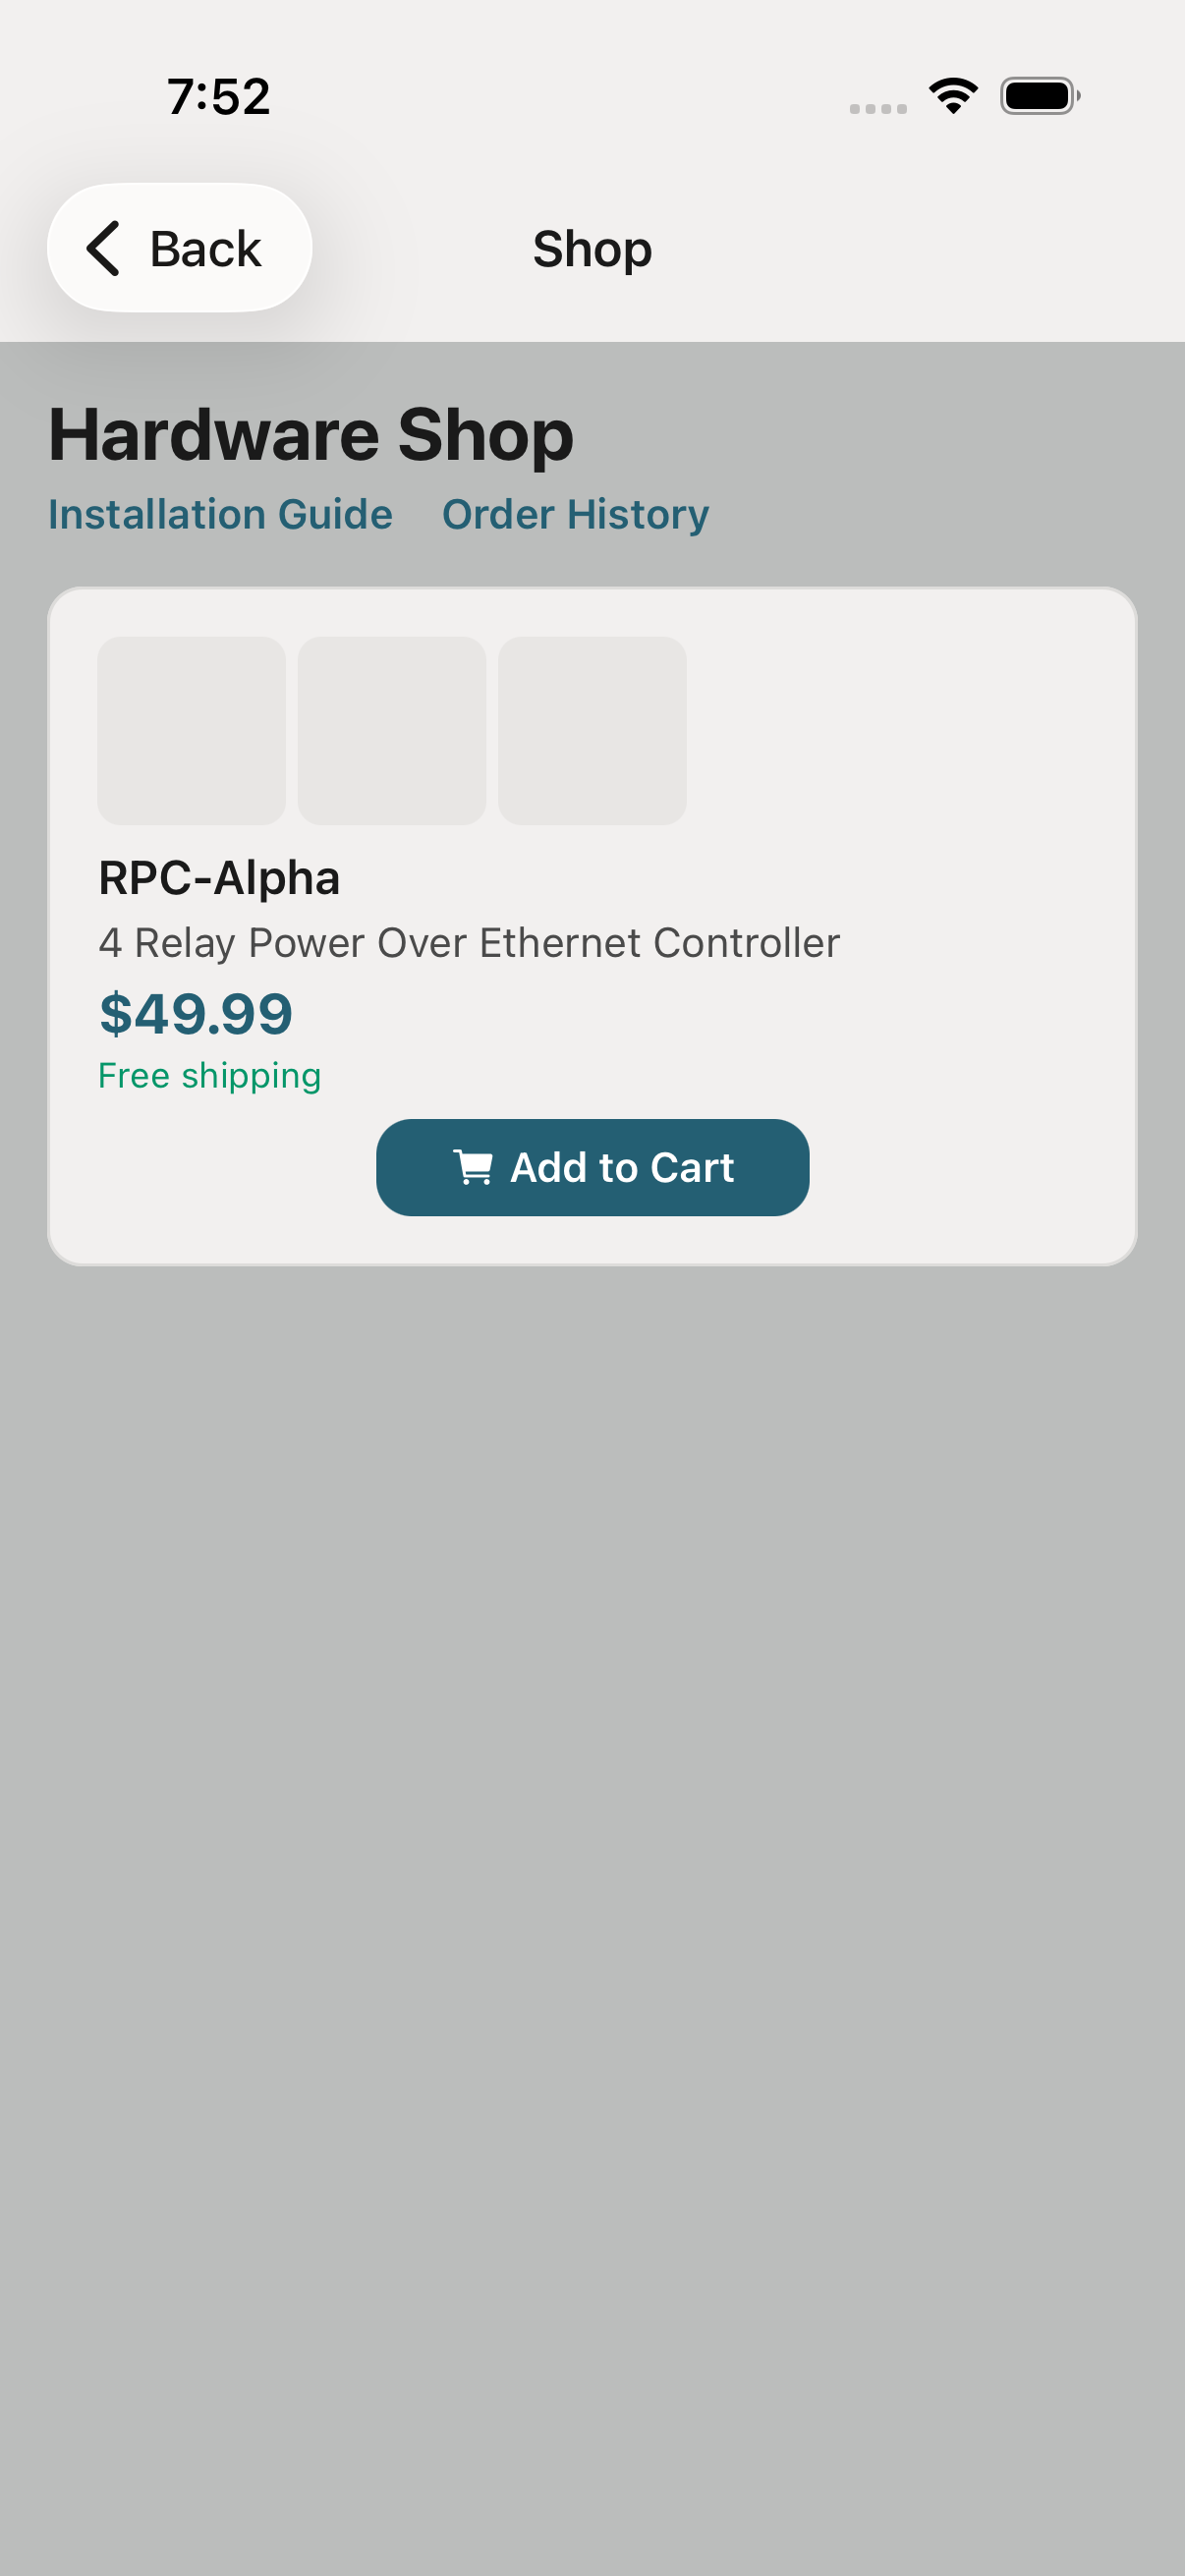
From the owner app, open the Hardware shop. Pick the number of controllers you need — one per bay, one per vacuum, one per vending machine — and check out.
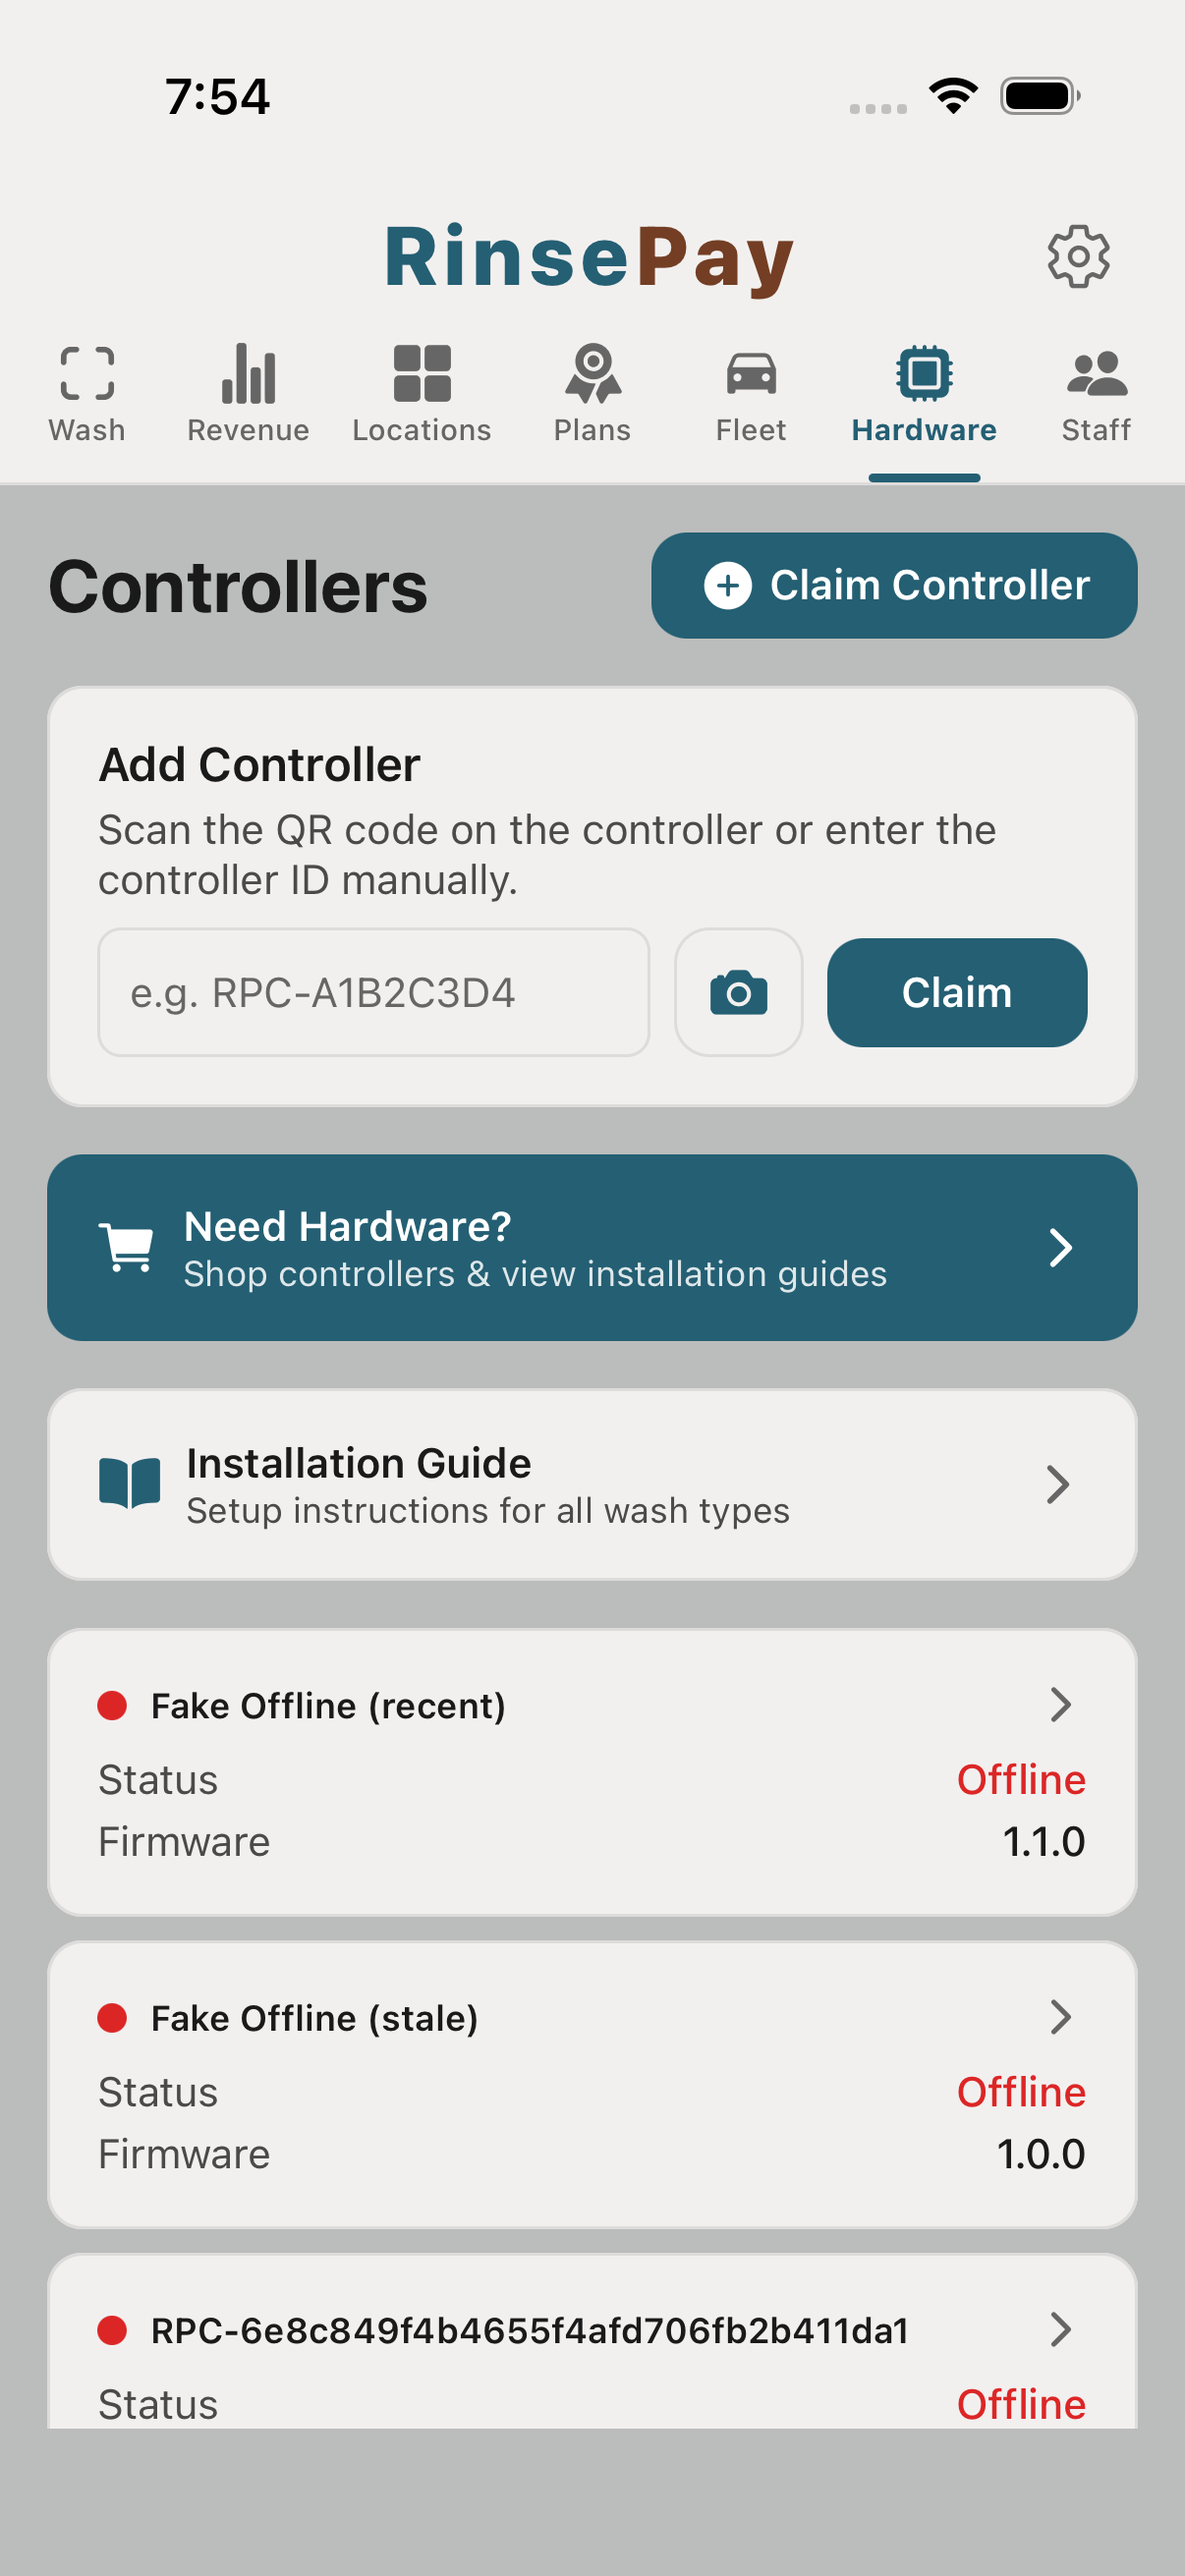
When your hardware arrives, each controller has a claim code printed on it. Scan or type the code in the app to link that controller to a specific bay in your location.
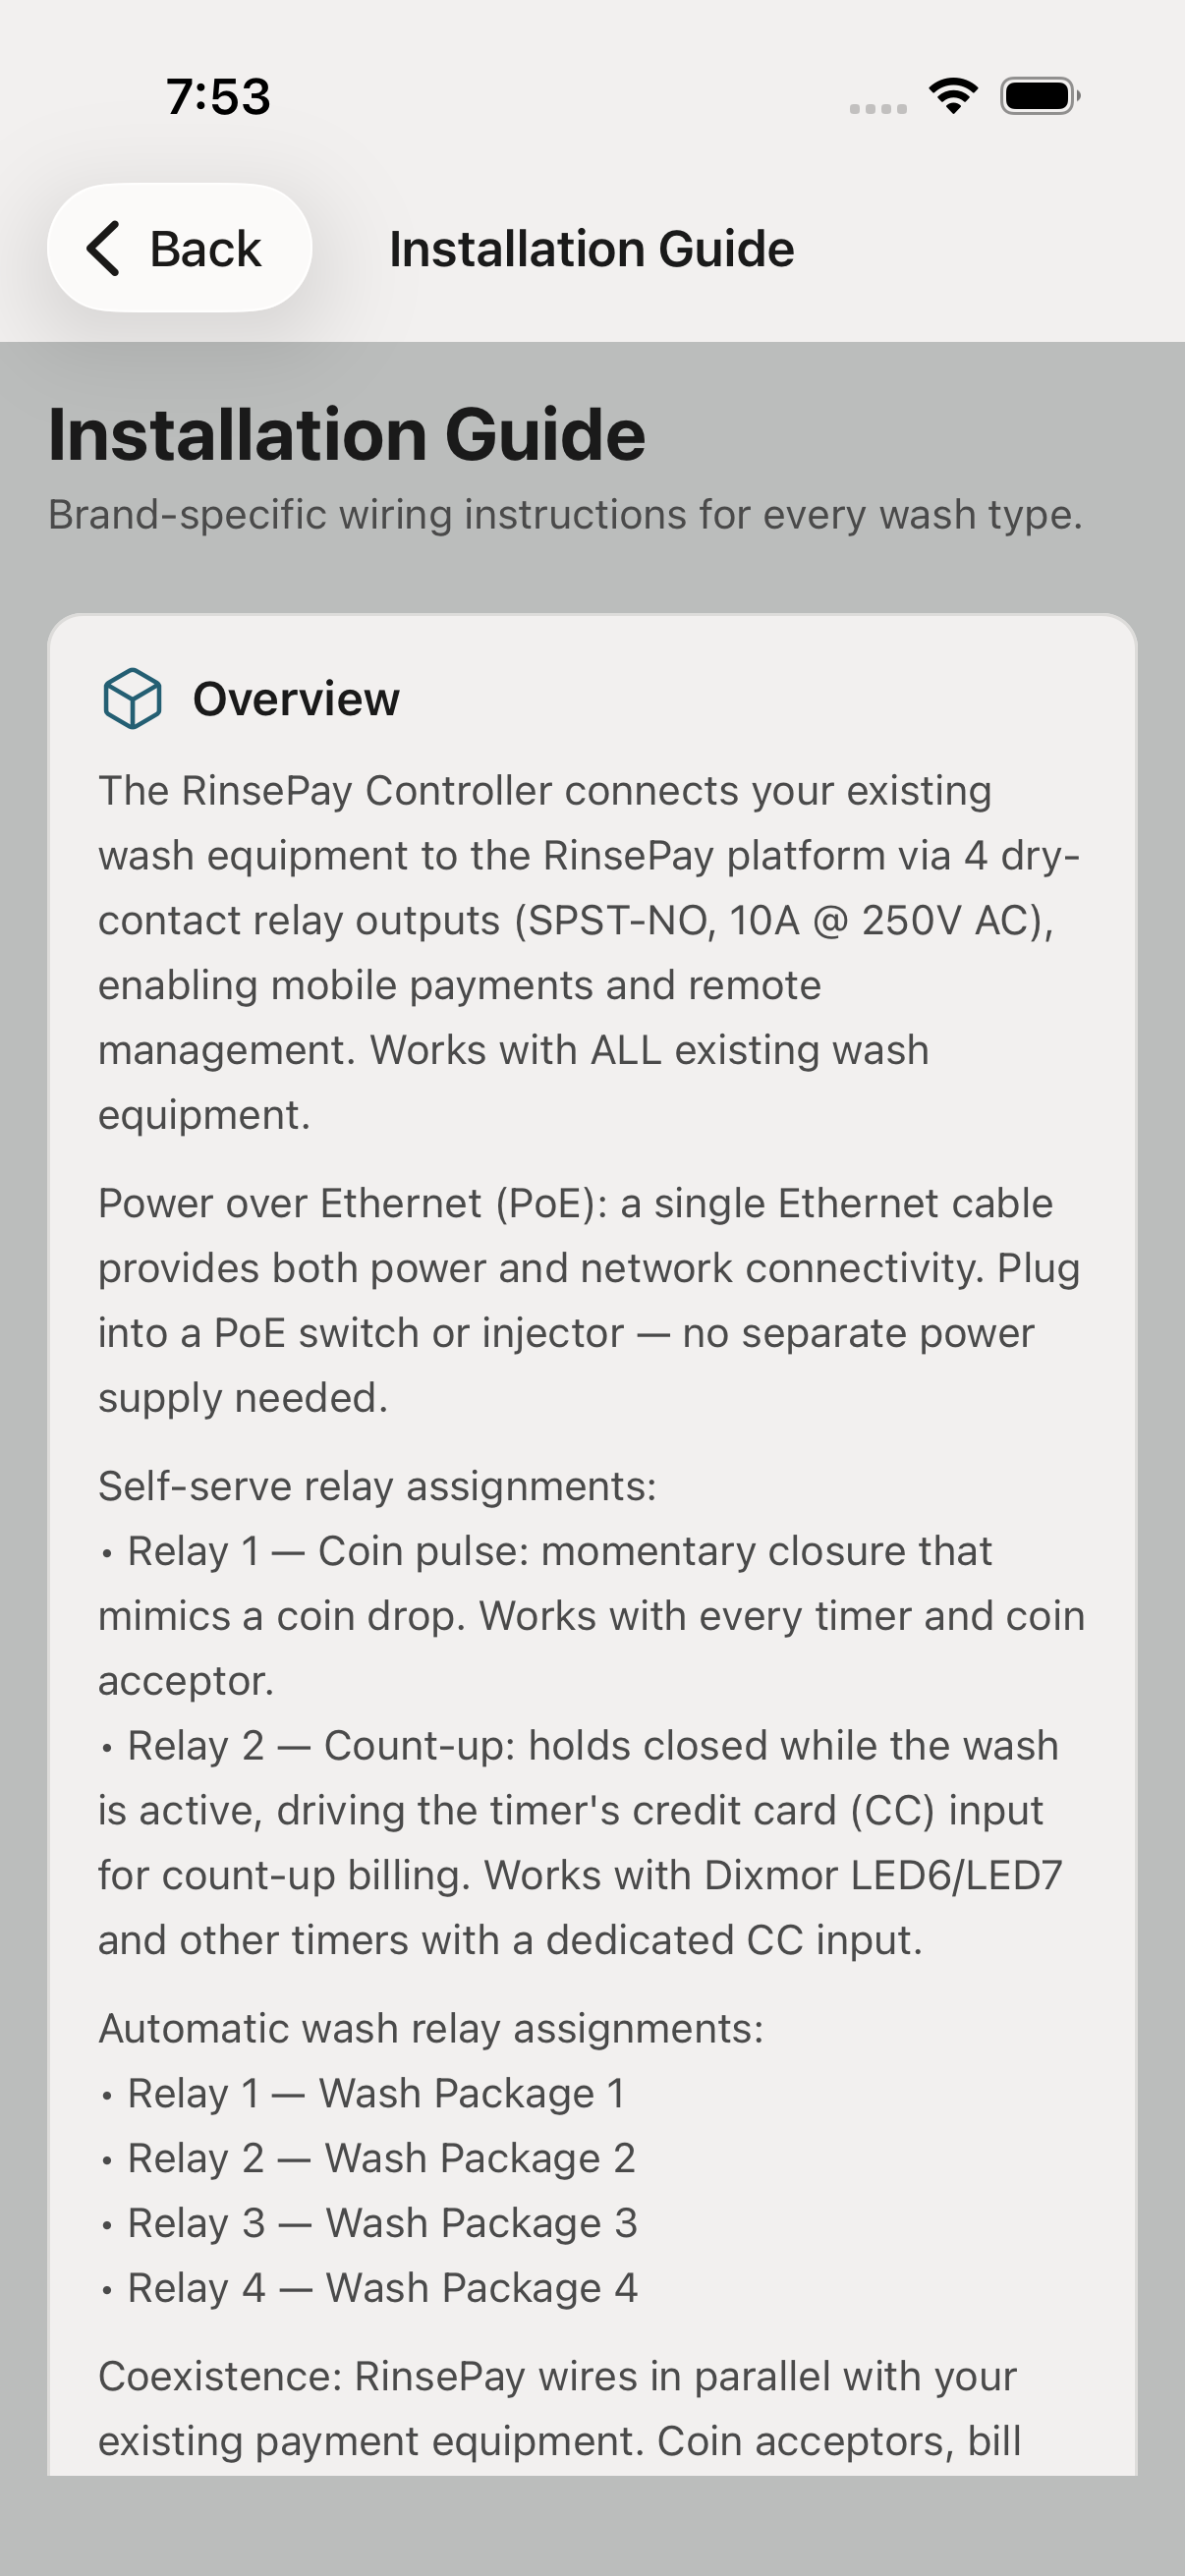
Follow the in-app install guide for your bay type. The guide walks you through the wiring to your existing timer or coin acceptor step-by-step — wire colors, terminal numbers, test procedure.
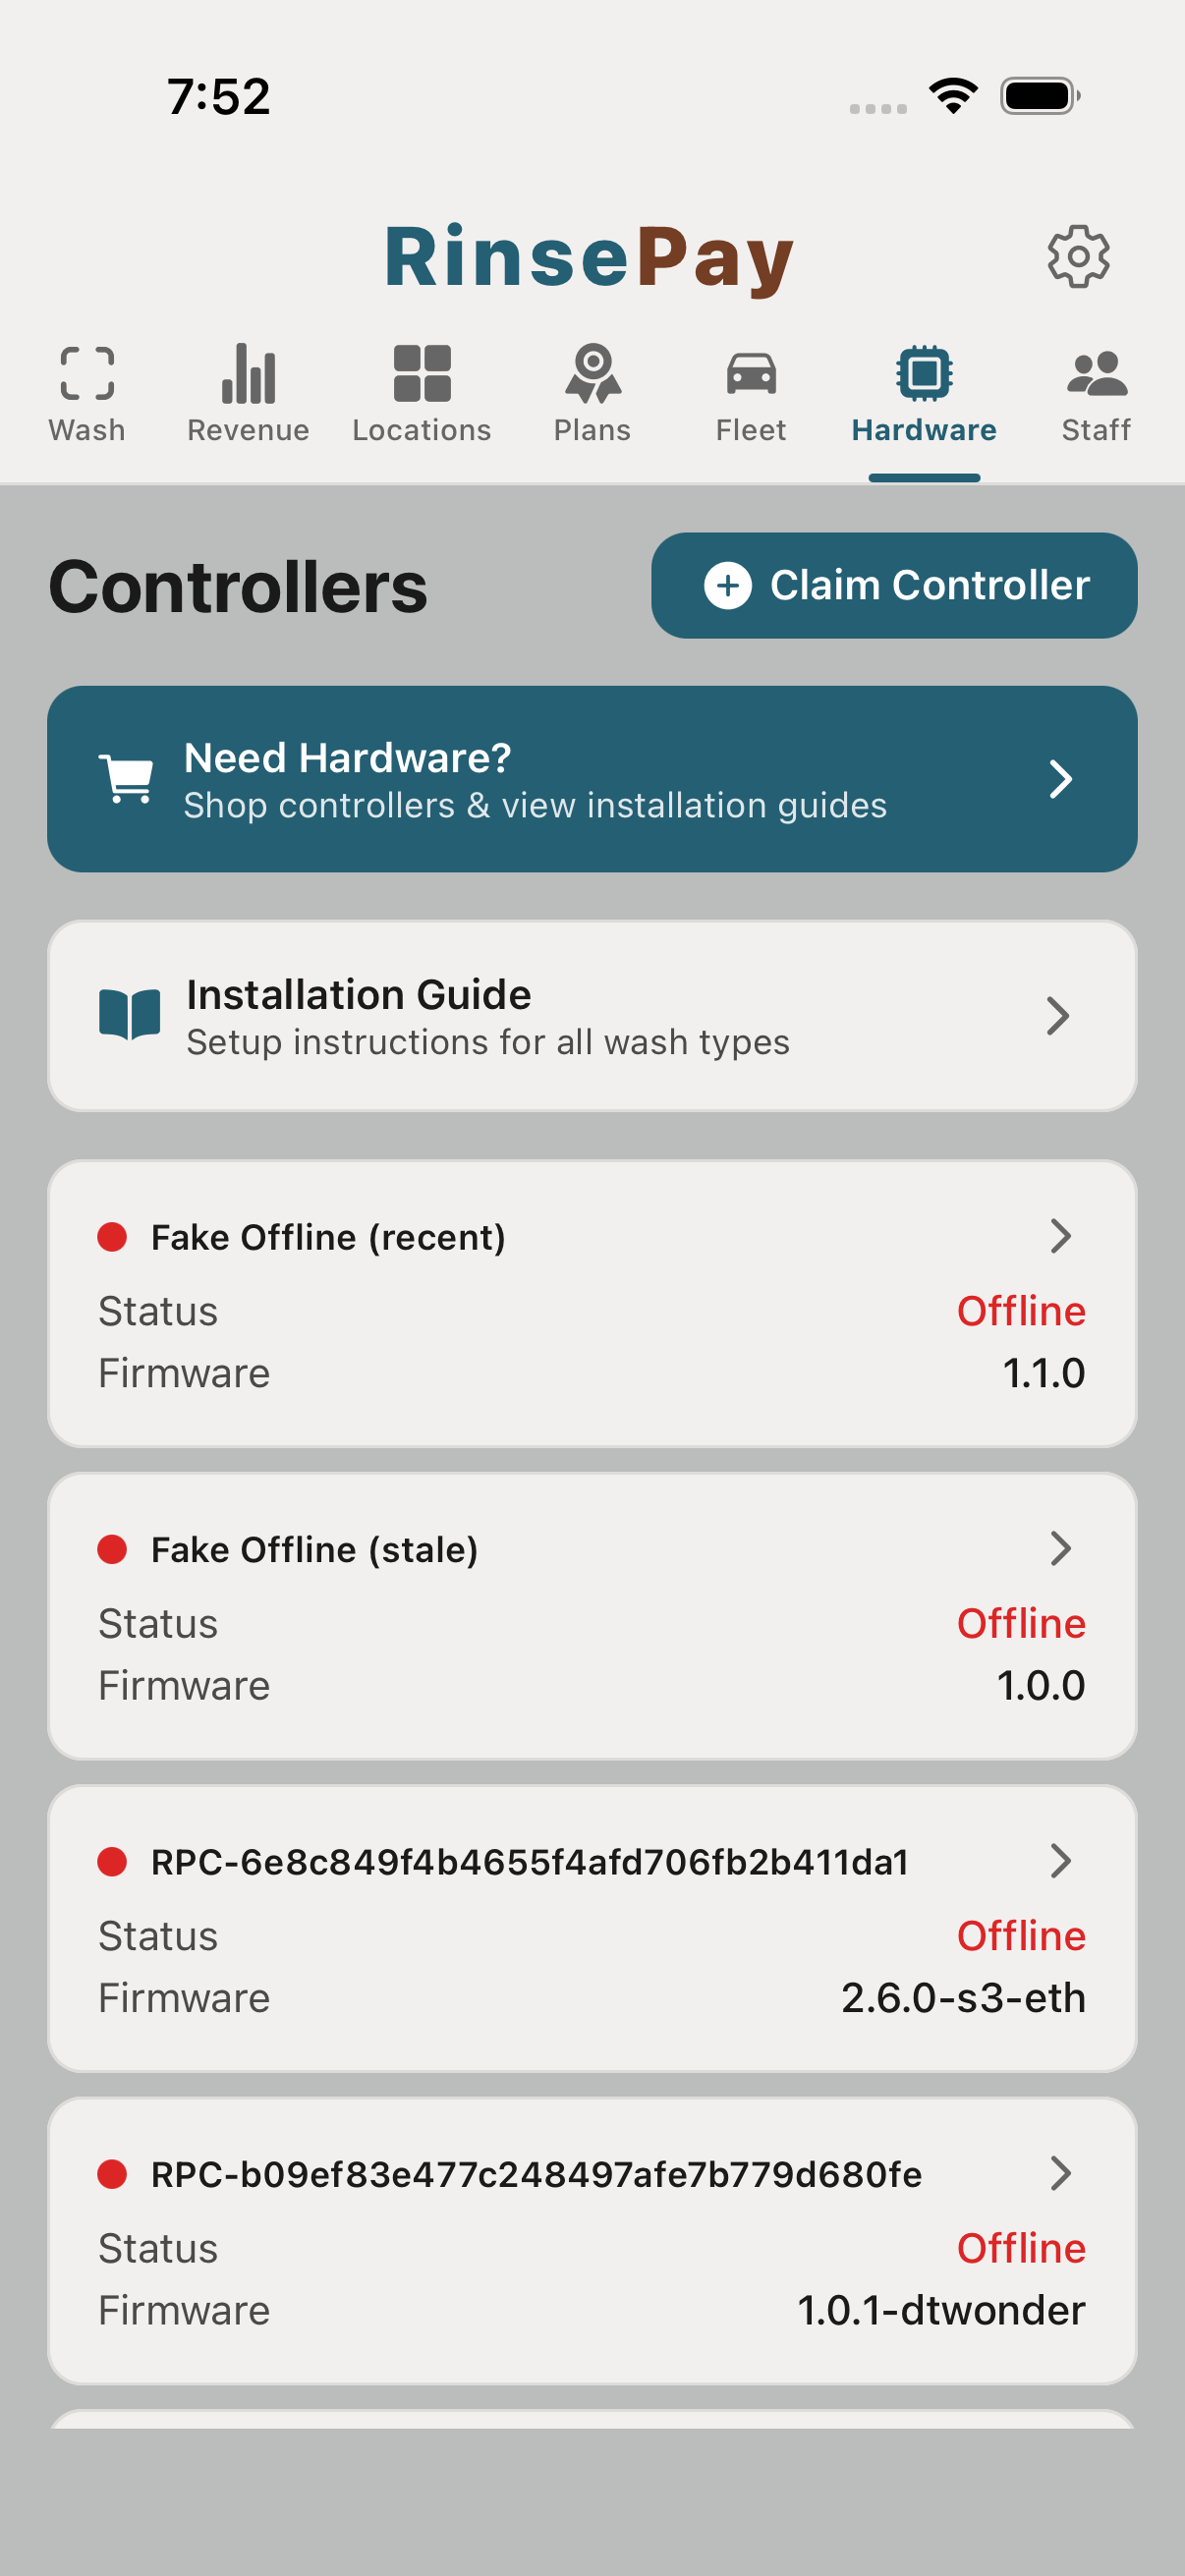
The Hardware status screen shows each controller's live heartbeat. Green means it's talking to RinsePay. Any offline bay shows up red with a timestamp of when it last checked in.
Email support@rinsepay.app or call the support line. A RinsePay engineer can screen-share the install and walk you through any wiring that doesn't match the guide.
Every vacuum is its own piece of equipment with its own rate and its own pricing mode — metered by the minute, or prepaid timed packages. Vacuum minutes also flow in from bundles, memberships, and free-vac wash tiers, and customers can stop a session from their phone at any time.
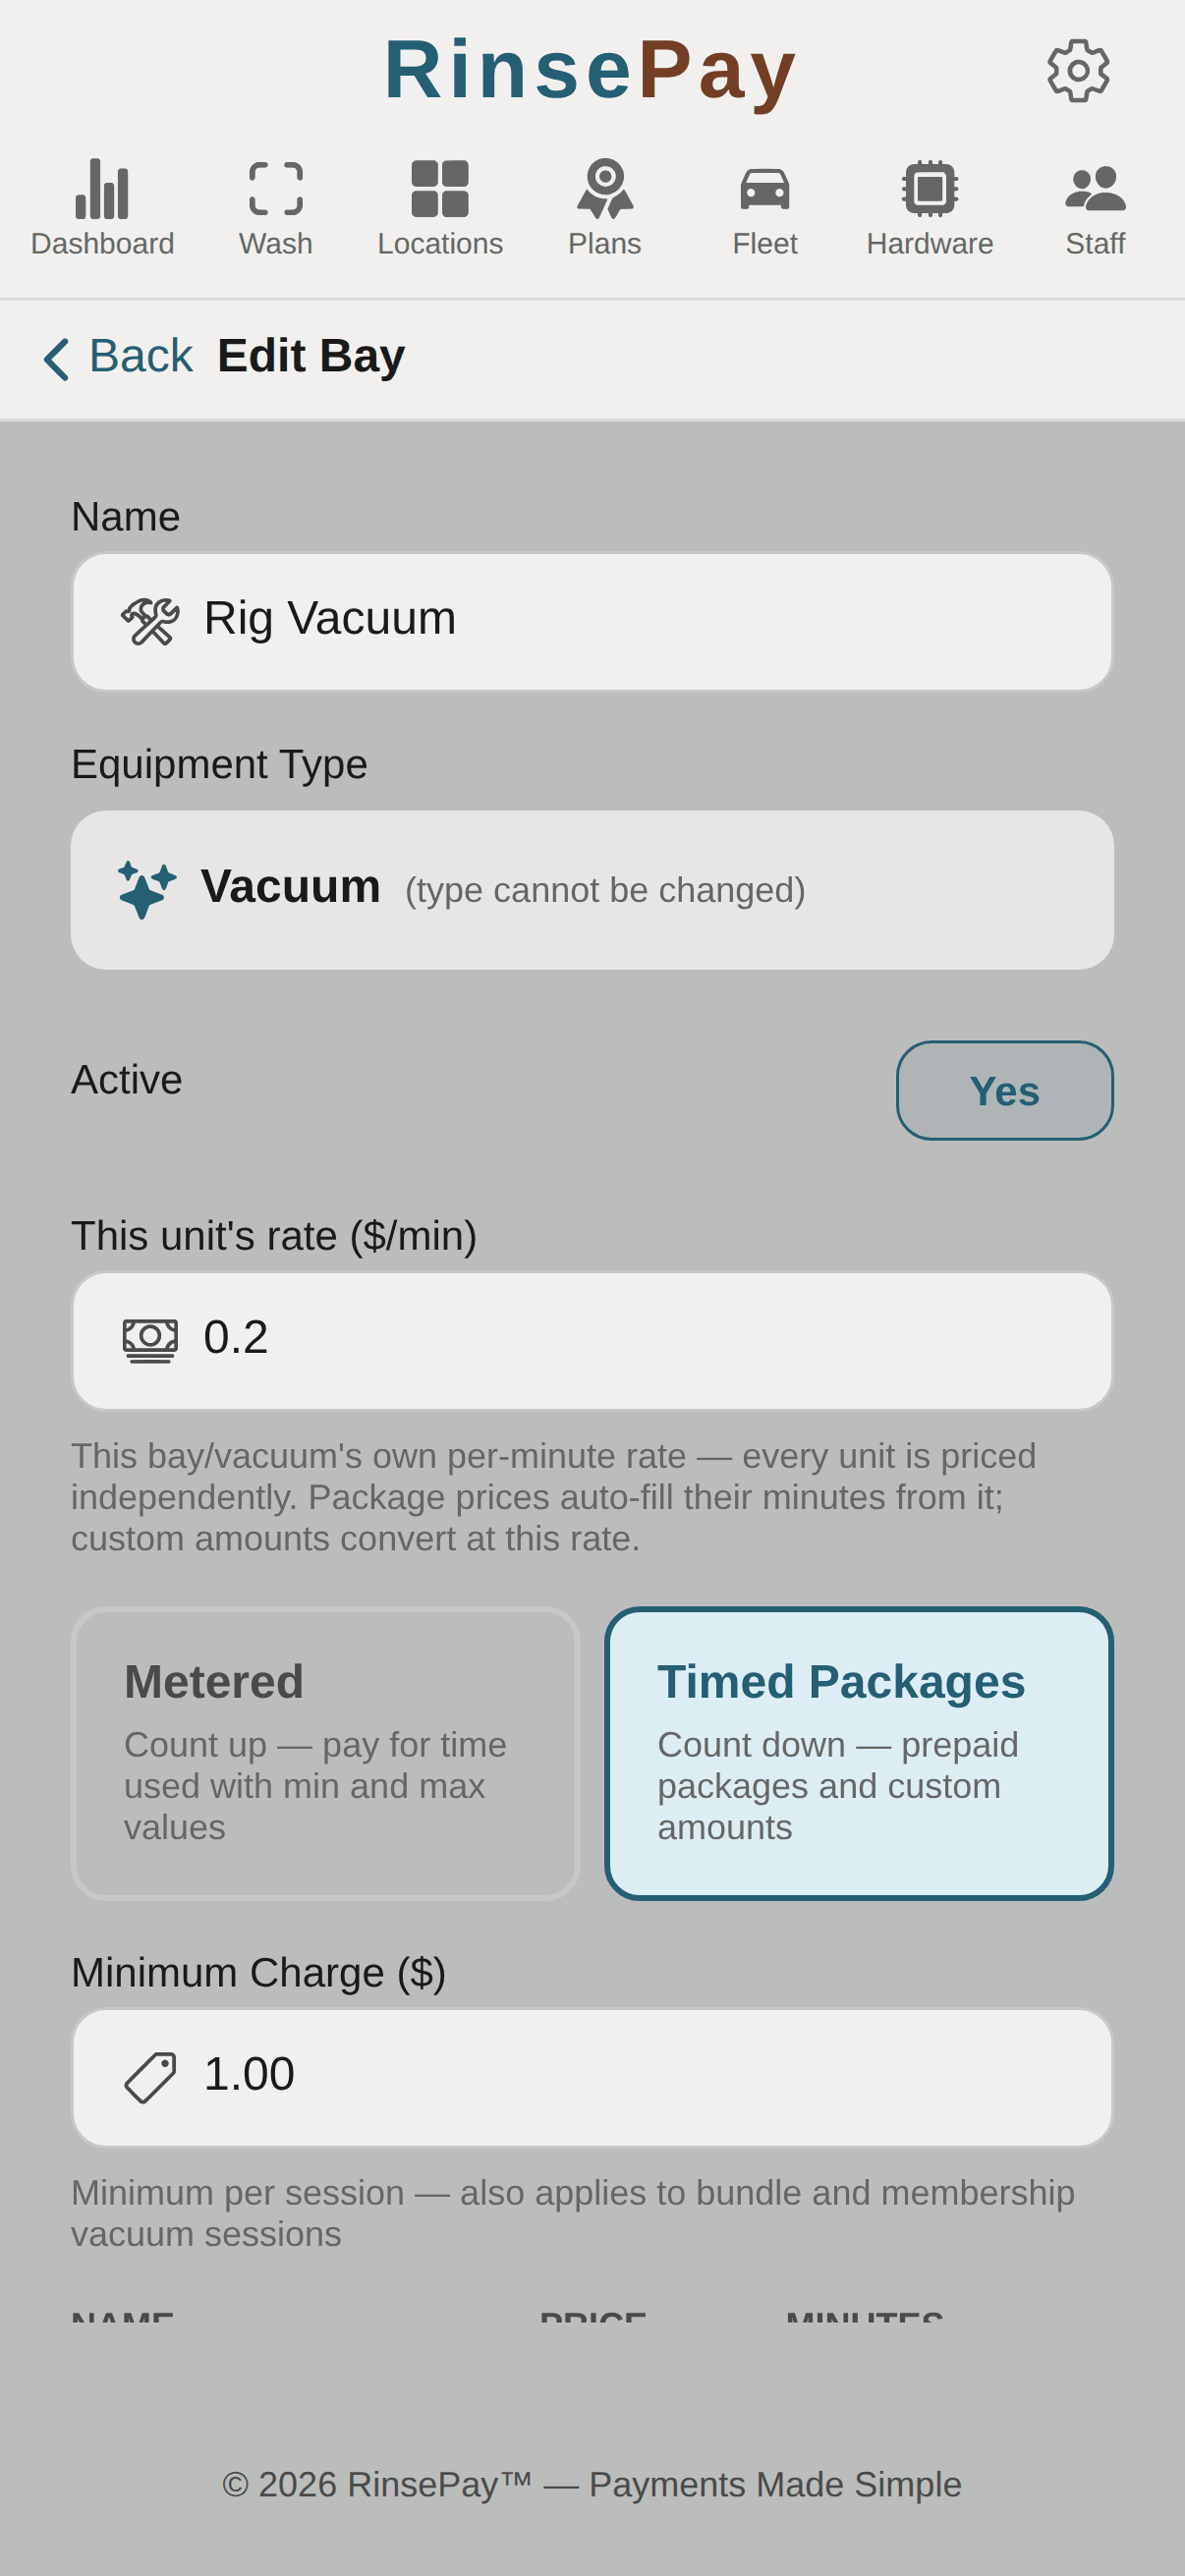
From your location, tap Add Equipment and pick Vacuum. Give it a name customers will recognize at the machine ("Vac 1 — North Lot"). Each vacuum gets its own controller and its own QR sticker, exactly like a bay.
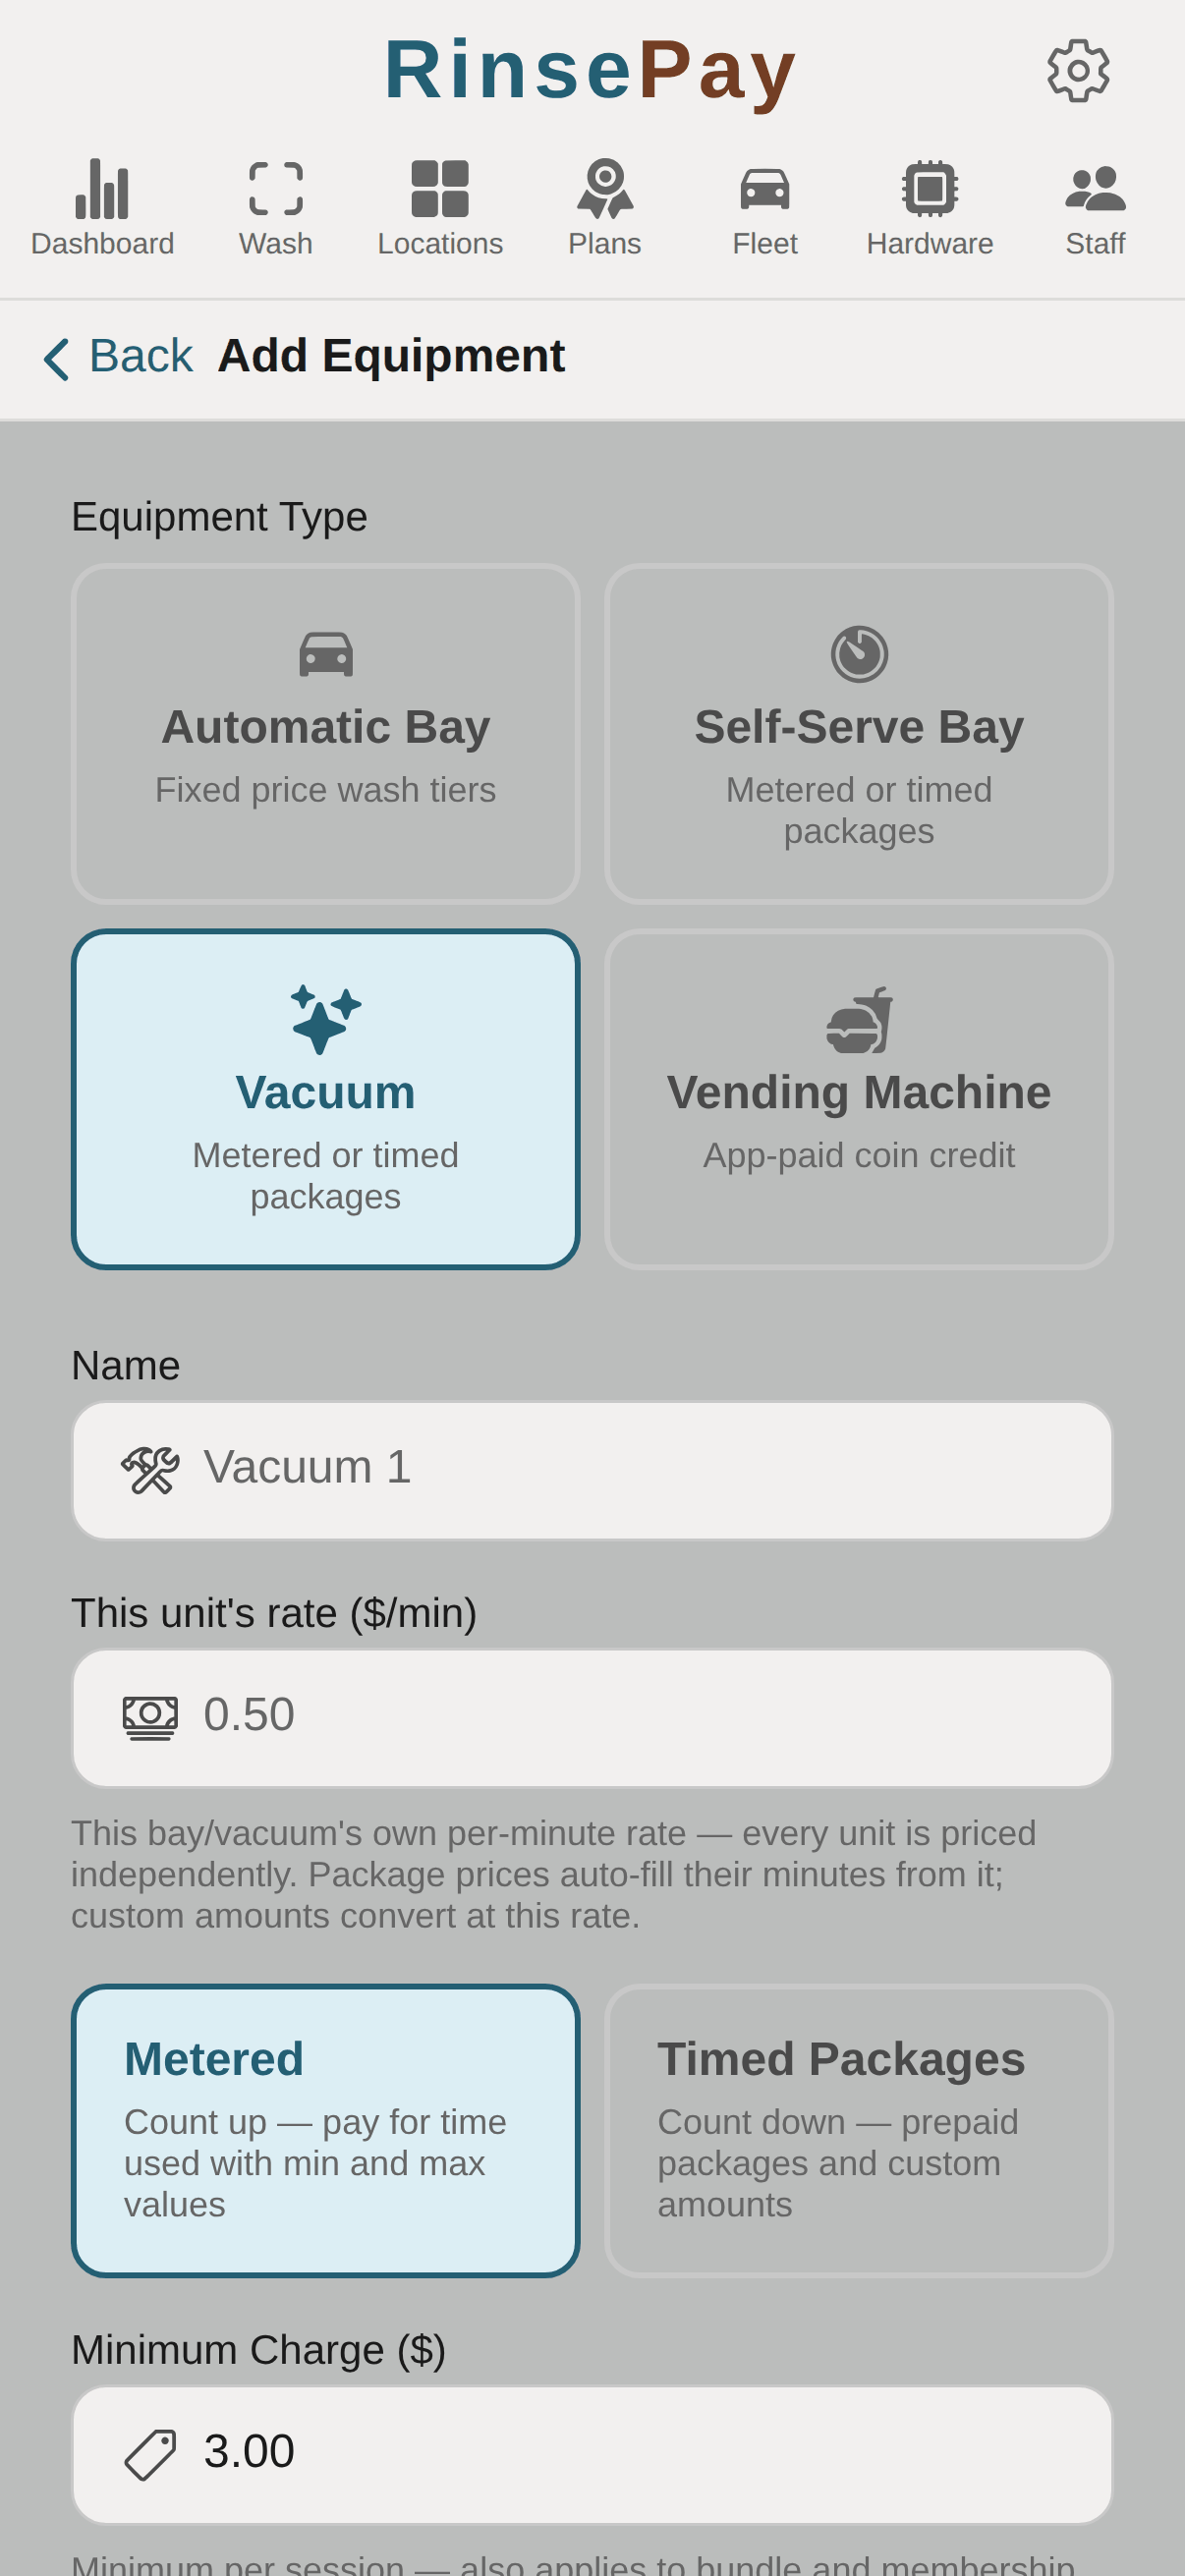
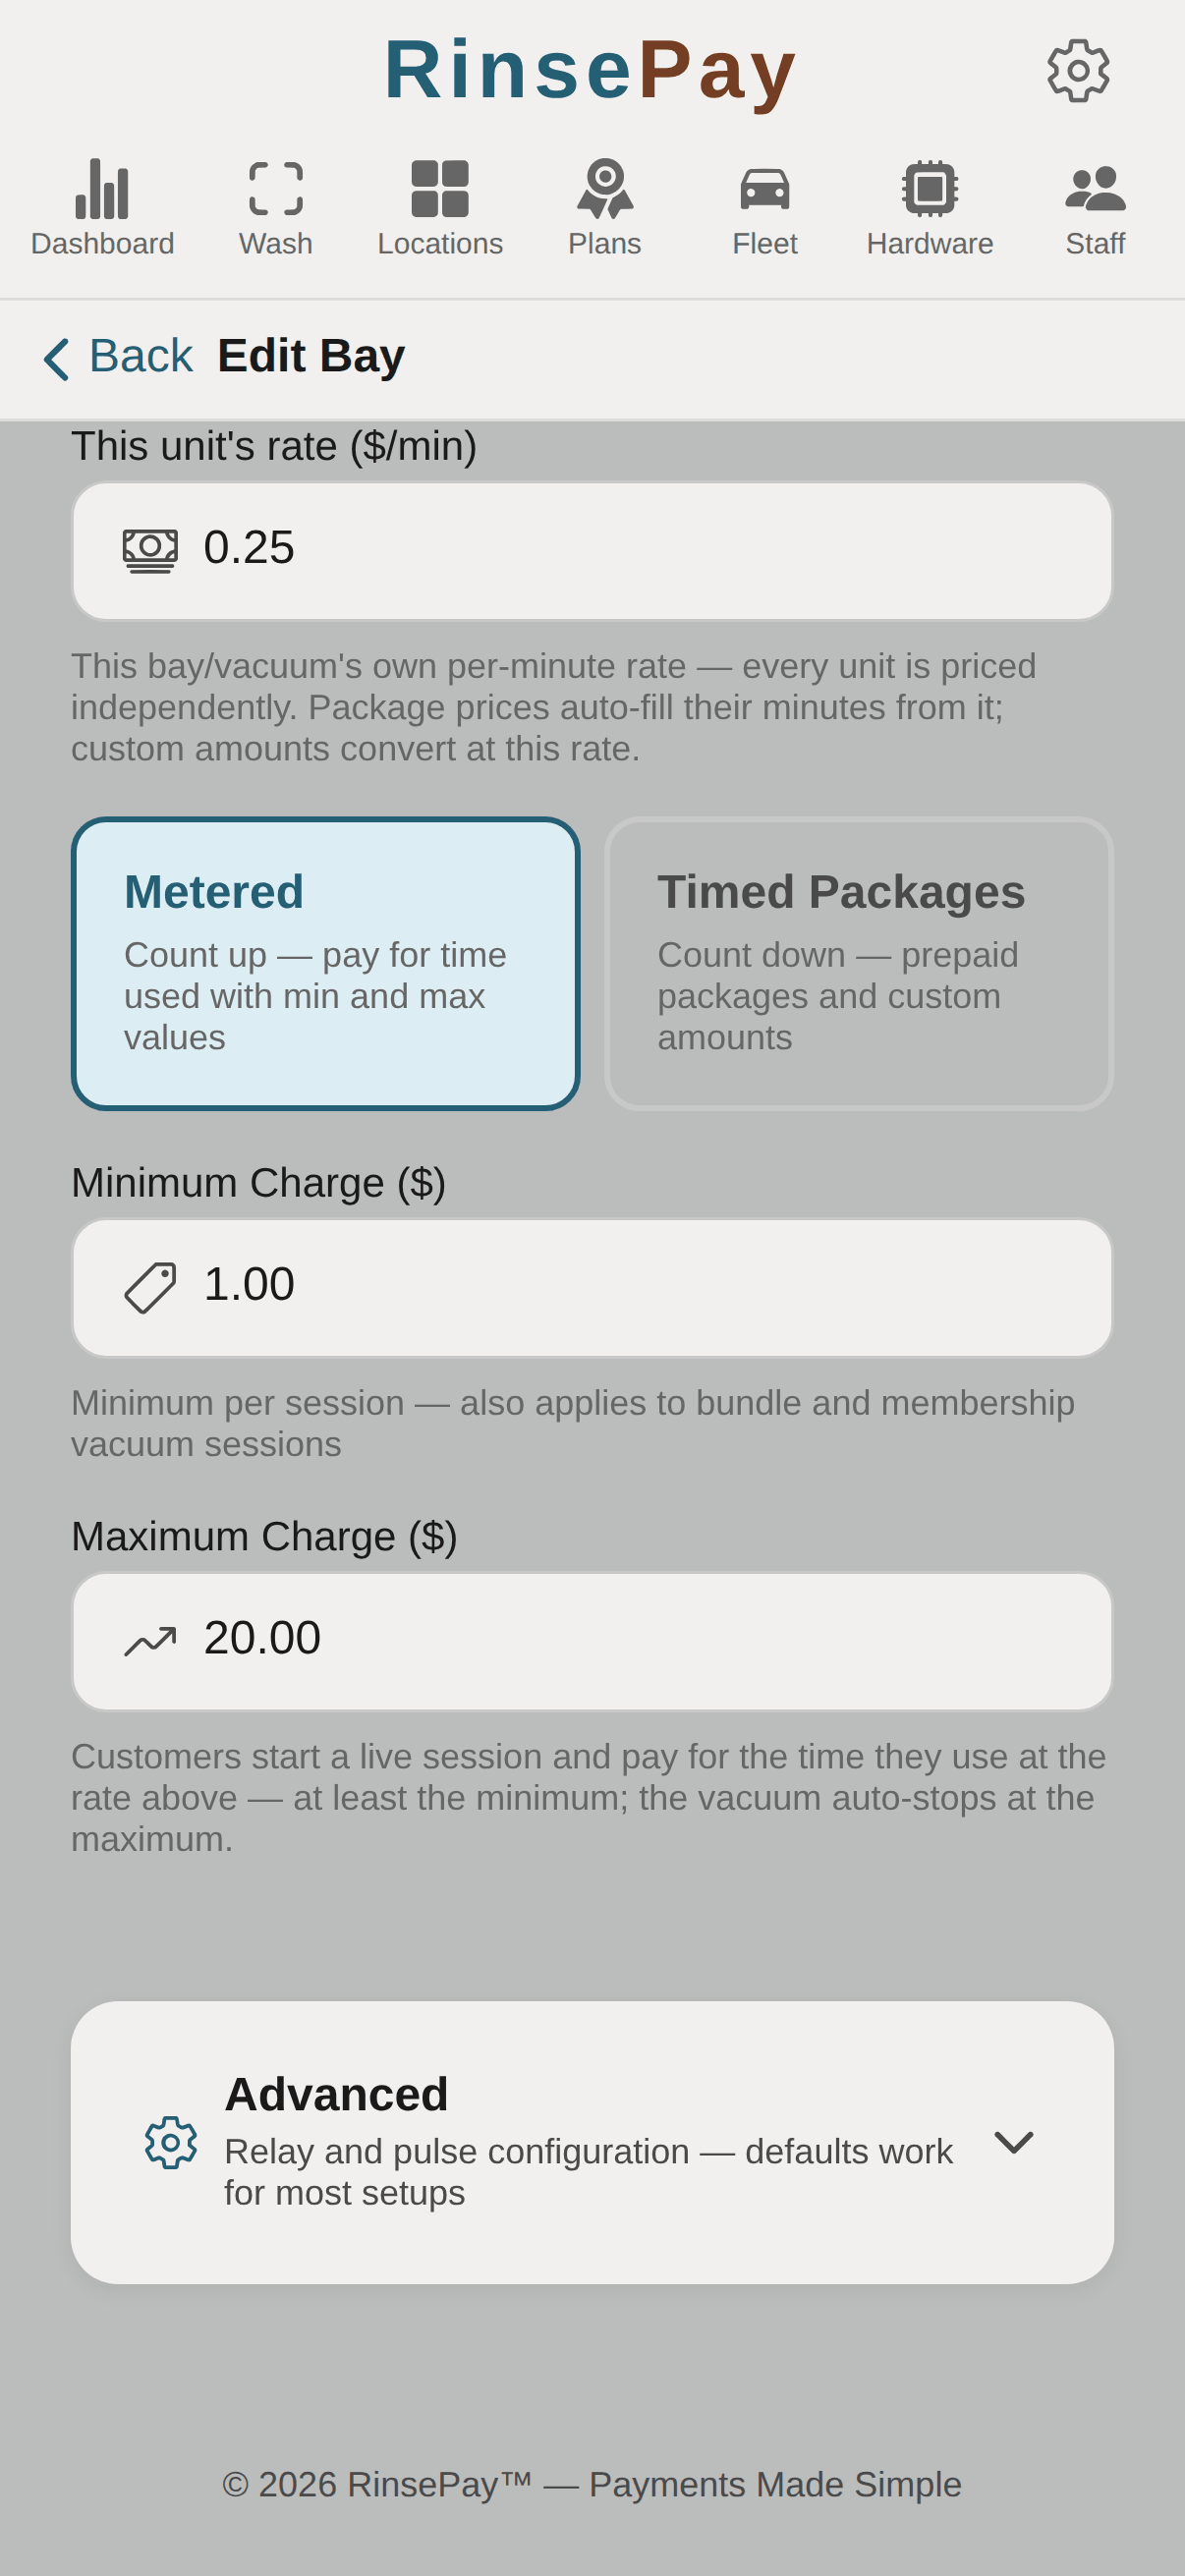
Every vacuum has one master Rate ($/min) — it drives everything: metered sessions, package auto-fill, and custom-amount conversion. Below it, pick one of two modes:
The Minimum Charge field applies in both modes — it's the per-session floor, and it also applies to bundle and membership vacuum sessions (stopping one early still deducts the minimum's worth of minutes, unless the plan overrides it — see the Subscriptions tab).
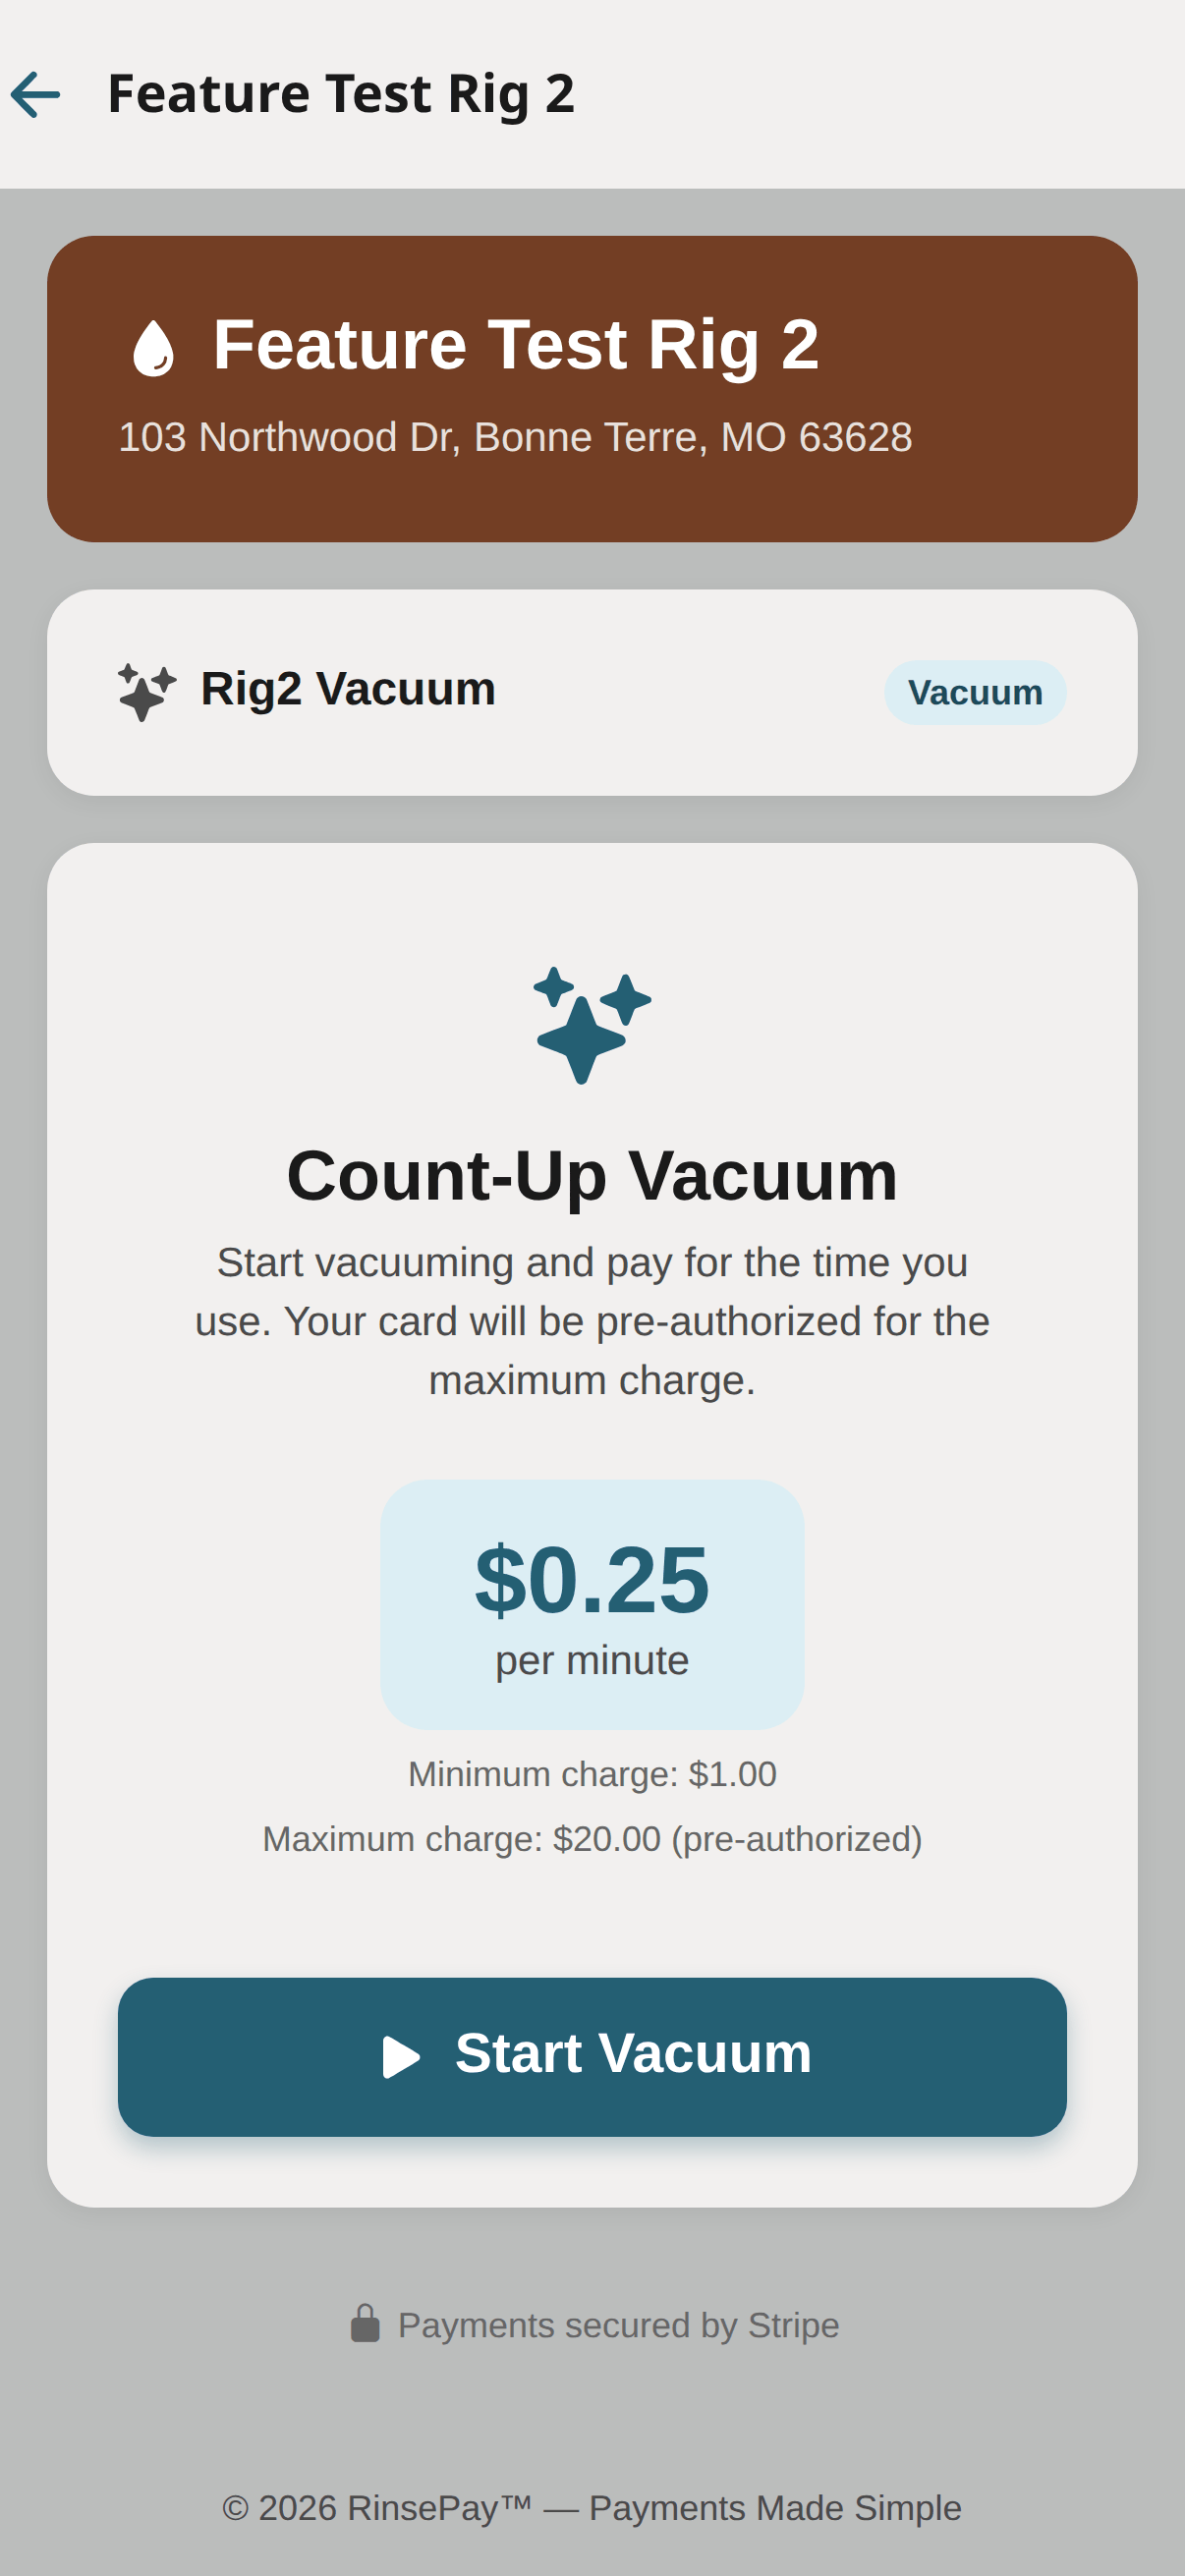
Set the Minimum Charge and a Maximum Charge. The customer's card is pre-authorized for the maximum when they start; when they stop, they're charged only for the time they used (never less than the minimum). The vacuum auto-stops if the session ever reaches the maximum, so nobody gets a surprise bill.
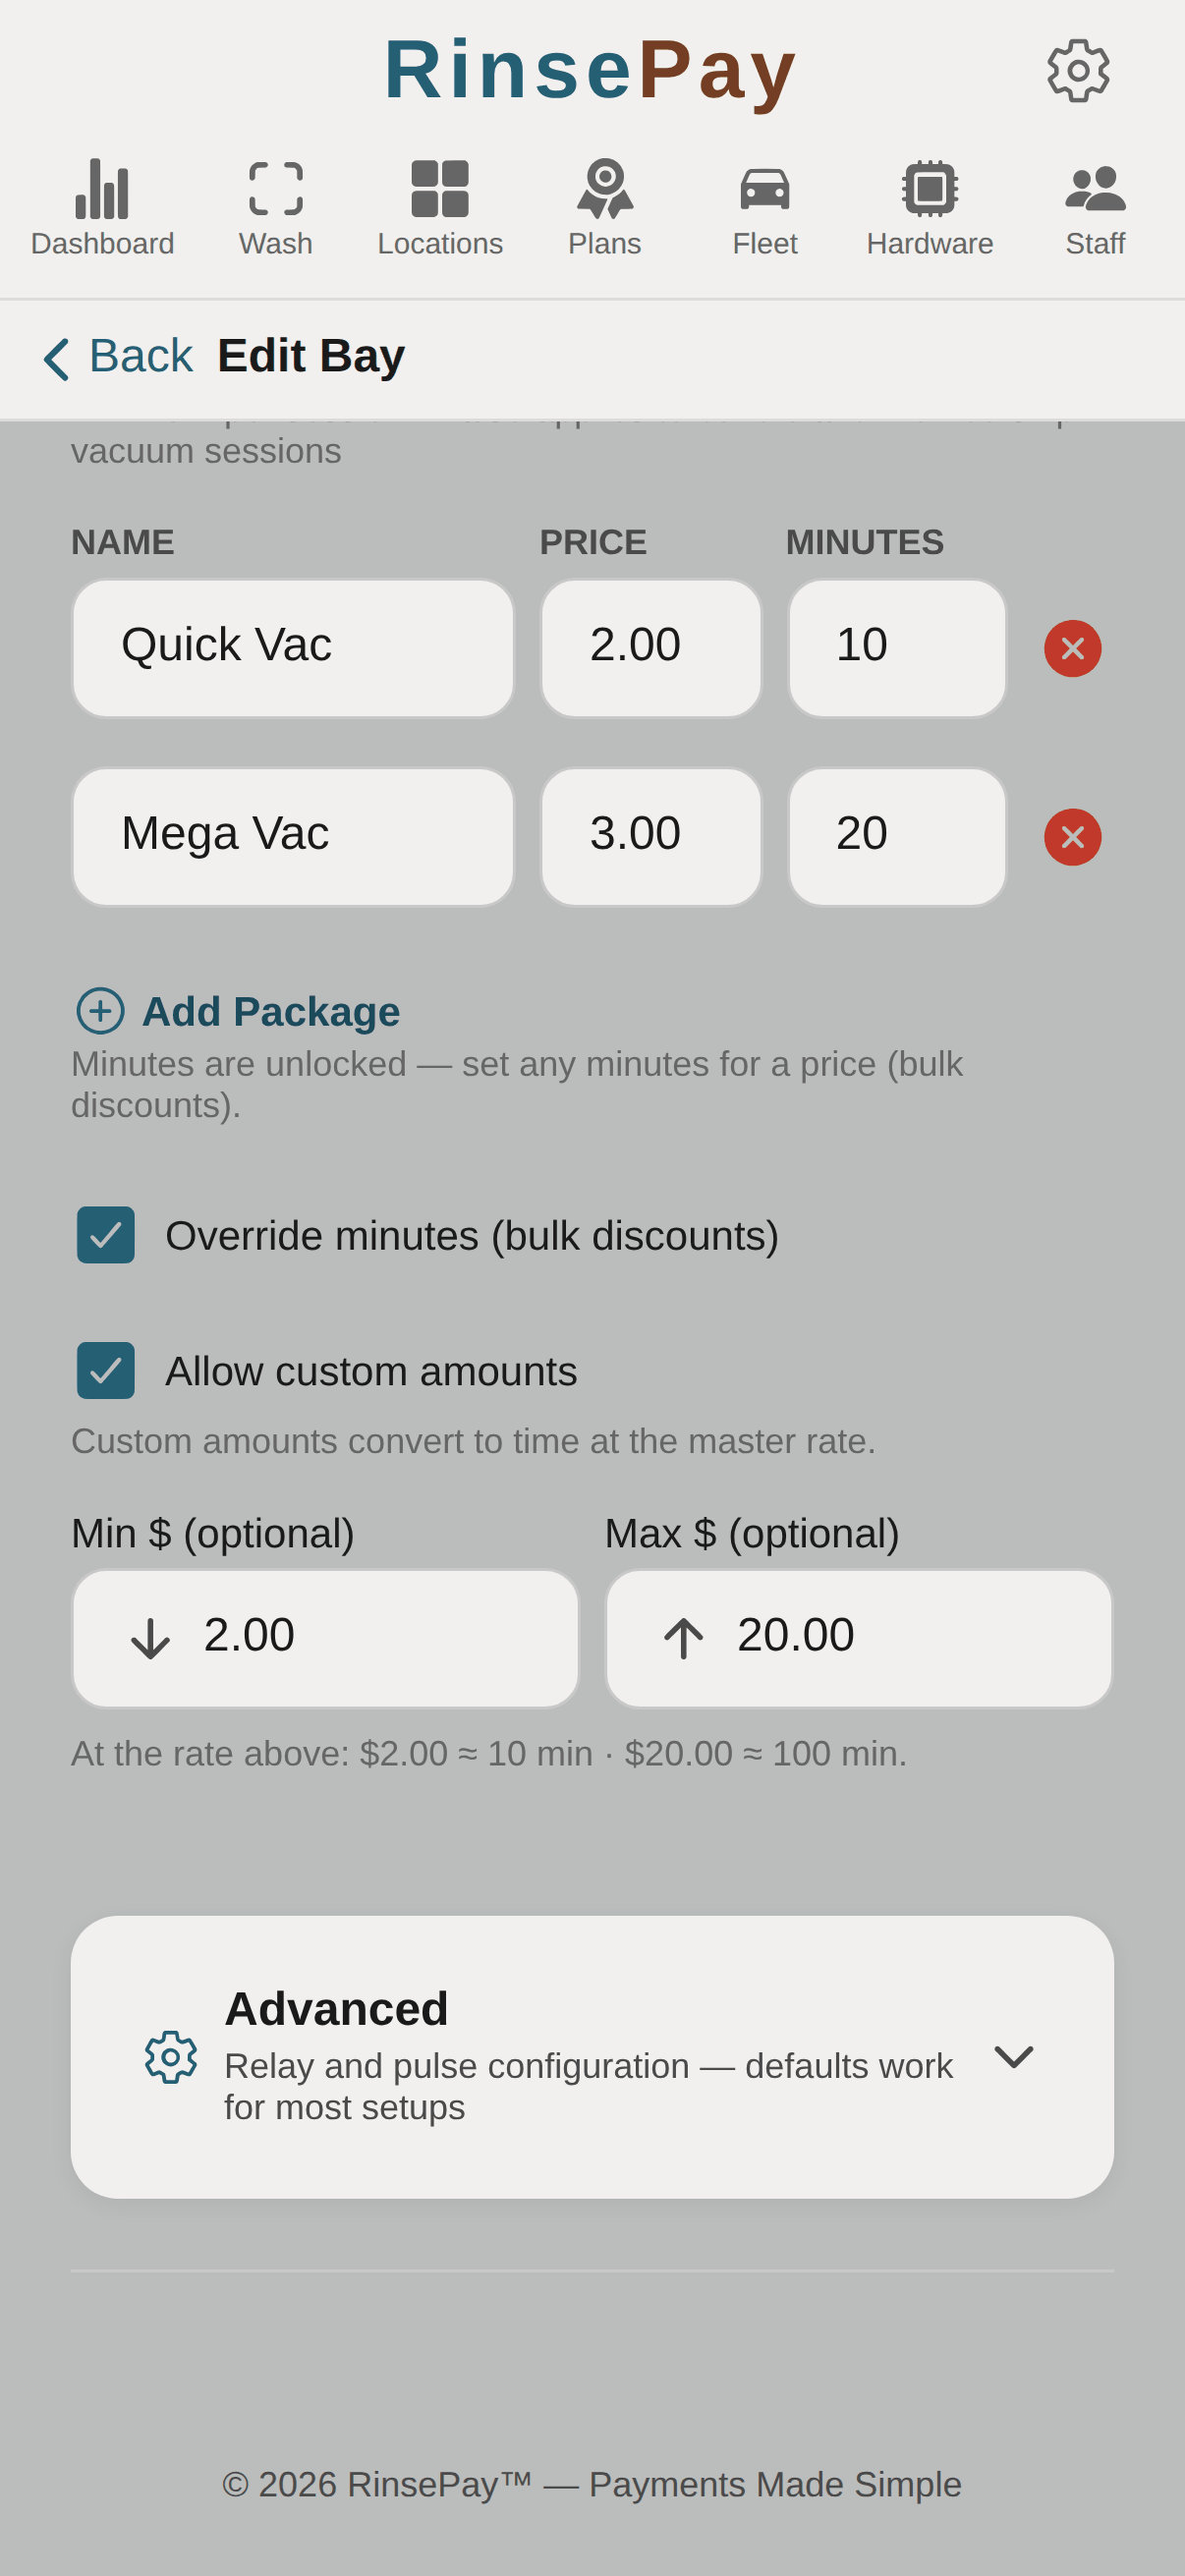
In package mode, add rows like "Quick Vac — $2.00 — 10 min". Minutes auto-fill from the master rate as you type prices; tick Override minutes to hand-edit them for bulk discounts (e.g. $5 buys more than 5× the $1 time). Tick Allow custom amounts to let customers type their own dollar amount, converted at the master rate — and set optional Min $ / Max $ bounds on what they may enter. The editor shows you exactly how many minutes each bound buys.
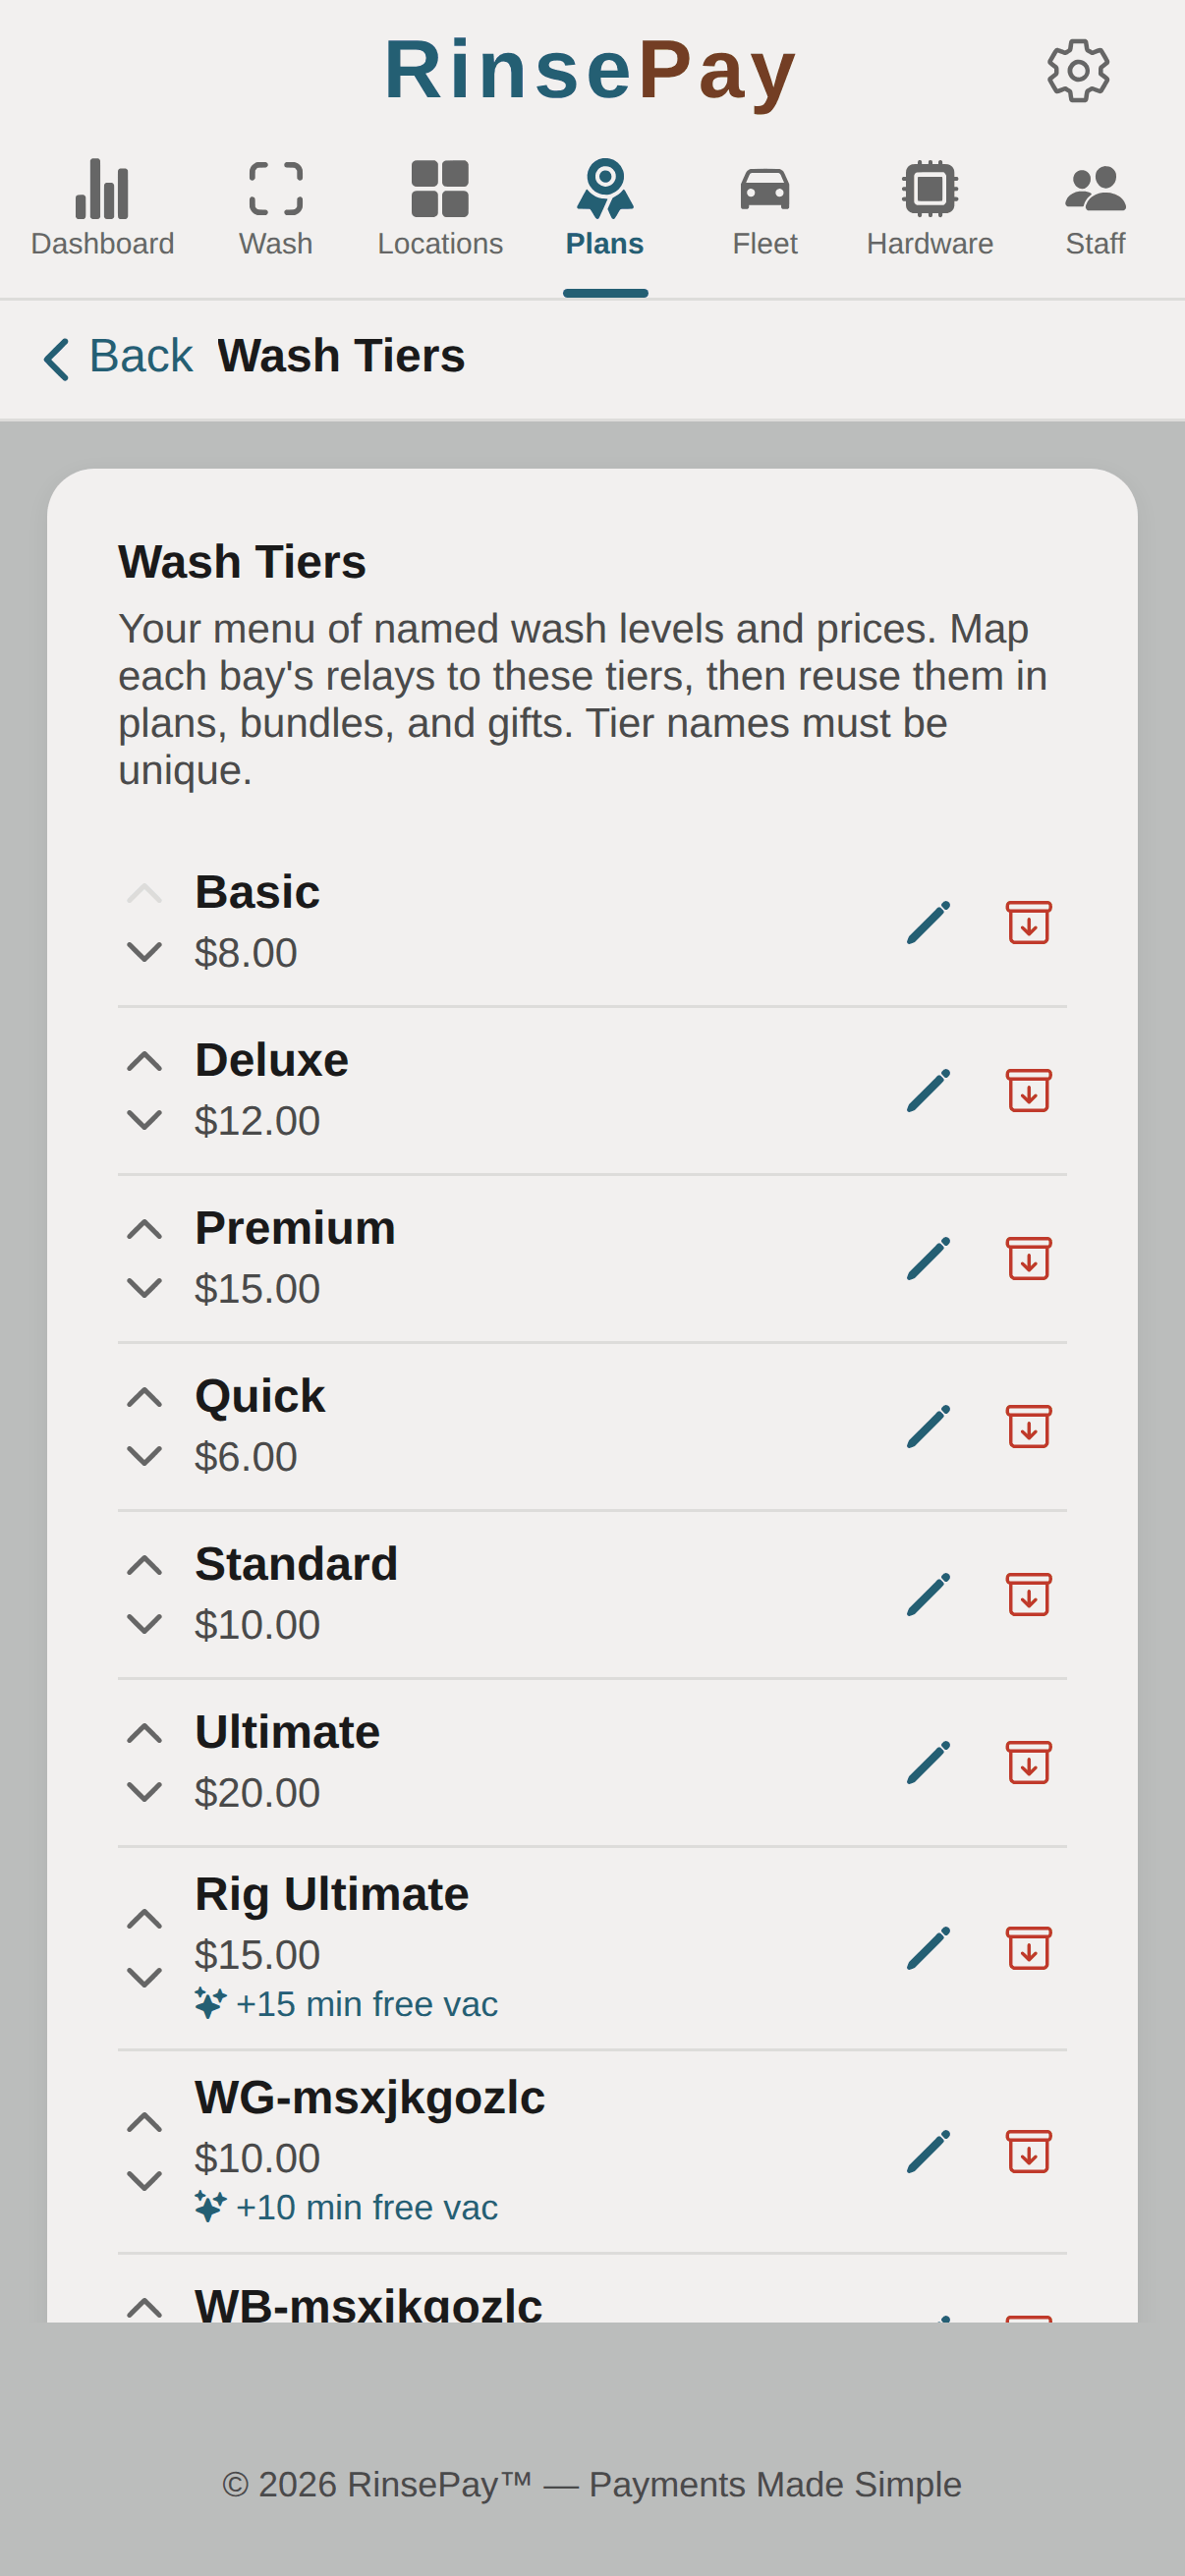
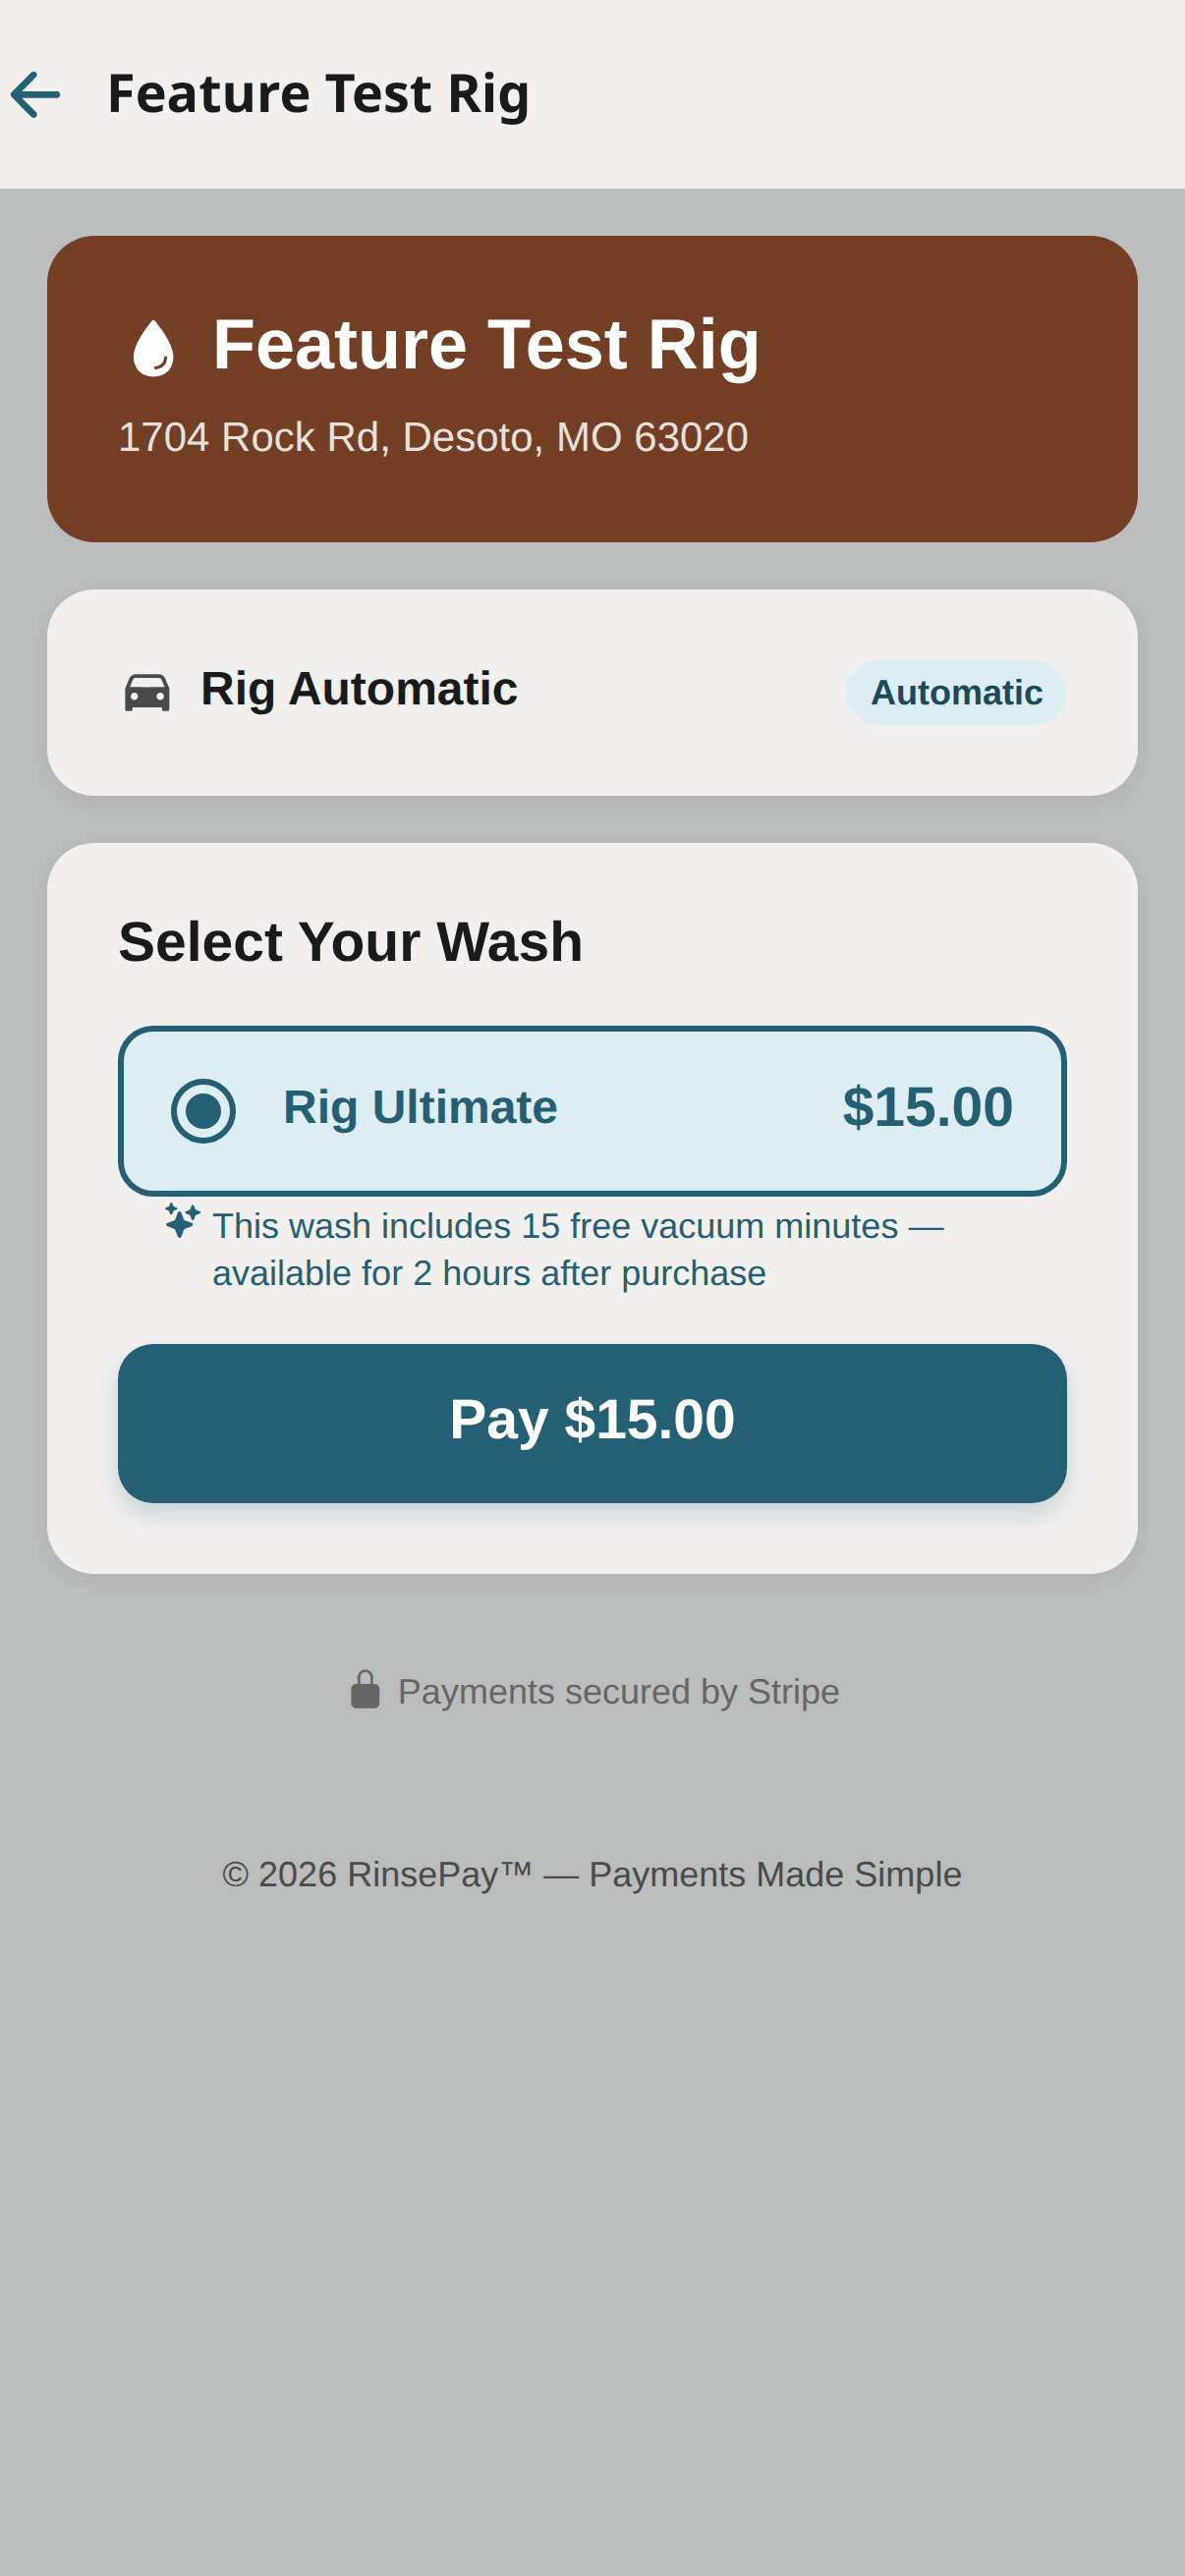
Under Plans → Wash Tiers, any automatic wash tier can include free vac minutes — buy the wash, get a free vacuum session. The Free-Vac Redemption Window (one setting for your whole account, default 2 hours) controls how long after the wash the free session stays redeemable. Customers see "This wash includes 15 free vacuum minutes — available for 2 hours after purchase" right on the tier they're buying, and "Free vacuum available" when they scan a vac. The free session counts down; they can stop it early, but unused free minutes are lost.
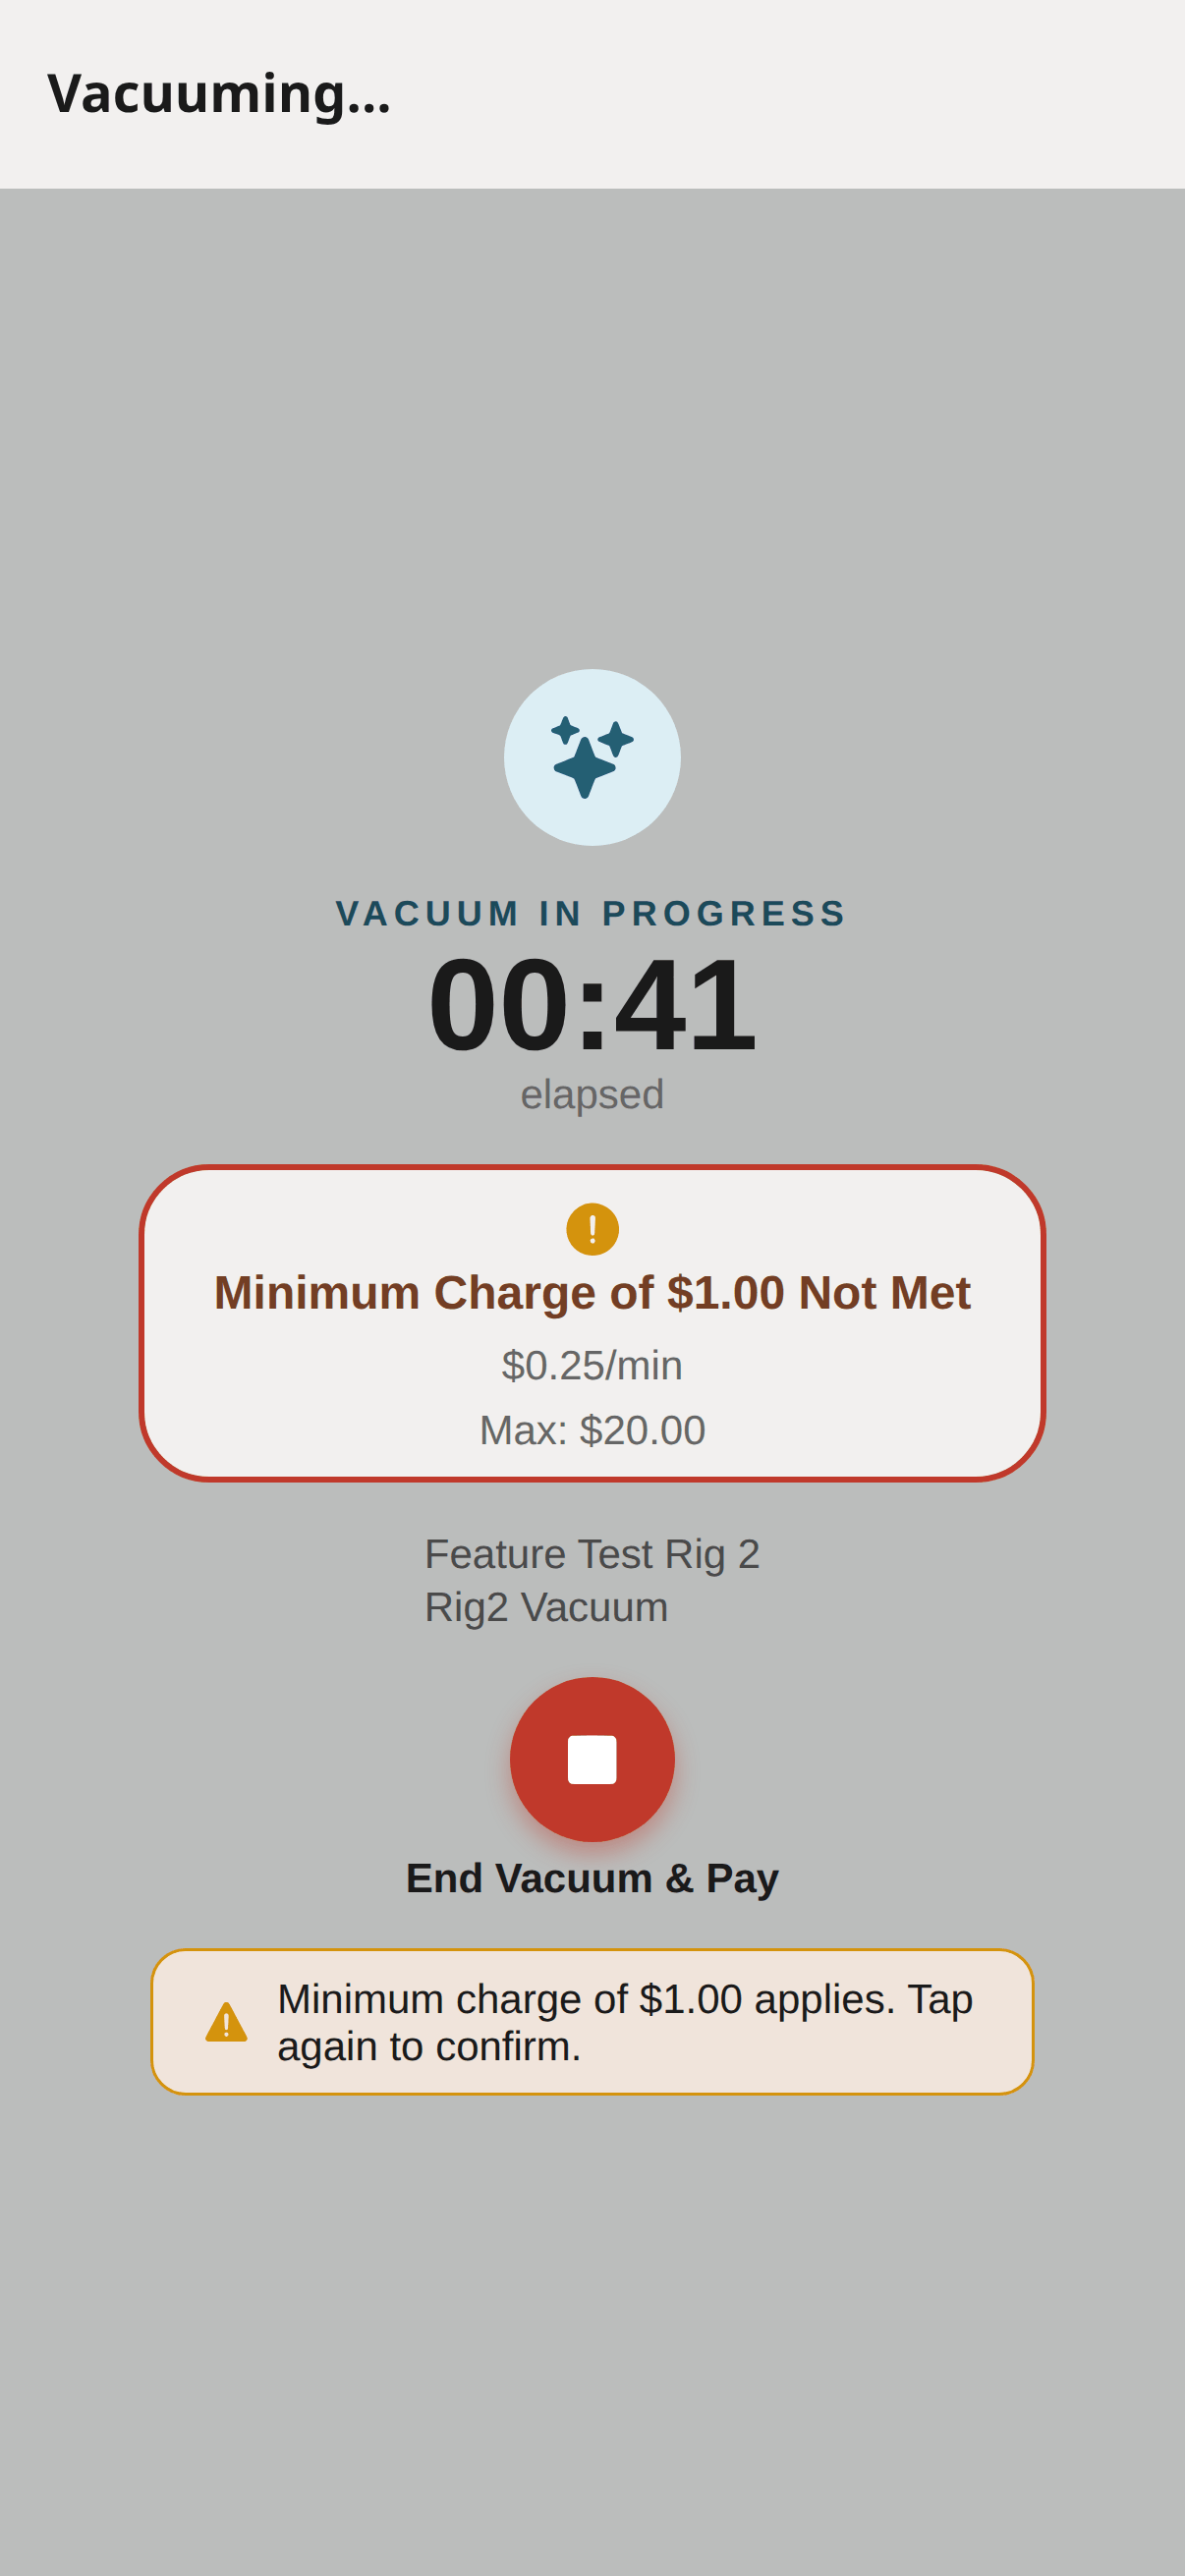
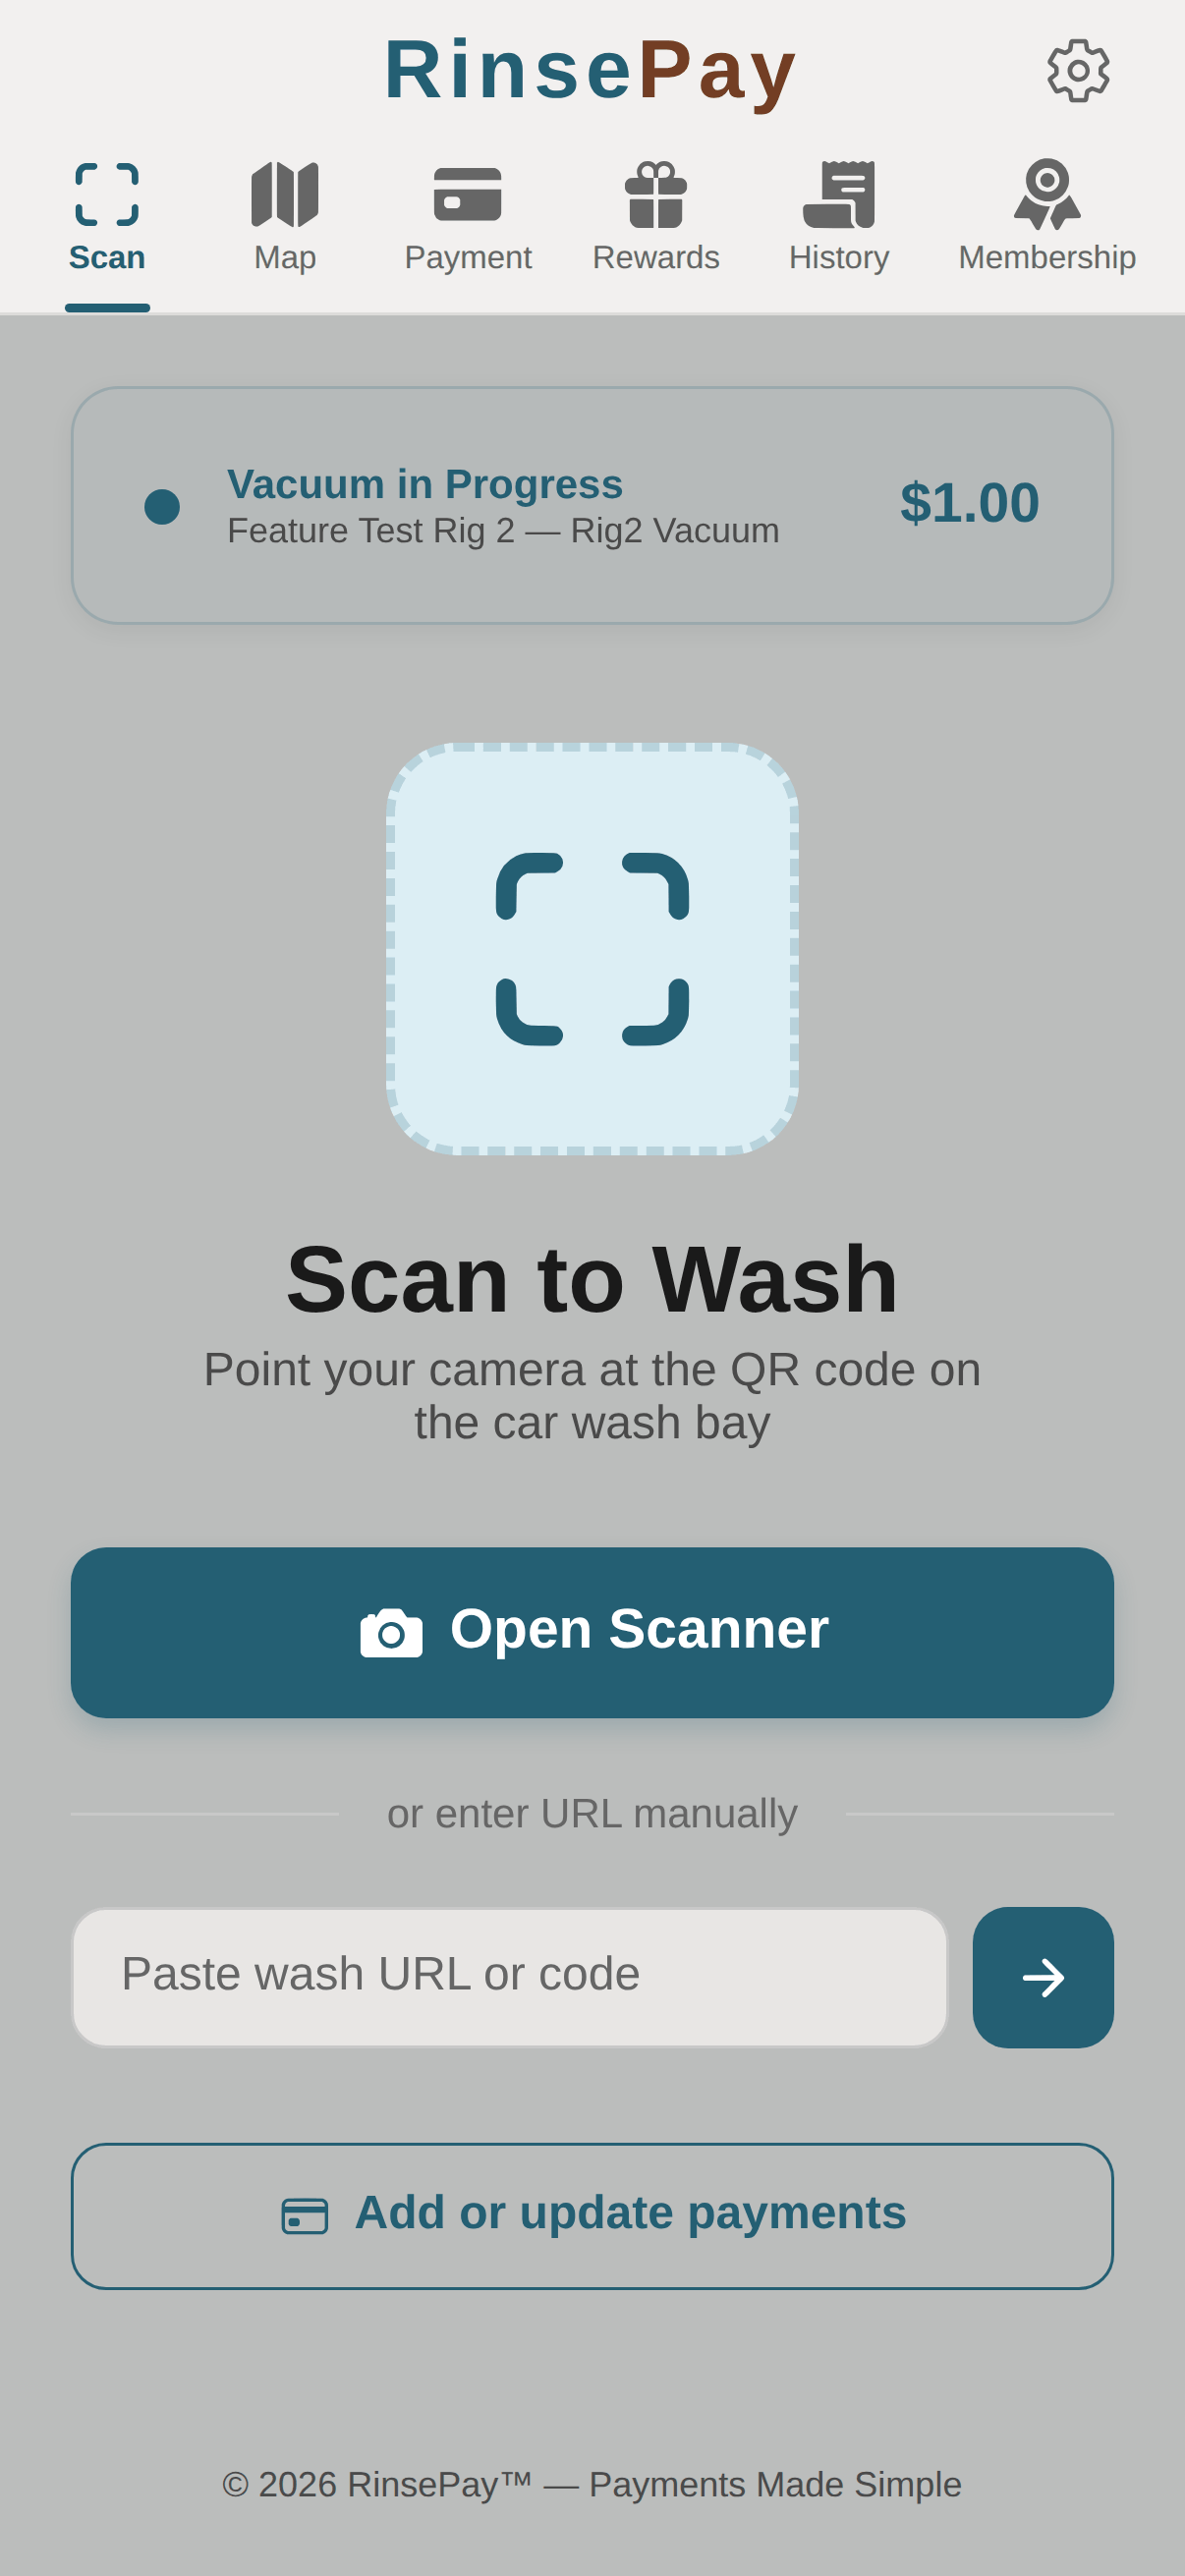
Every running vacuum session shows a live timer and a stop button. Stopping early always warns first: on a metered session below the minimum, "Minimum charge of $1.00 applies — tap again to confirm"; on bundle or membership minutes, how many minutes will still be deducted; on one-session bundle minutes, that the rest is forfeited. And if the customer wanders off to another screen mid-session, an app-wide "Vacuum in Progress — tap to return" banner keeps the session one tap away on every screen.
Put a QR on any electronic coin-acceptor vending machine and customers pay from their phone. Credit pulses to the machine exactly like coins — no machine modifications beyond the RinsePay controller.
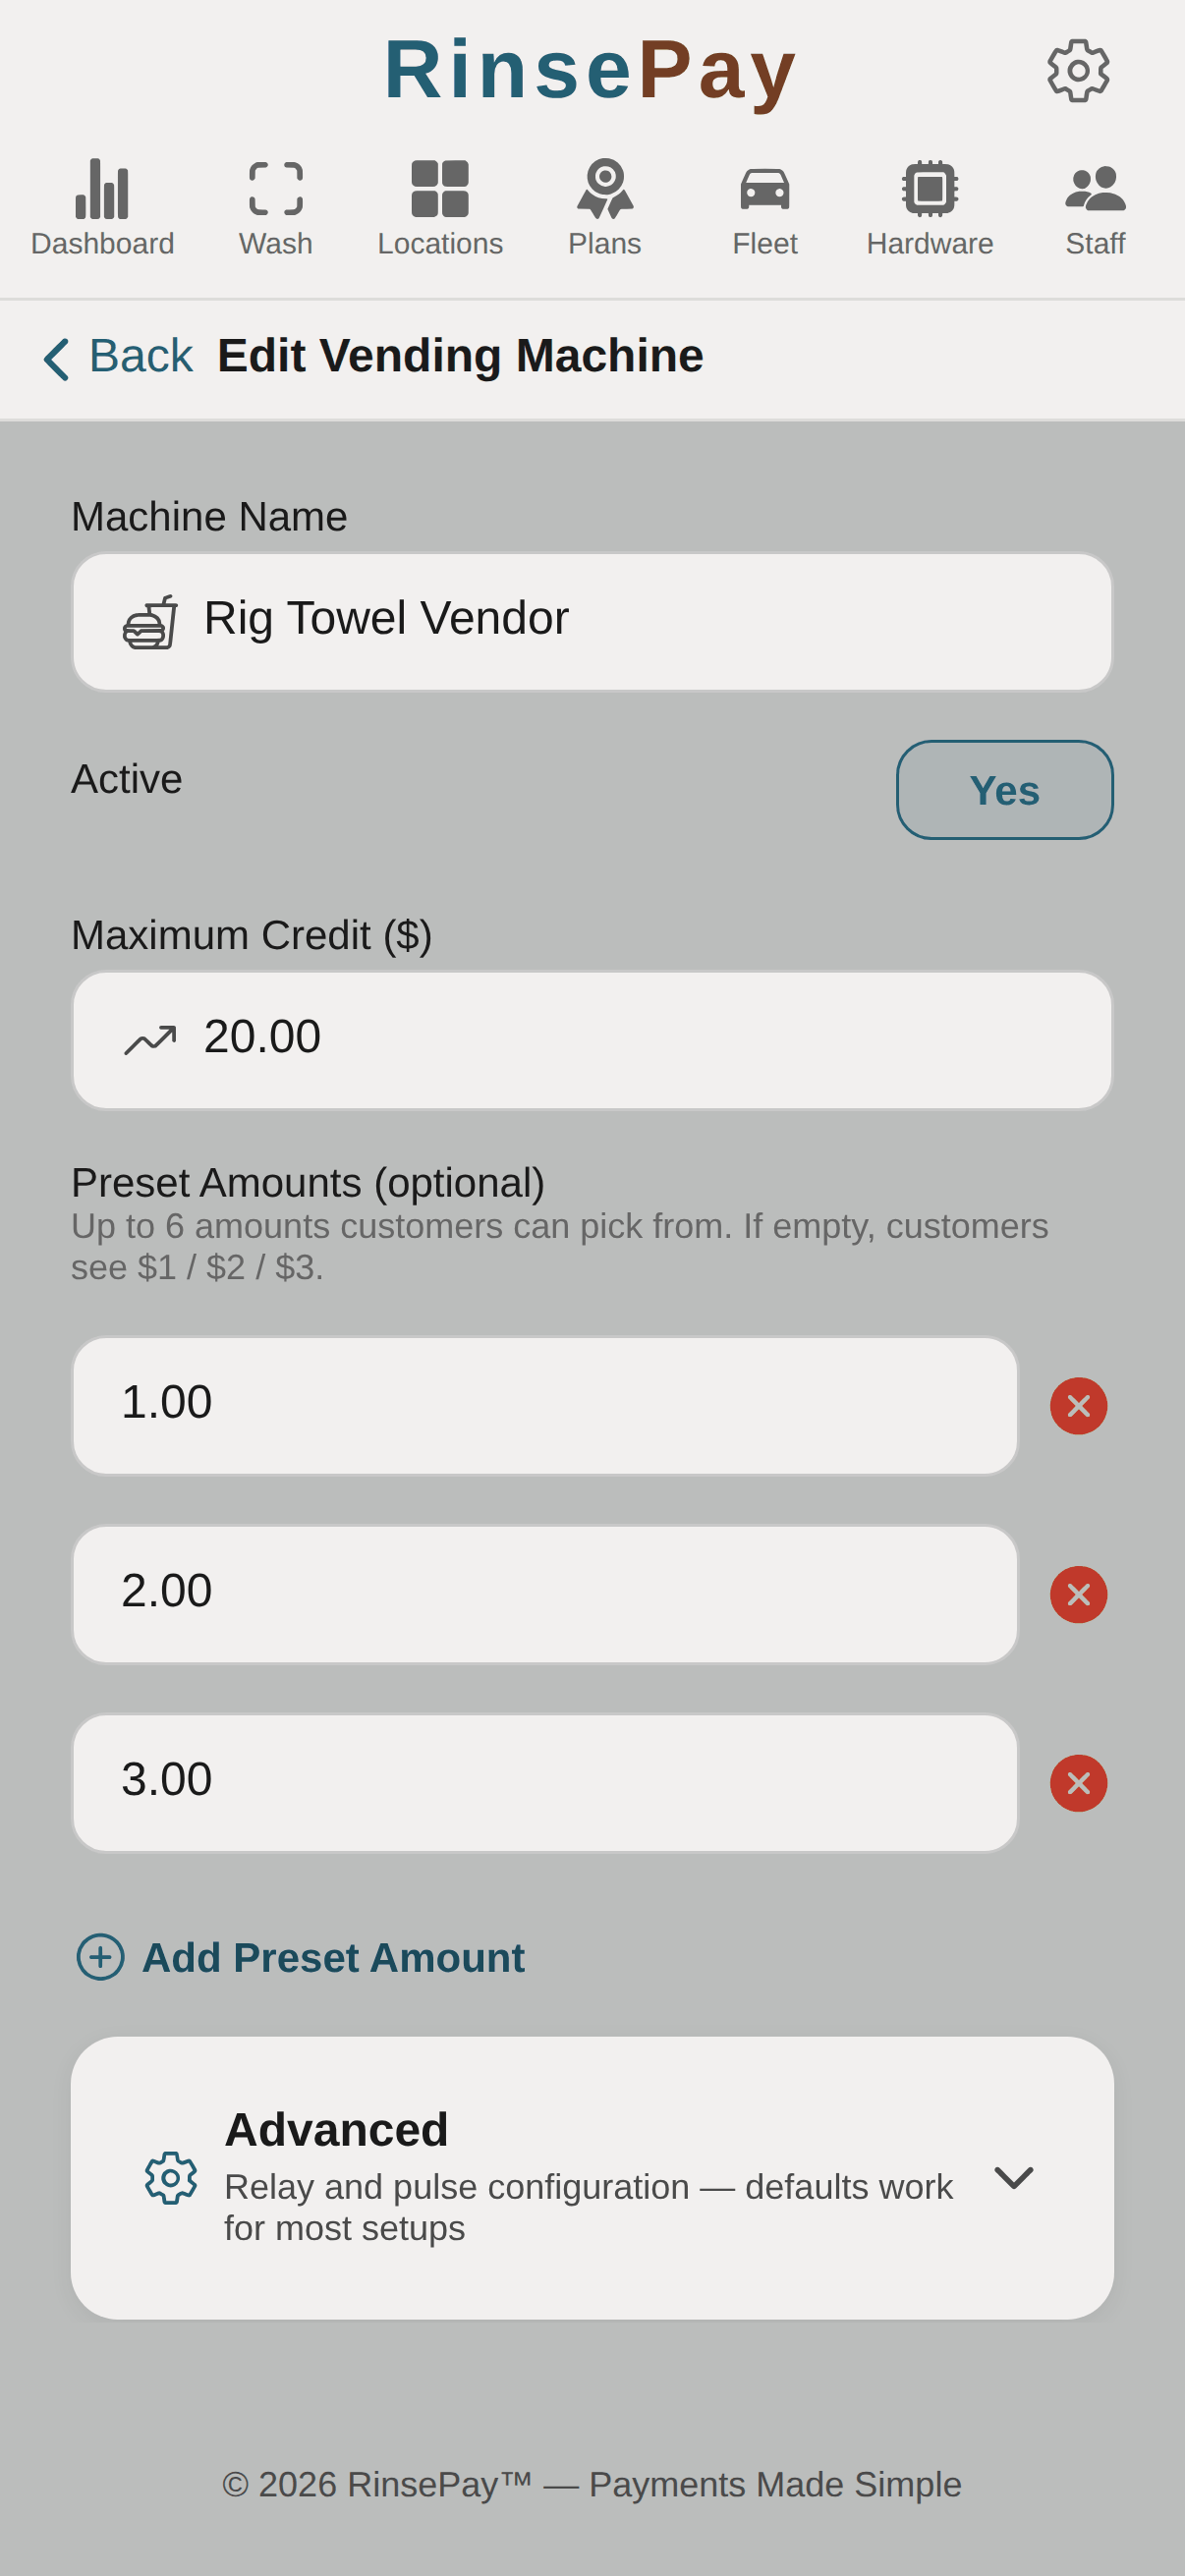
From your location, tap Add Equipment and pick Vending Machine. Name it what it sells ("Towel Vendor", "Snack Machine") — customers see the name when they scan.
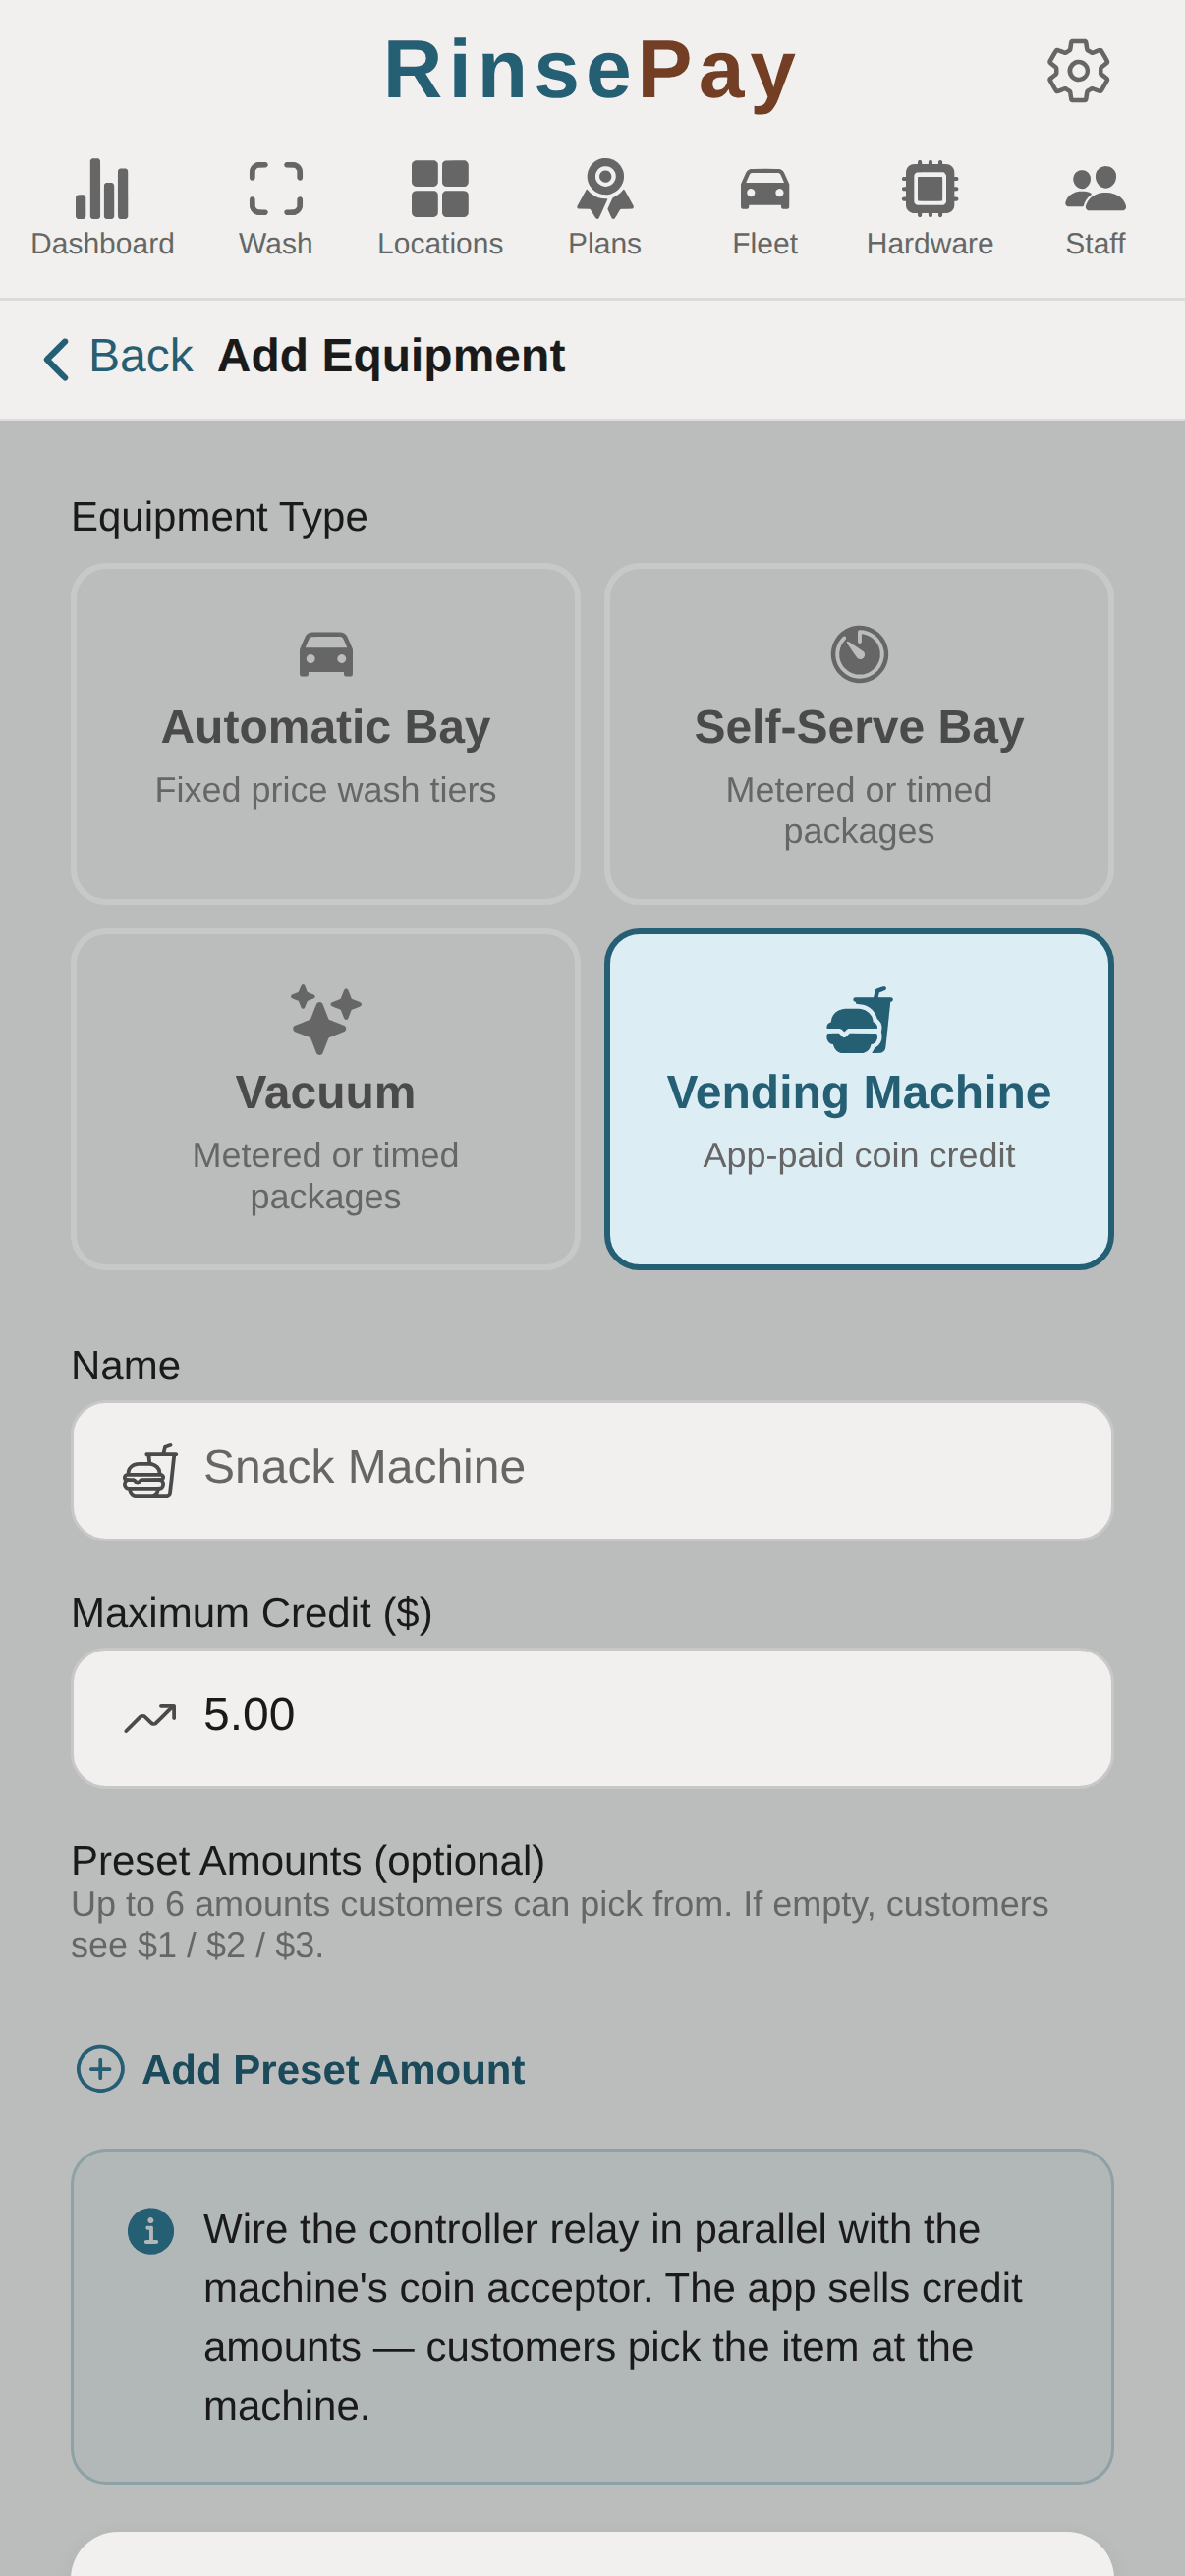
Set the Maximum Credit and up to six Preset Amounts customers can pick from (leave presets empty and they see $1 / $2 / $3). Relay and pulse timing lives under Advanced — the defaults match standard coin-acceptor wiring.
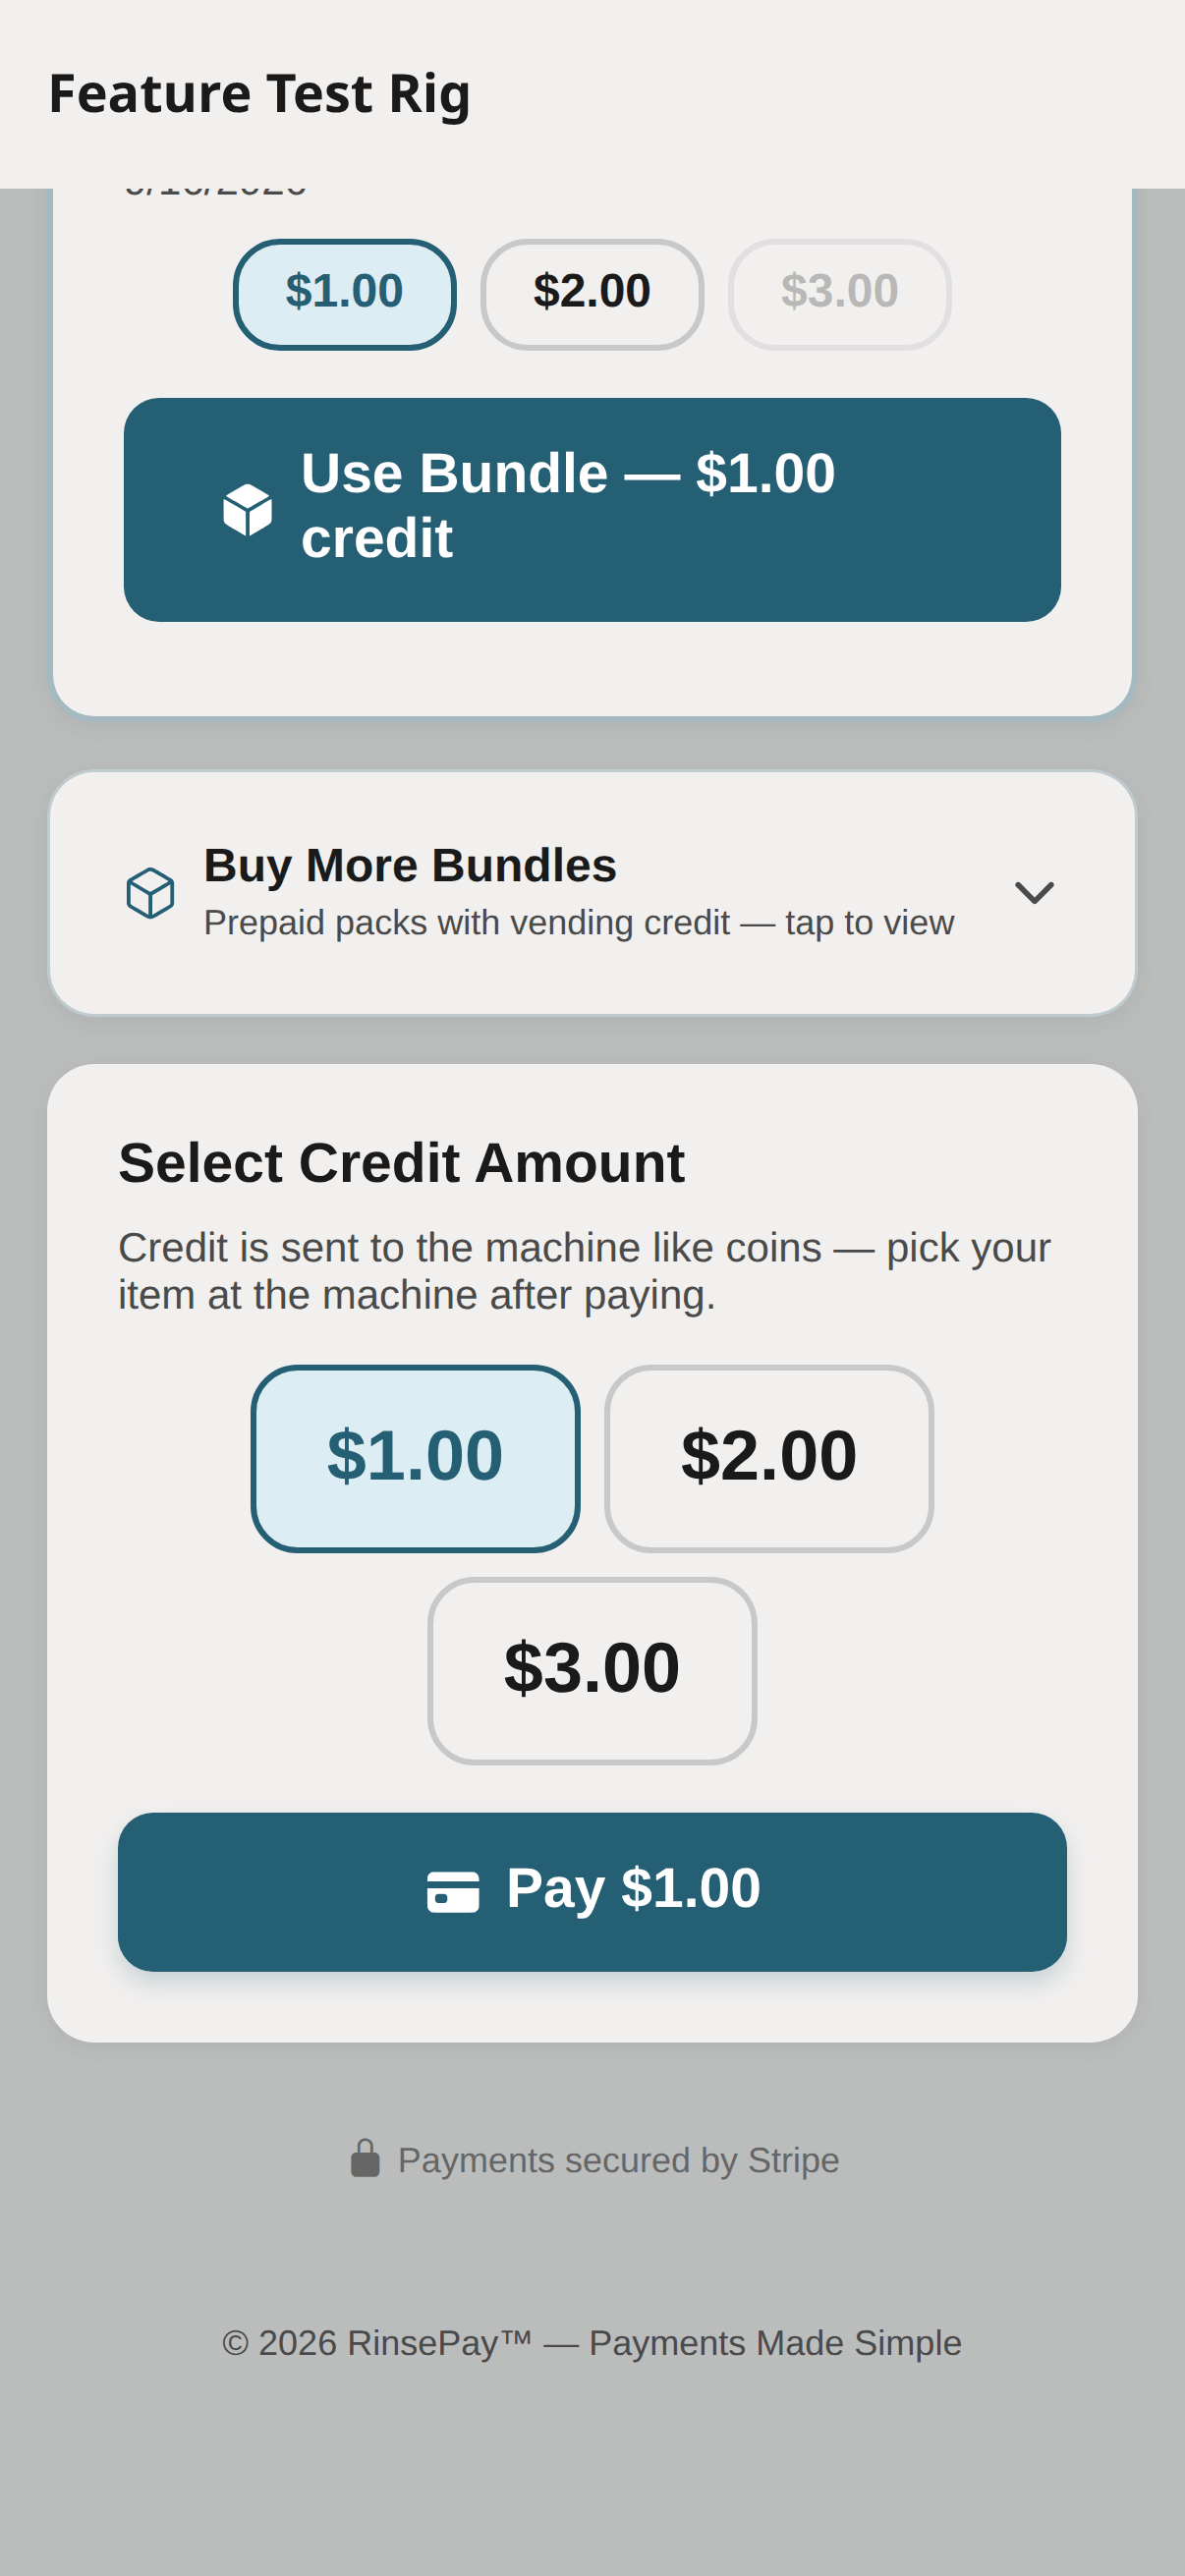
Every vending machine gets its own QR code, same as bays and vacuums — print it any size and mount it on the machine. Customers scan, pick an amount, pay, and the machine is credited instantly; they make their selection at the machine as usual.
The pay screen offers every way they can pay, in order: membership vending credit first, then bundle vending credit, then their card. Membership and bundle spends can use any of the machine's configured amounts (up to what's left), plus a "use remaining" chip to drain an odd balance exactly. Card purchases use the same preset amounts. If an item doesn't vend, the customer taps "Item didn't vend" on the purchase and you see it immediately.
Fleet accounts let local trucking companies, landscapers, and rental shops put multiple drivers on one monthly invoice. The fastest way to sign one up: hand them your Fleet Signup QR — they apply on their phone, you approve, and the account is live. No data entry on your end.
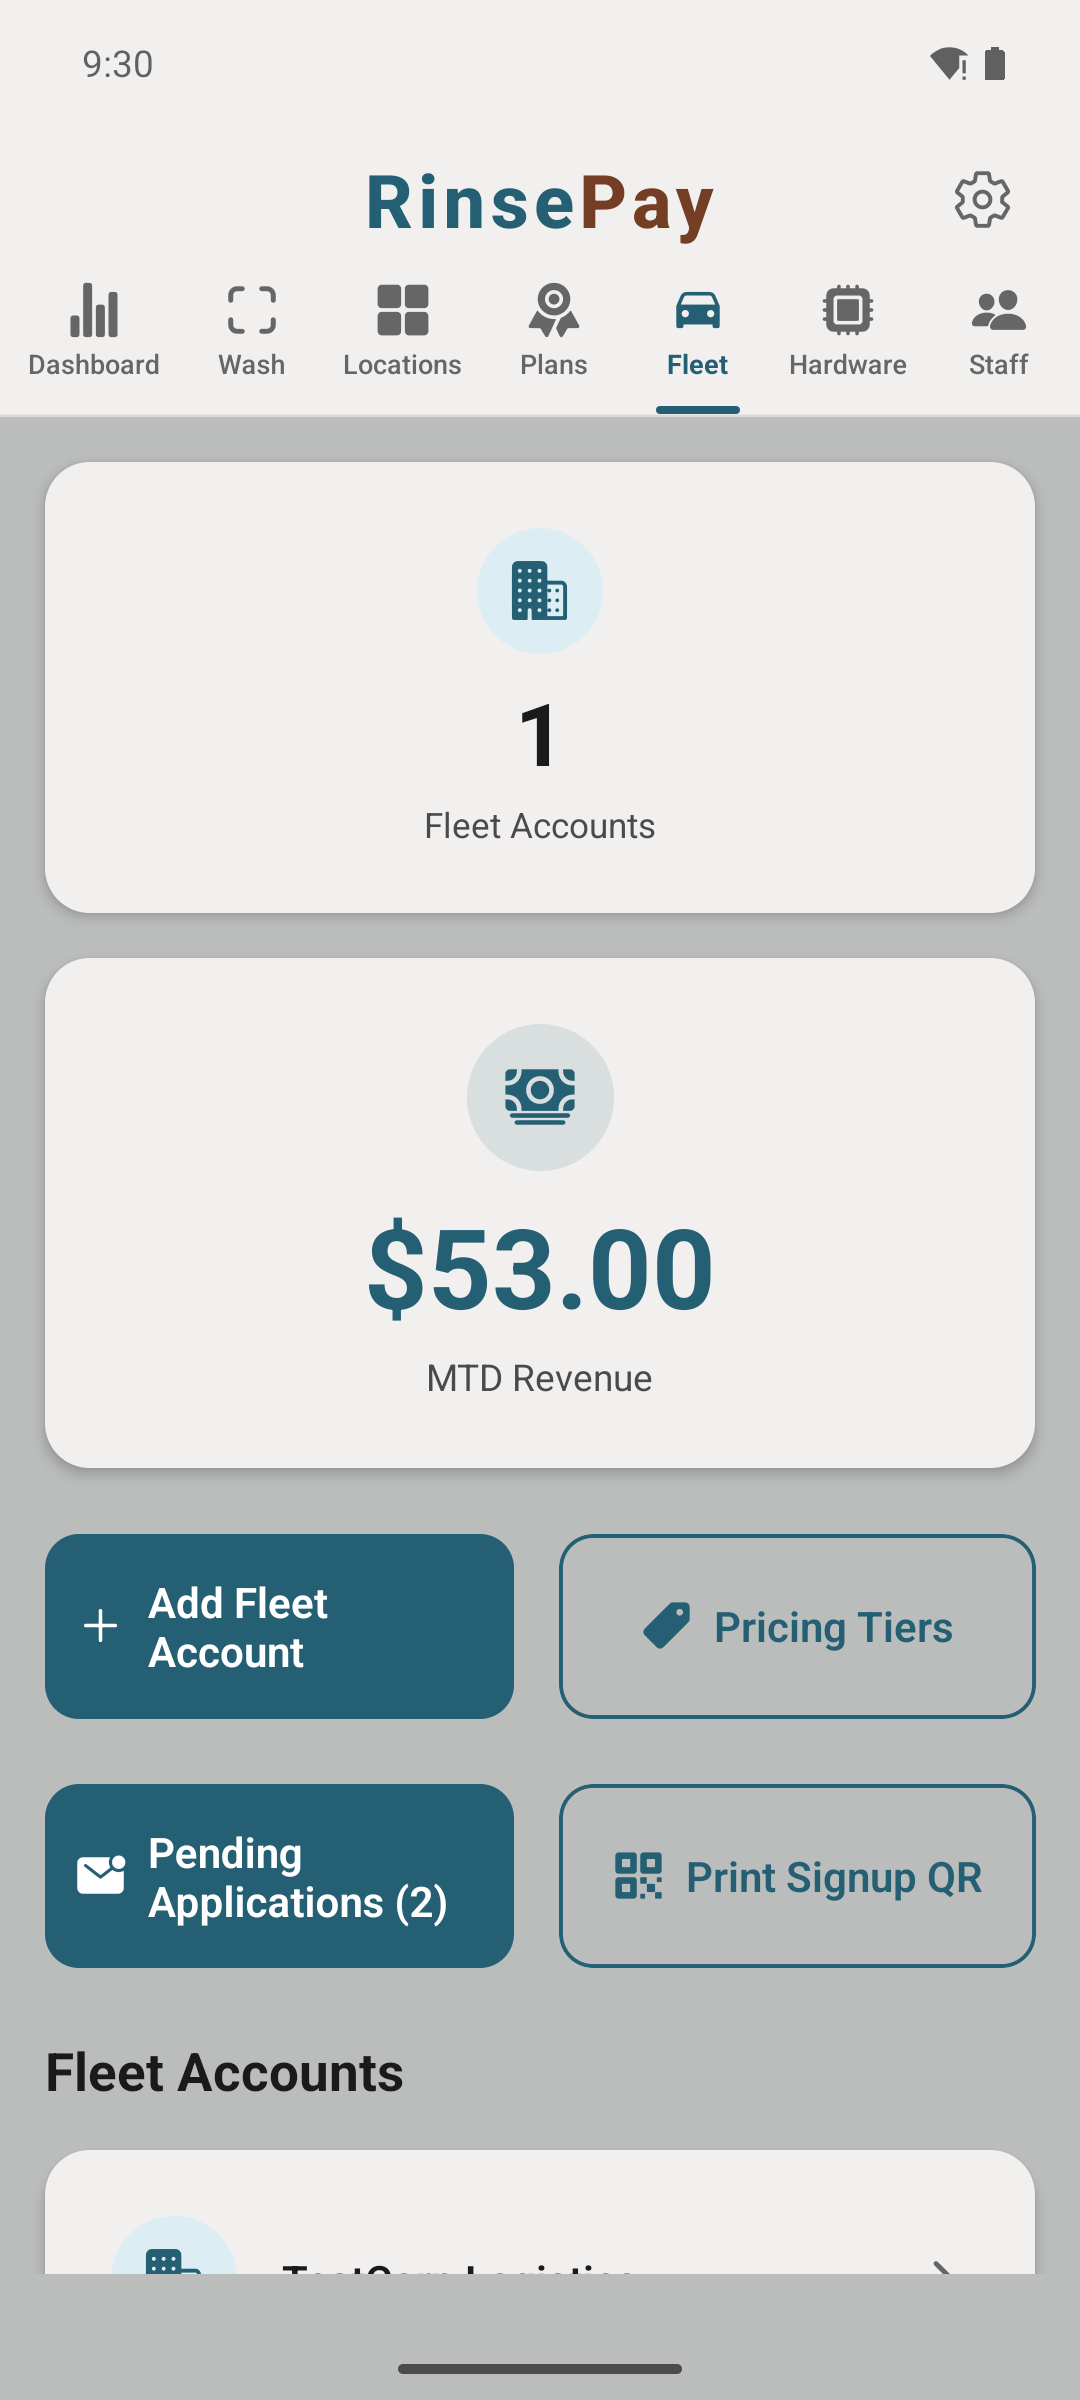
From the owner app, tap Fleet. You'll see your fleet accounts, month-to-date fleet revenue, and one-tap actions: pricing tiers, pending applications, and your signup QR.
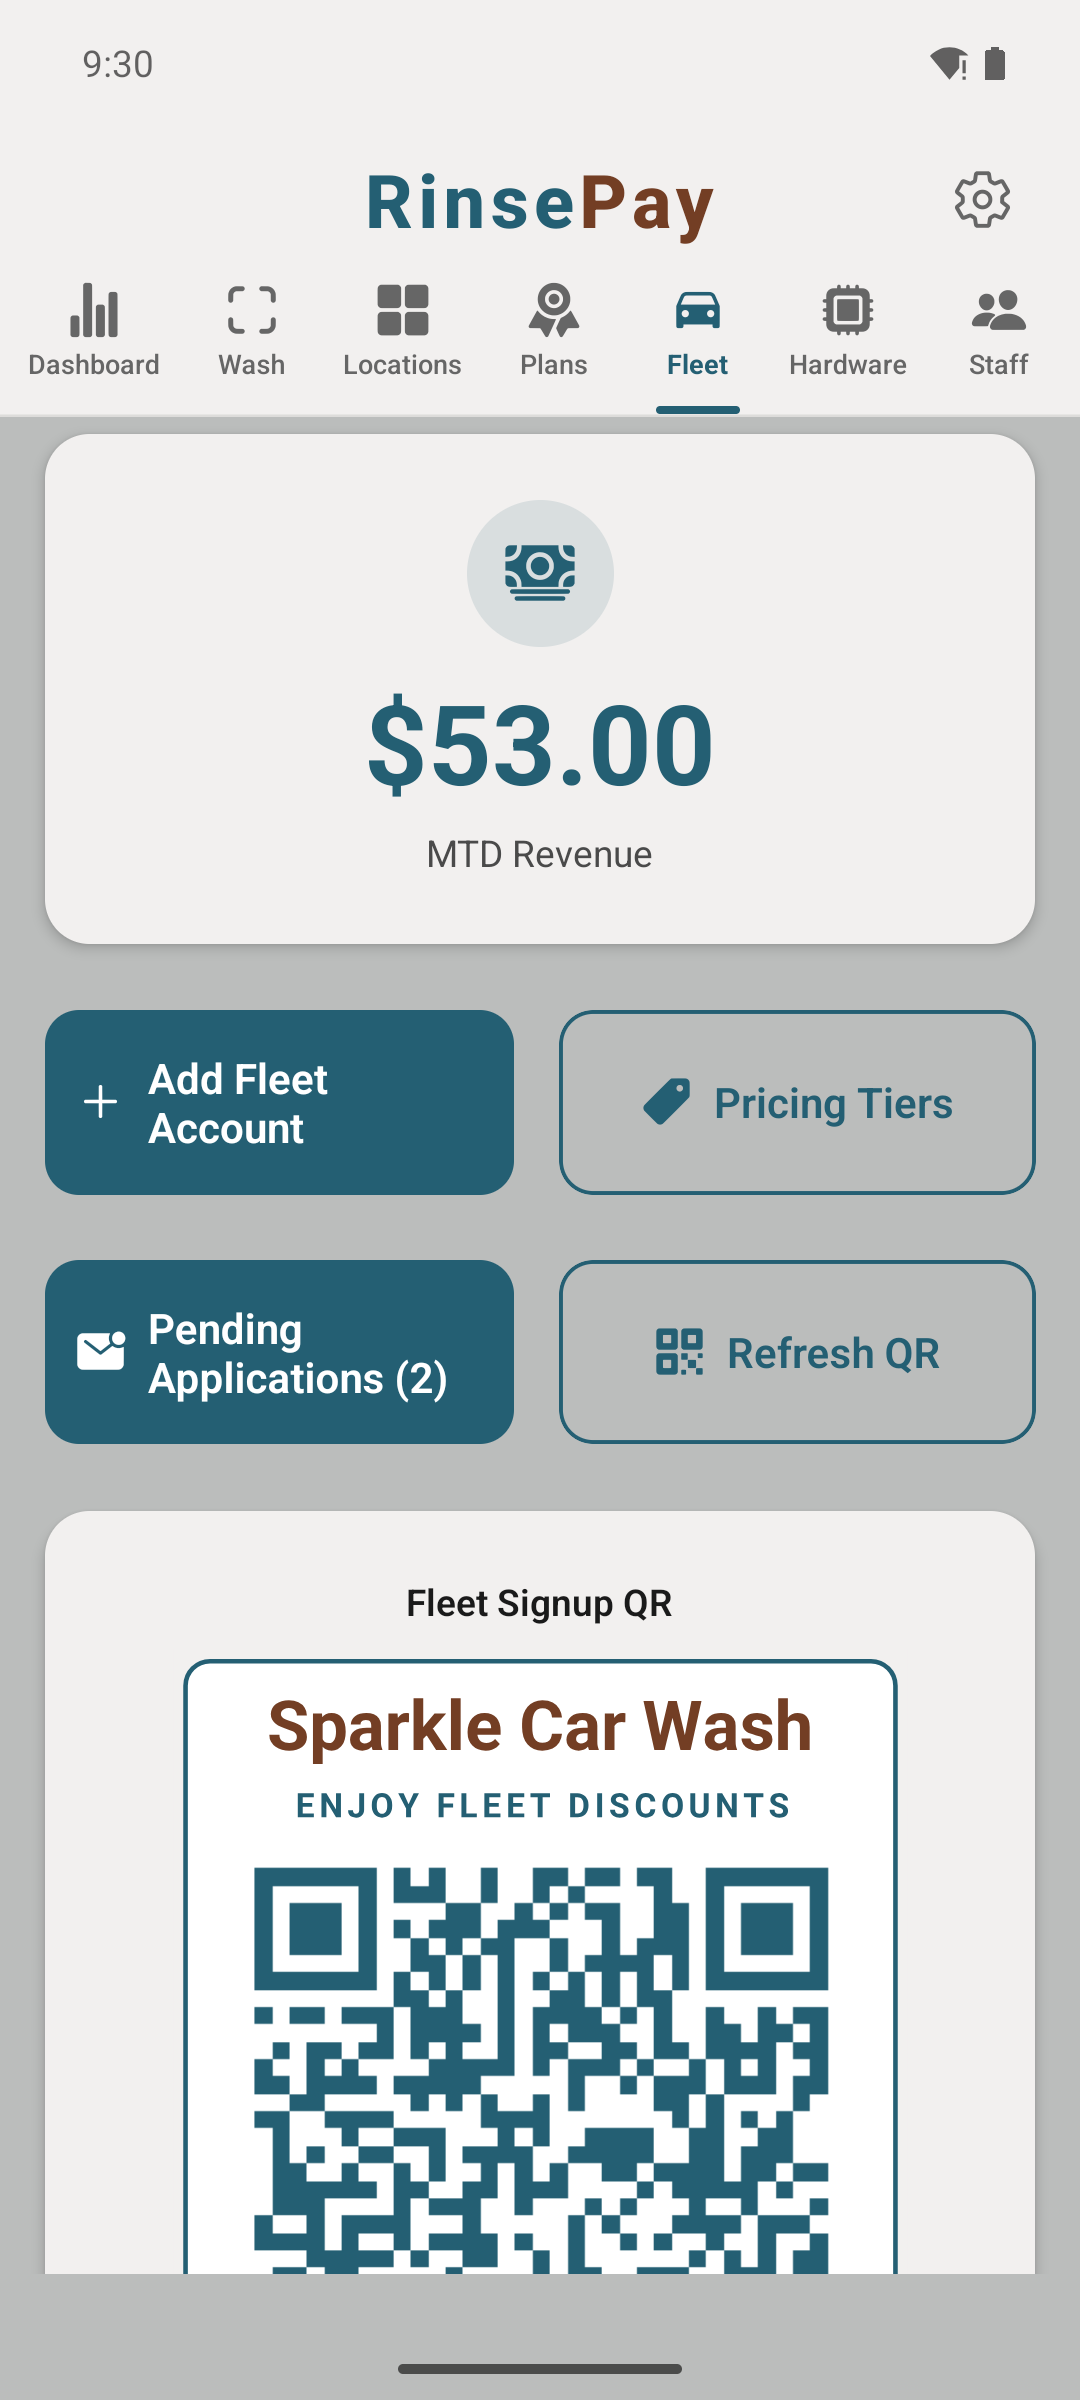
Tap Print Signup QR to generate a code unique to your business. Download or print it for the counter, a flyer, or a text to a prospect. Any company that scans it lands on a short signup form — no app install or account needed to apply.
Each scan creates a pending application with the company name, billing contact and address, estimated monthly volume, and vehicle count. Review them under Pending Applications — the badge tells you how many are waiting.
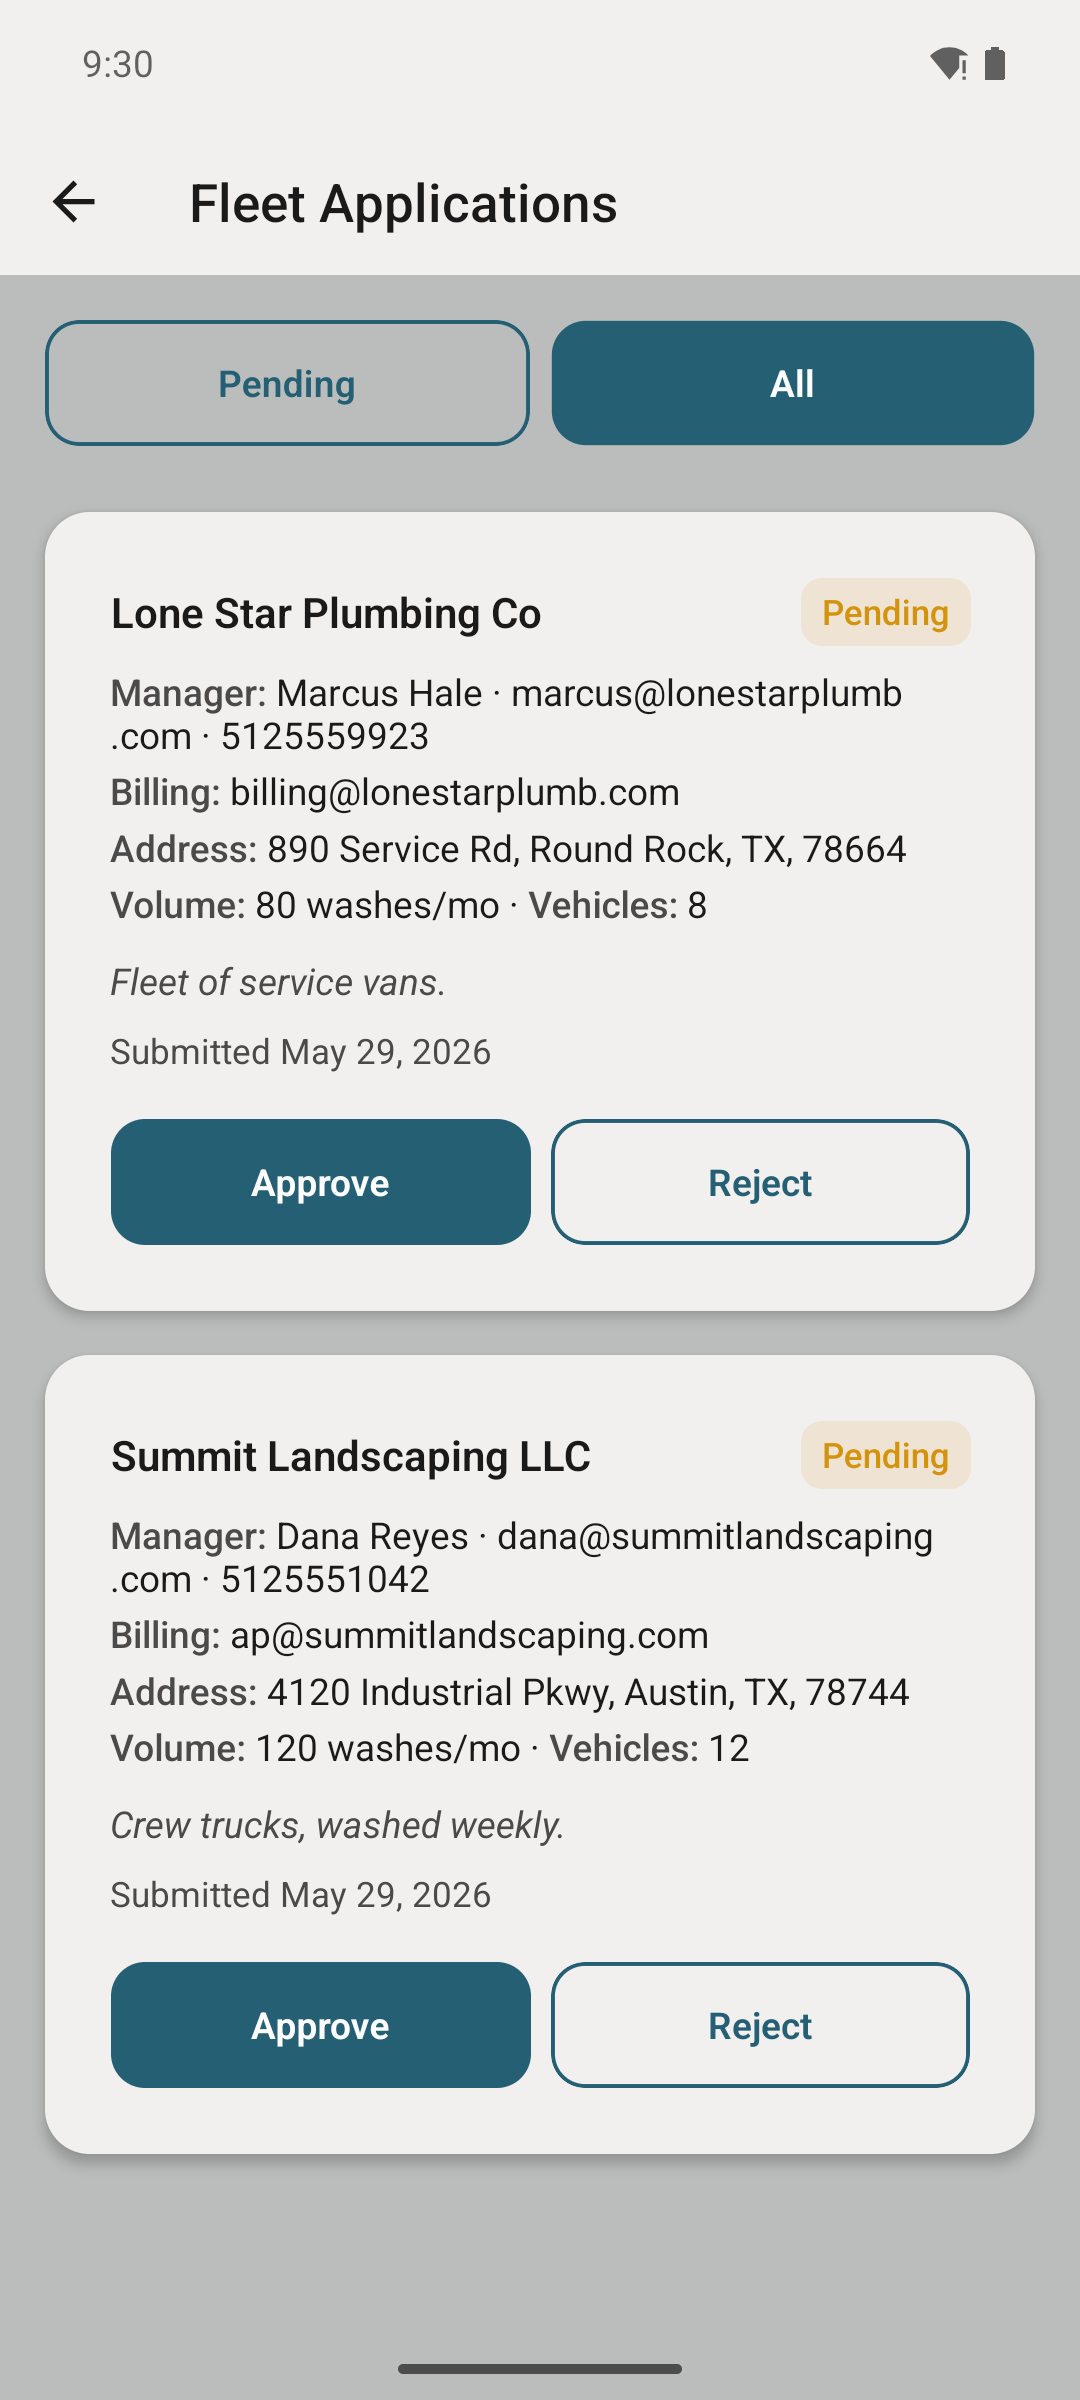
Tap Approve to pick a volume pricing tier, set net payment terms (e.g. Net 15), and optionally turn on auto-invoicing — generate & notify, or generate & send, on a weekly, biweekly, or monthly schedule. Approving creates the fleet account and invites the manager automatically. (Prefer to set one up by hand? + Add Fleet Account is still there.)
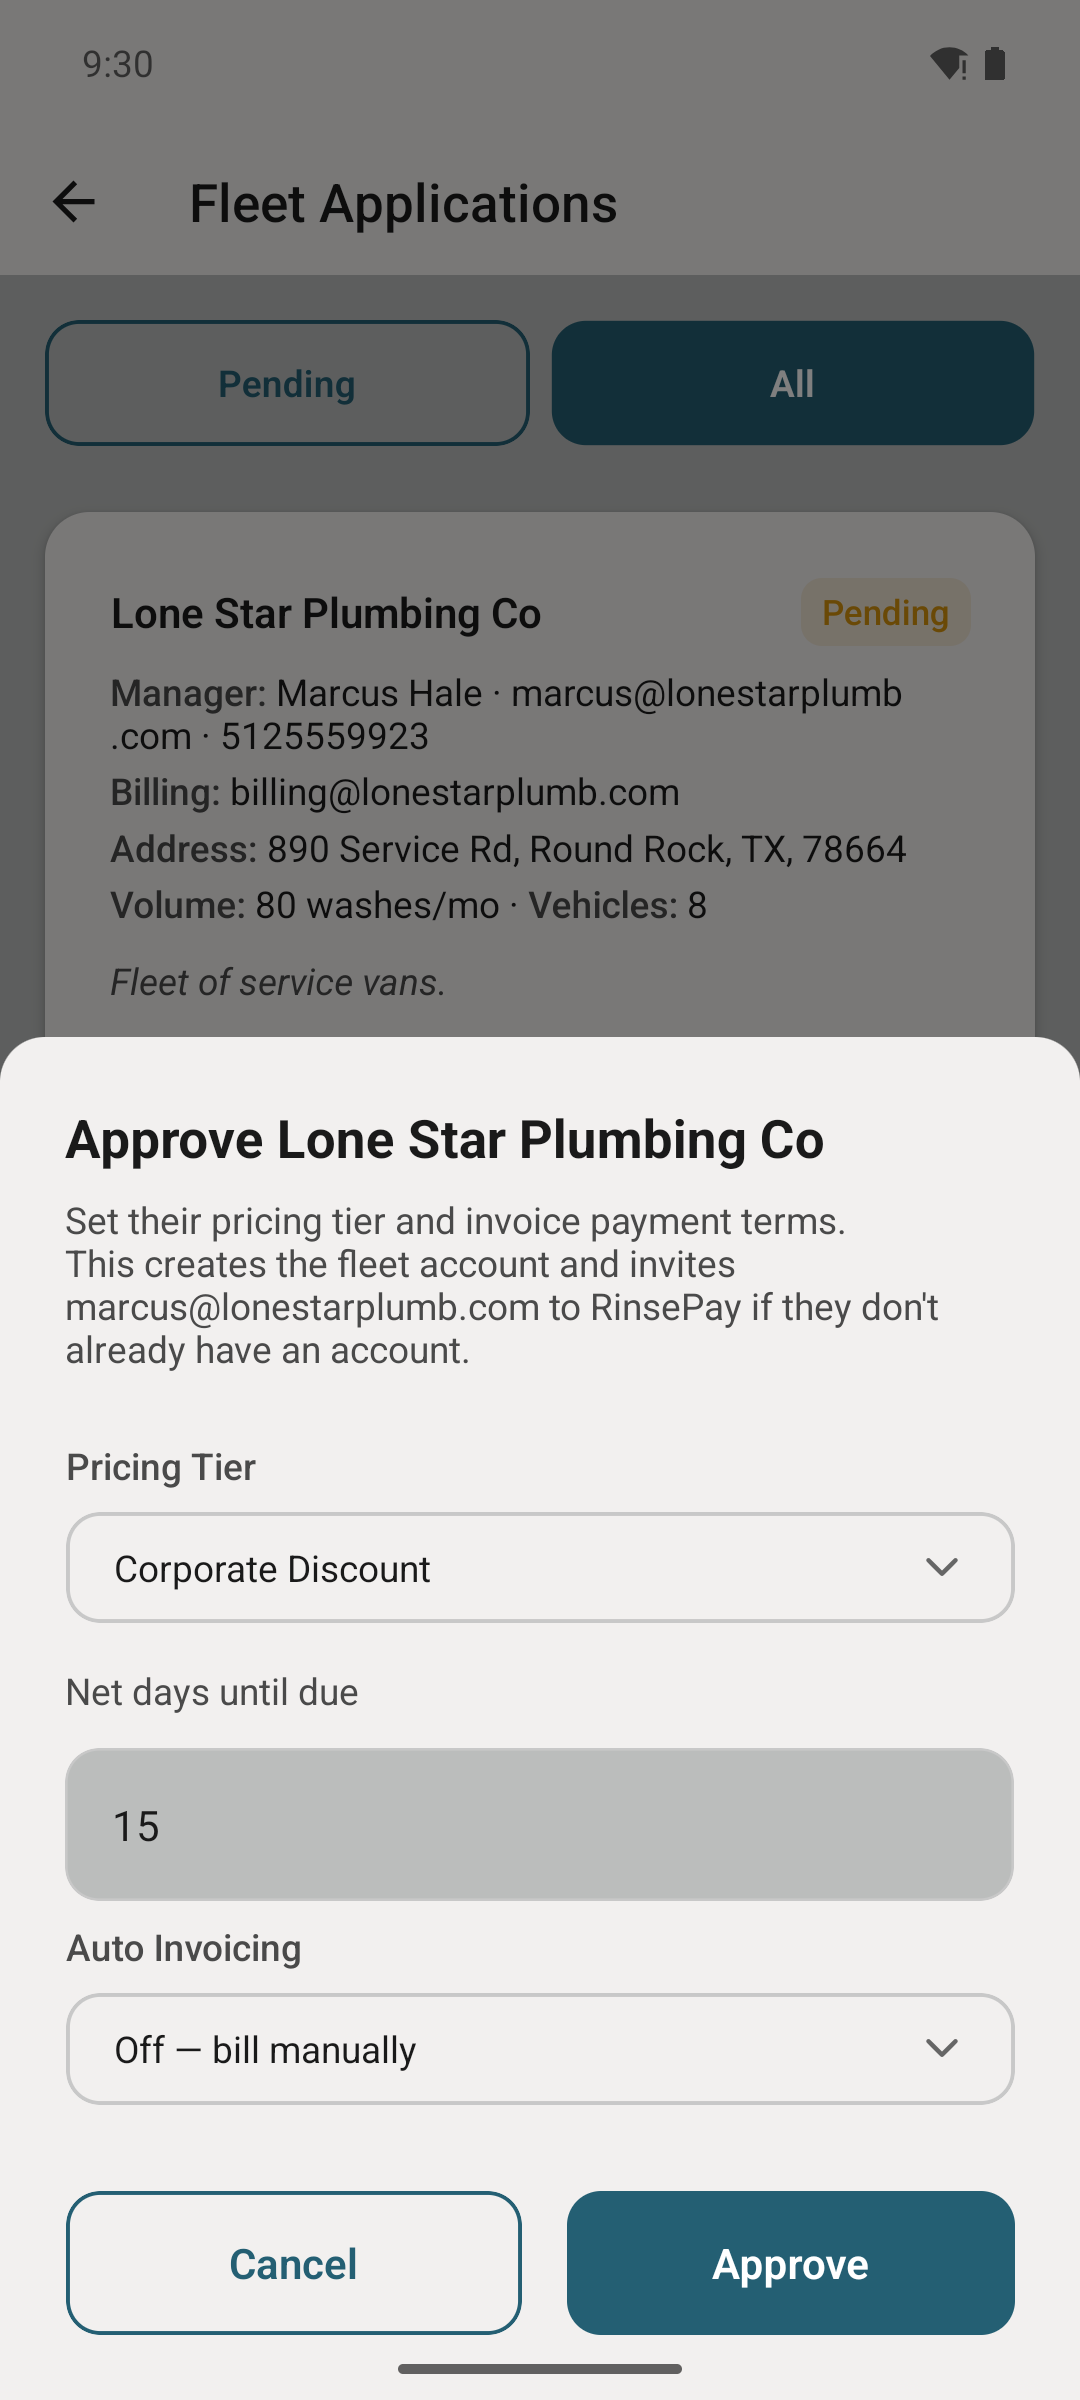
The approved fleet manager adds teammates by email from their own app. Each driver then gets the option to charge a wash to the fleet at the time of payment — per wash, their choice.
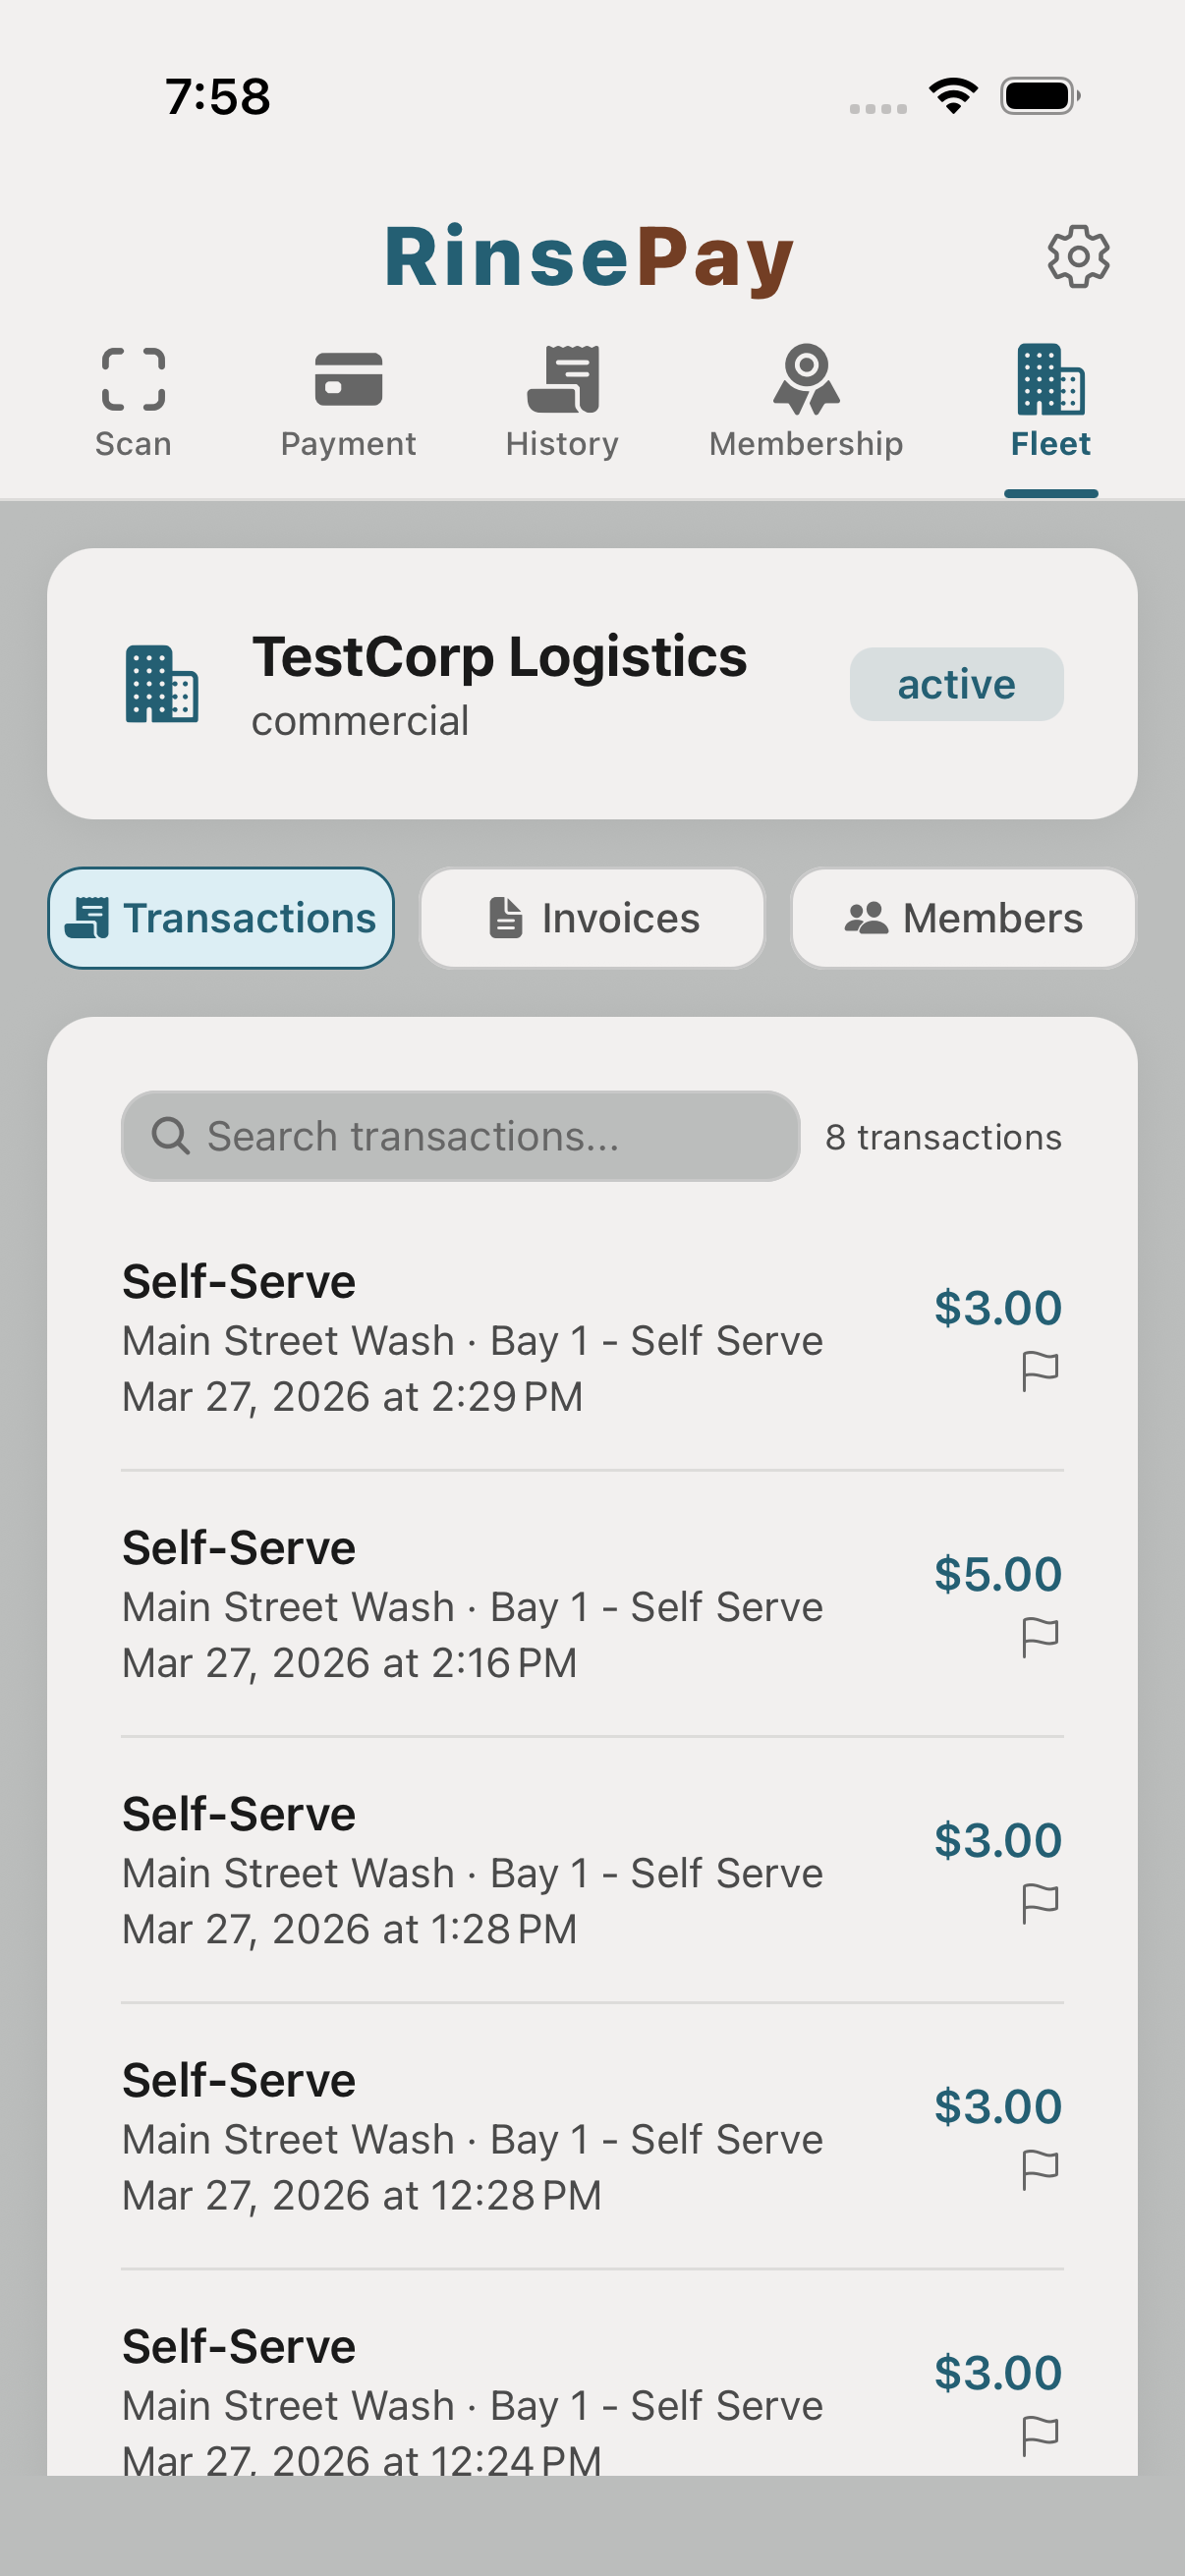
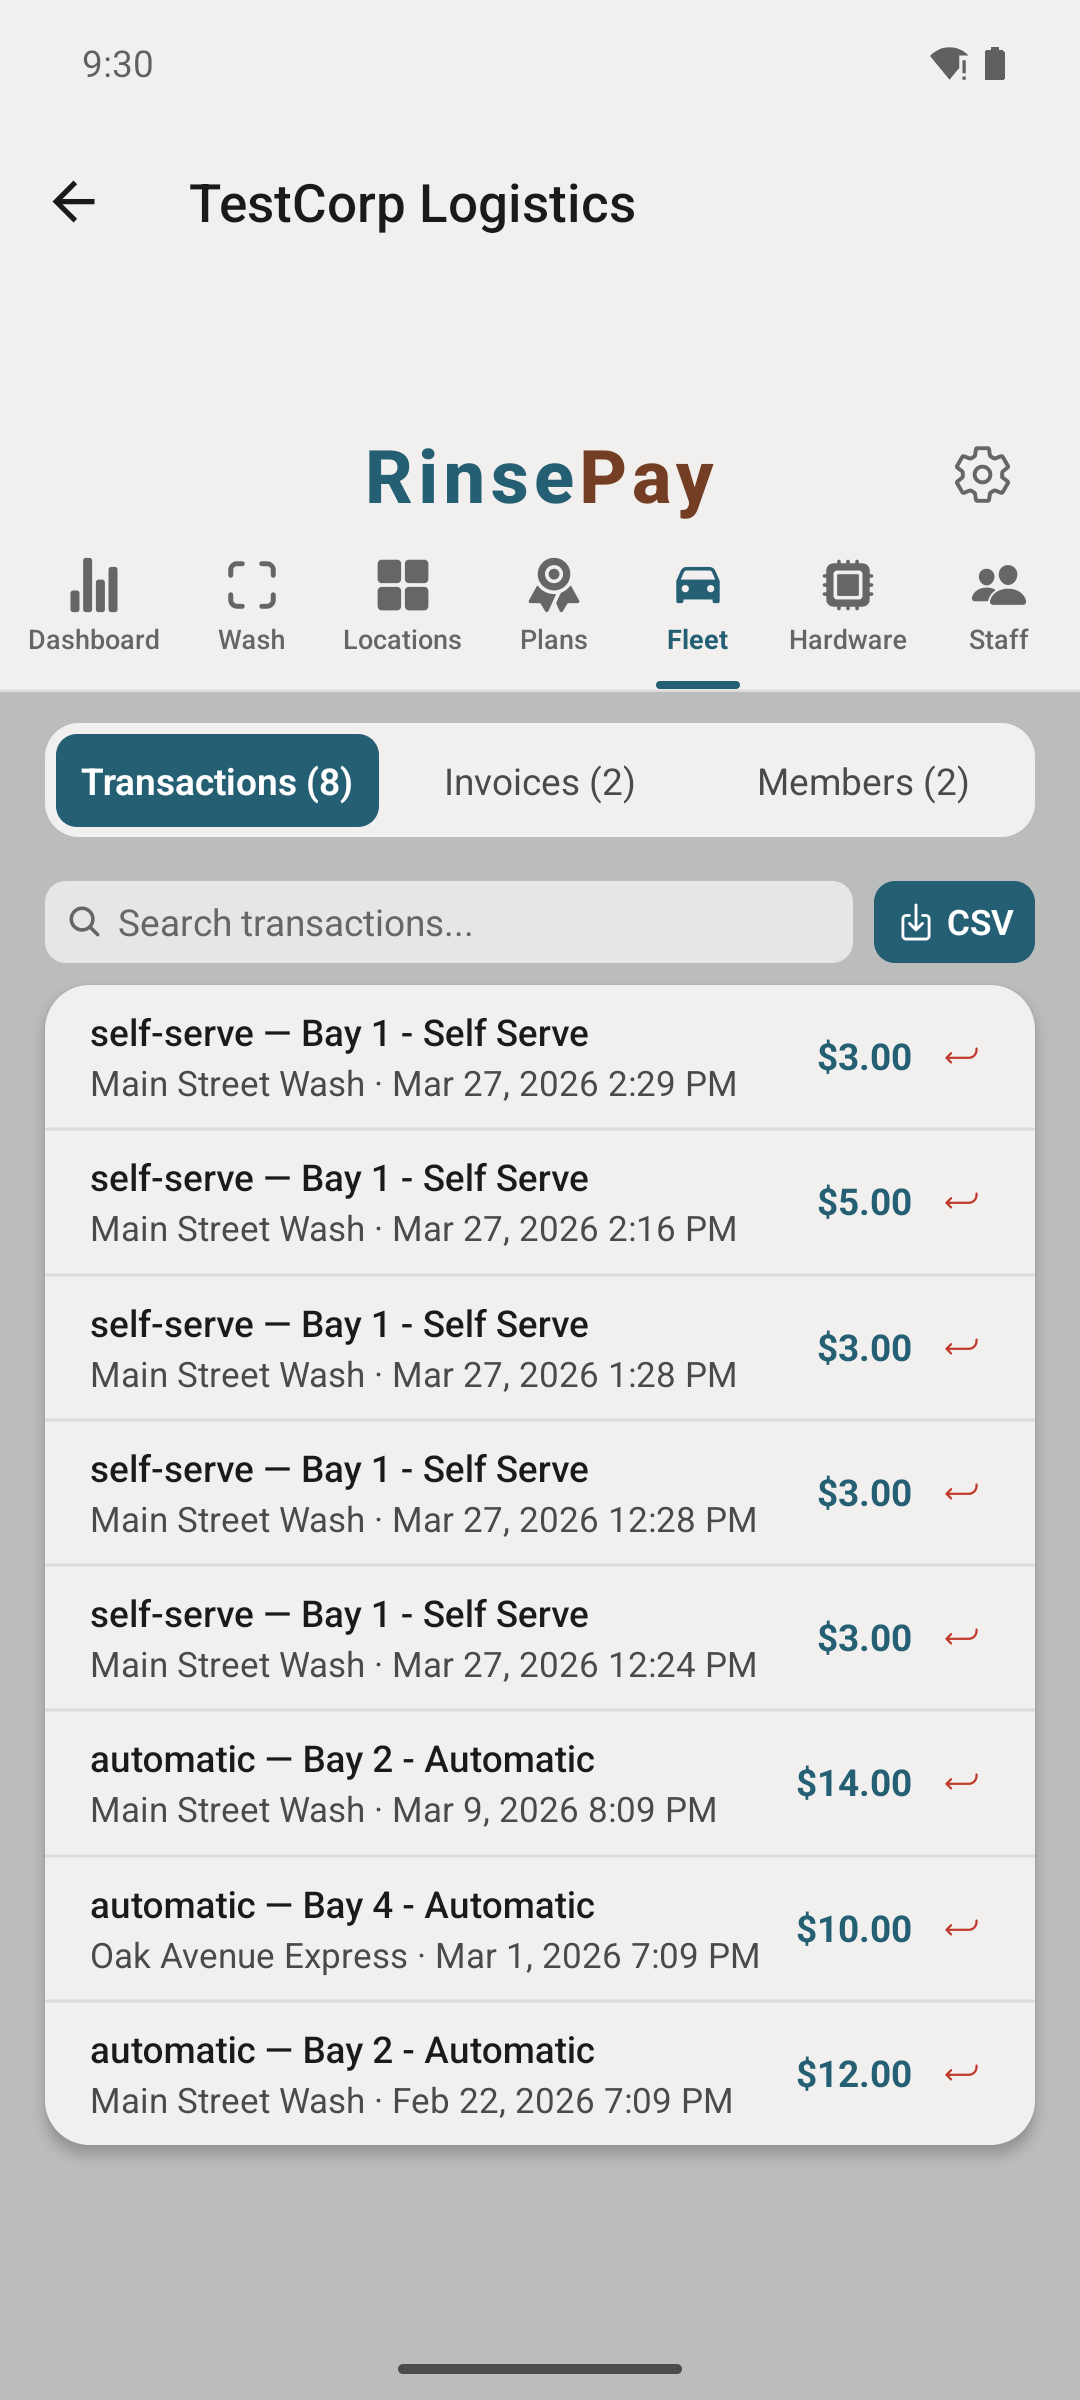
Every fleet wash shows the driver, bay, duration, and charge against the account. Open any fleet account to see its running balance and full activity.
If you turned on auto-invoicing, invoices generate (and optionally send) on the schedule you set. Otherwise, generate one anytime — every wash rolled up into a single invoice to the billing contact on file, payable online. Get paid by check or ACH instead? Mark the invoice paid and record how it was paid, so the books stay straight.
Bundles are prepaid packs sold at one price. The classic 5-Pack of washes still works — and bundles can now mix washes, vacuum minutes, and vending credit in a single plan (think "Clean Car Combo": a wash + 10 vac minutes + $2 vending). Customers buy in one tap and the app draws from the bundle automatically at each machine.
From the owner app, Pricing → Bundles shows every bundle you've published and total sales per bundle.
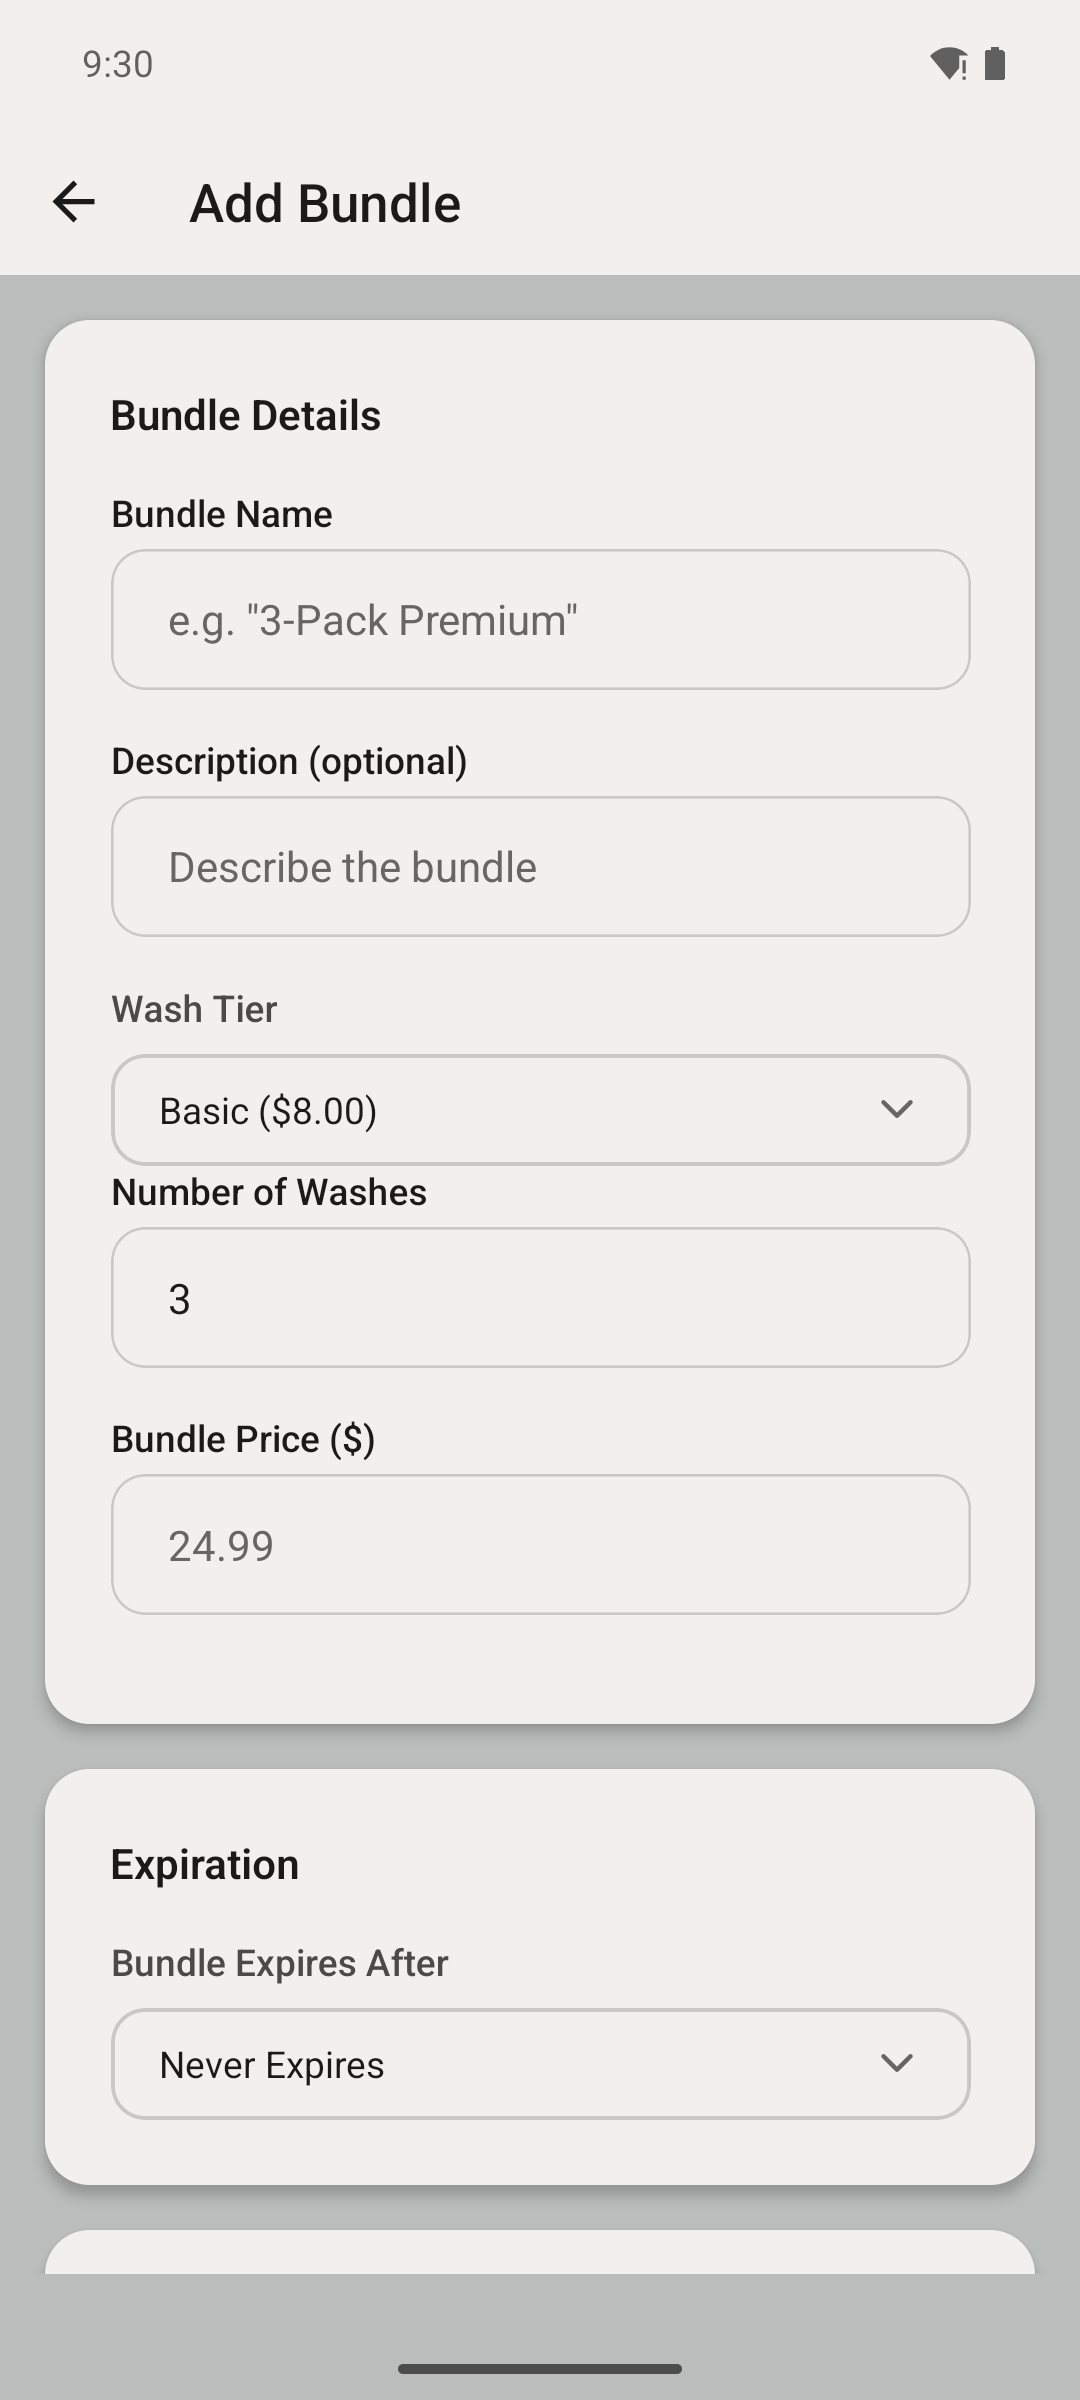
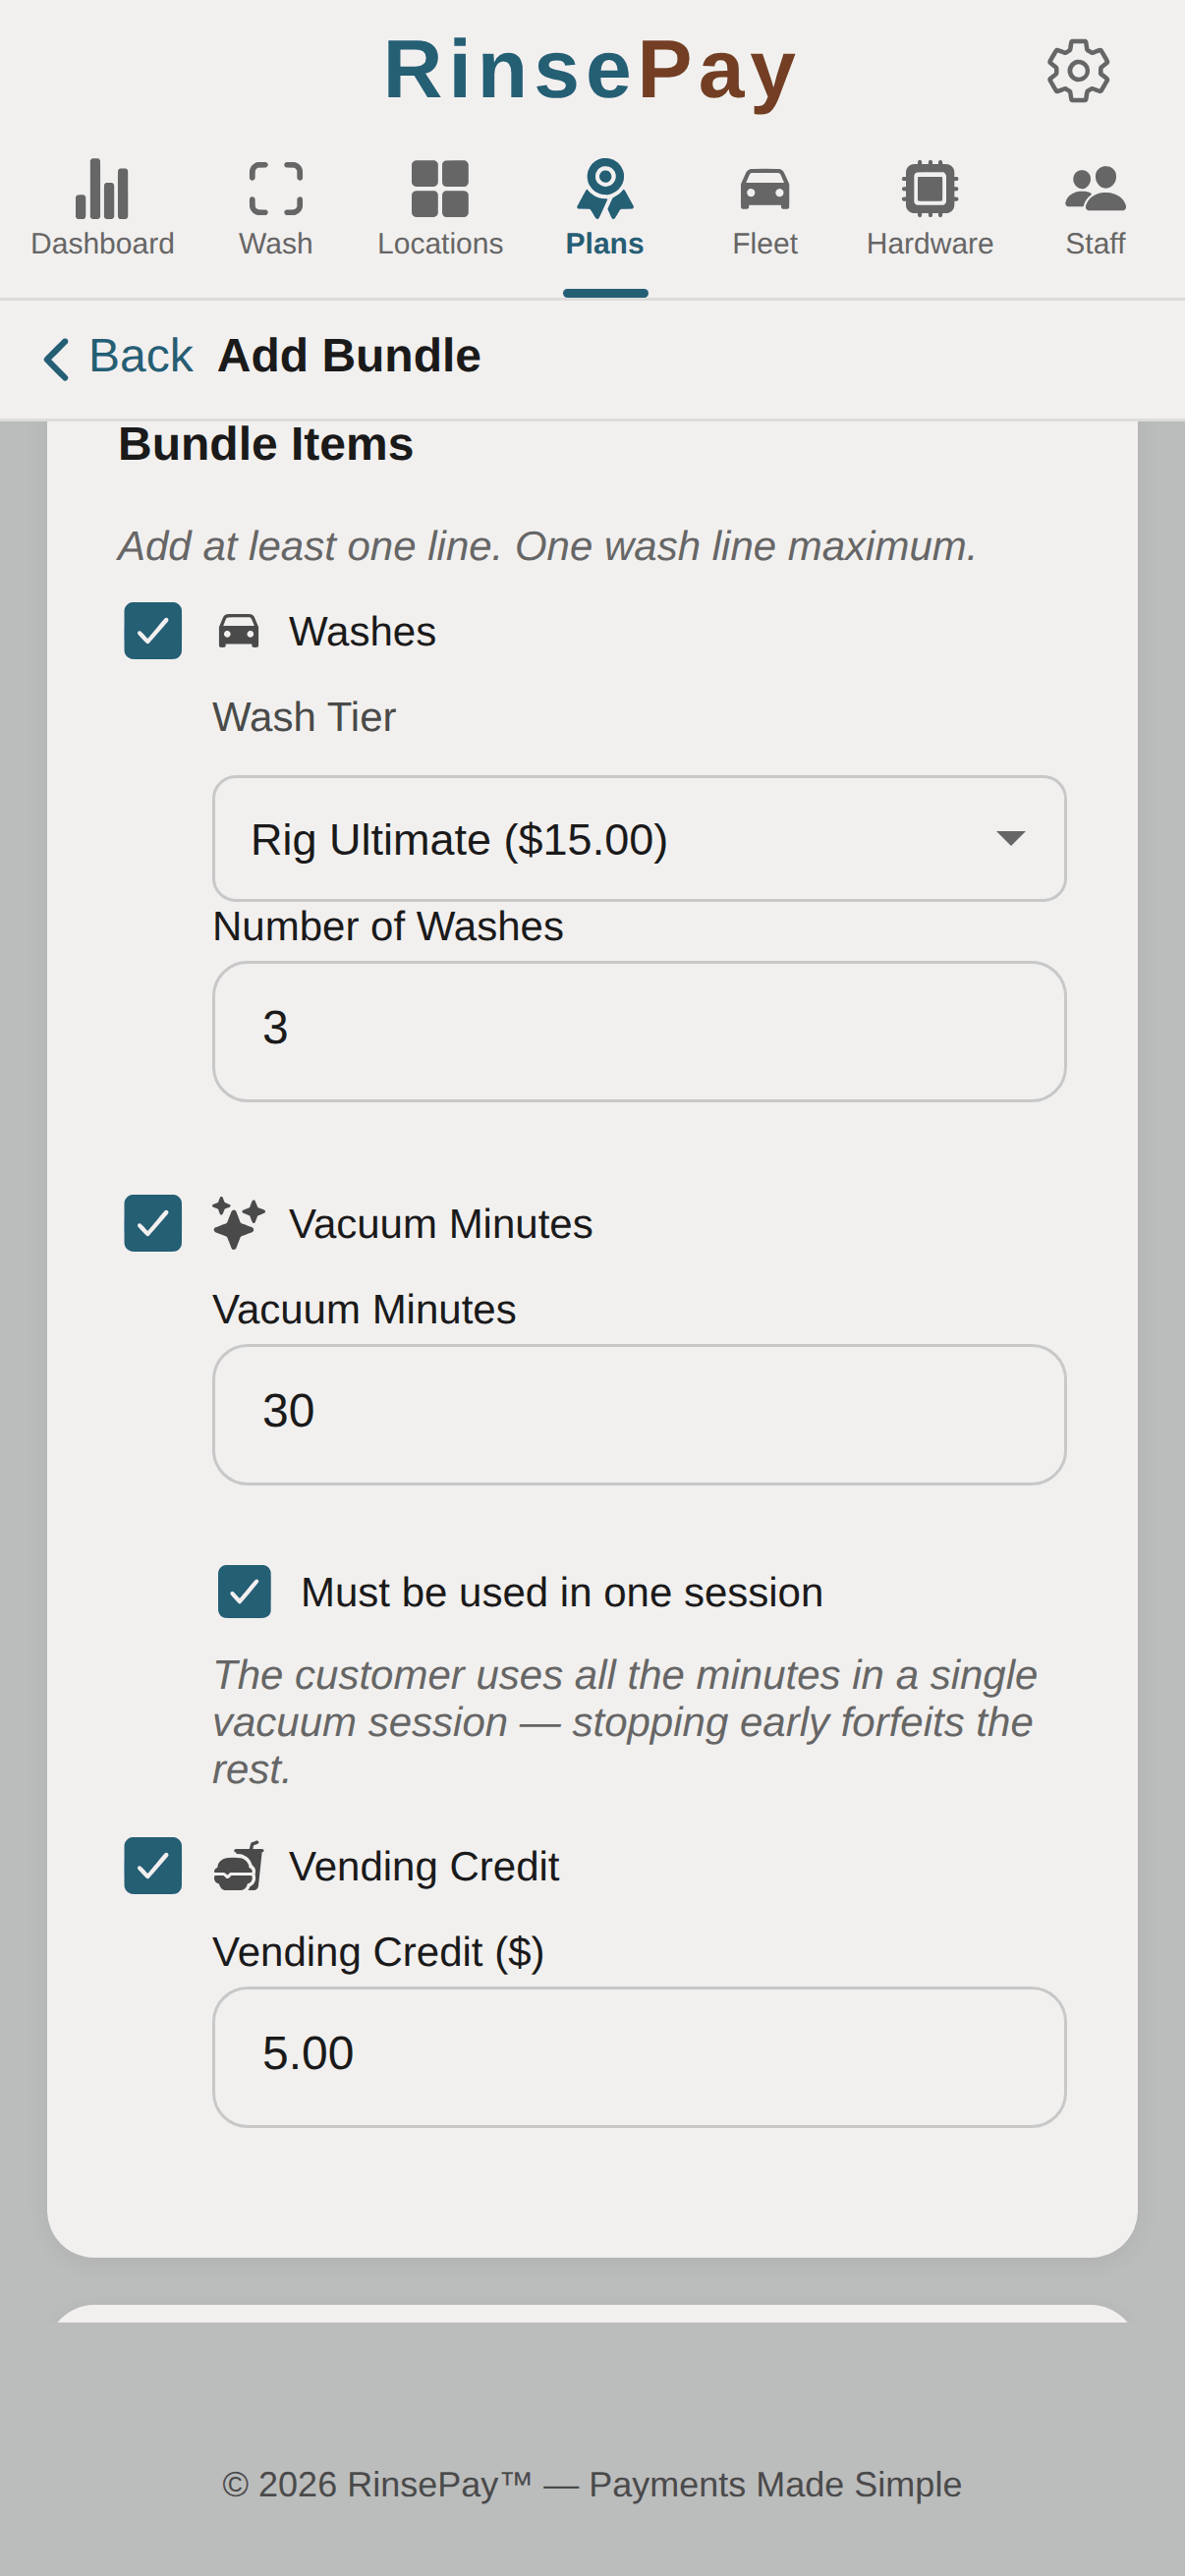
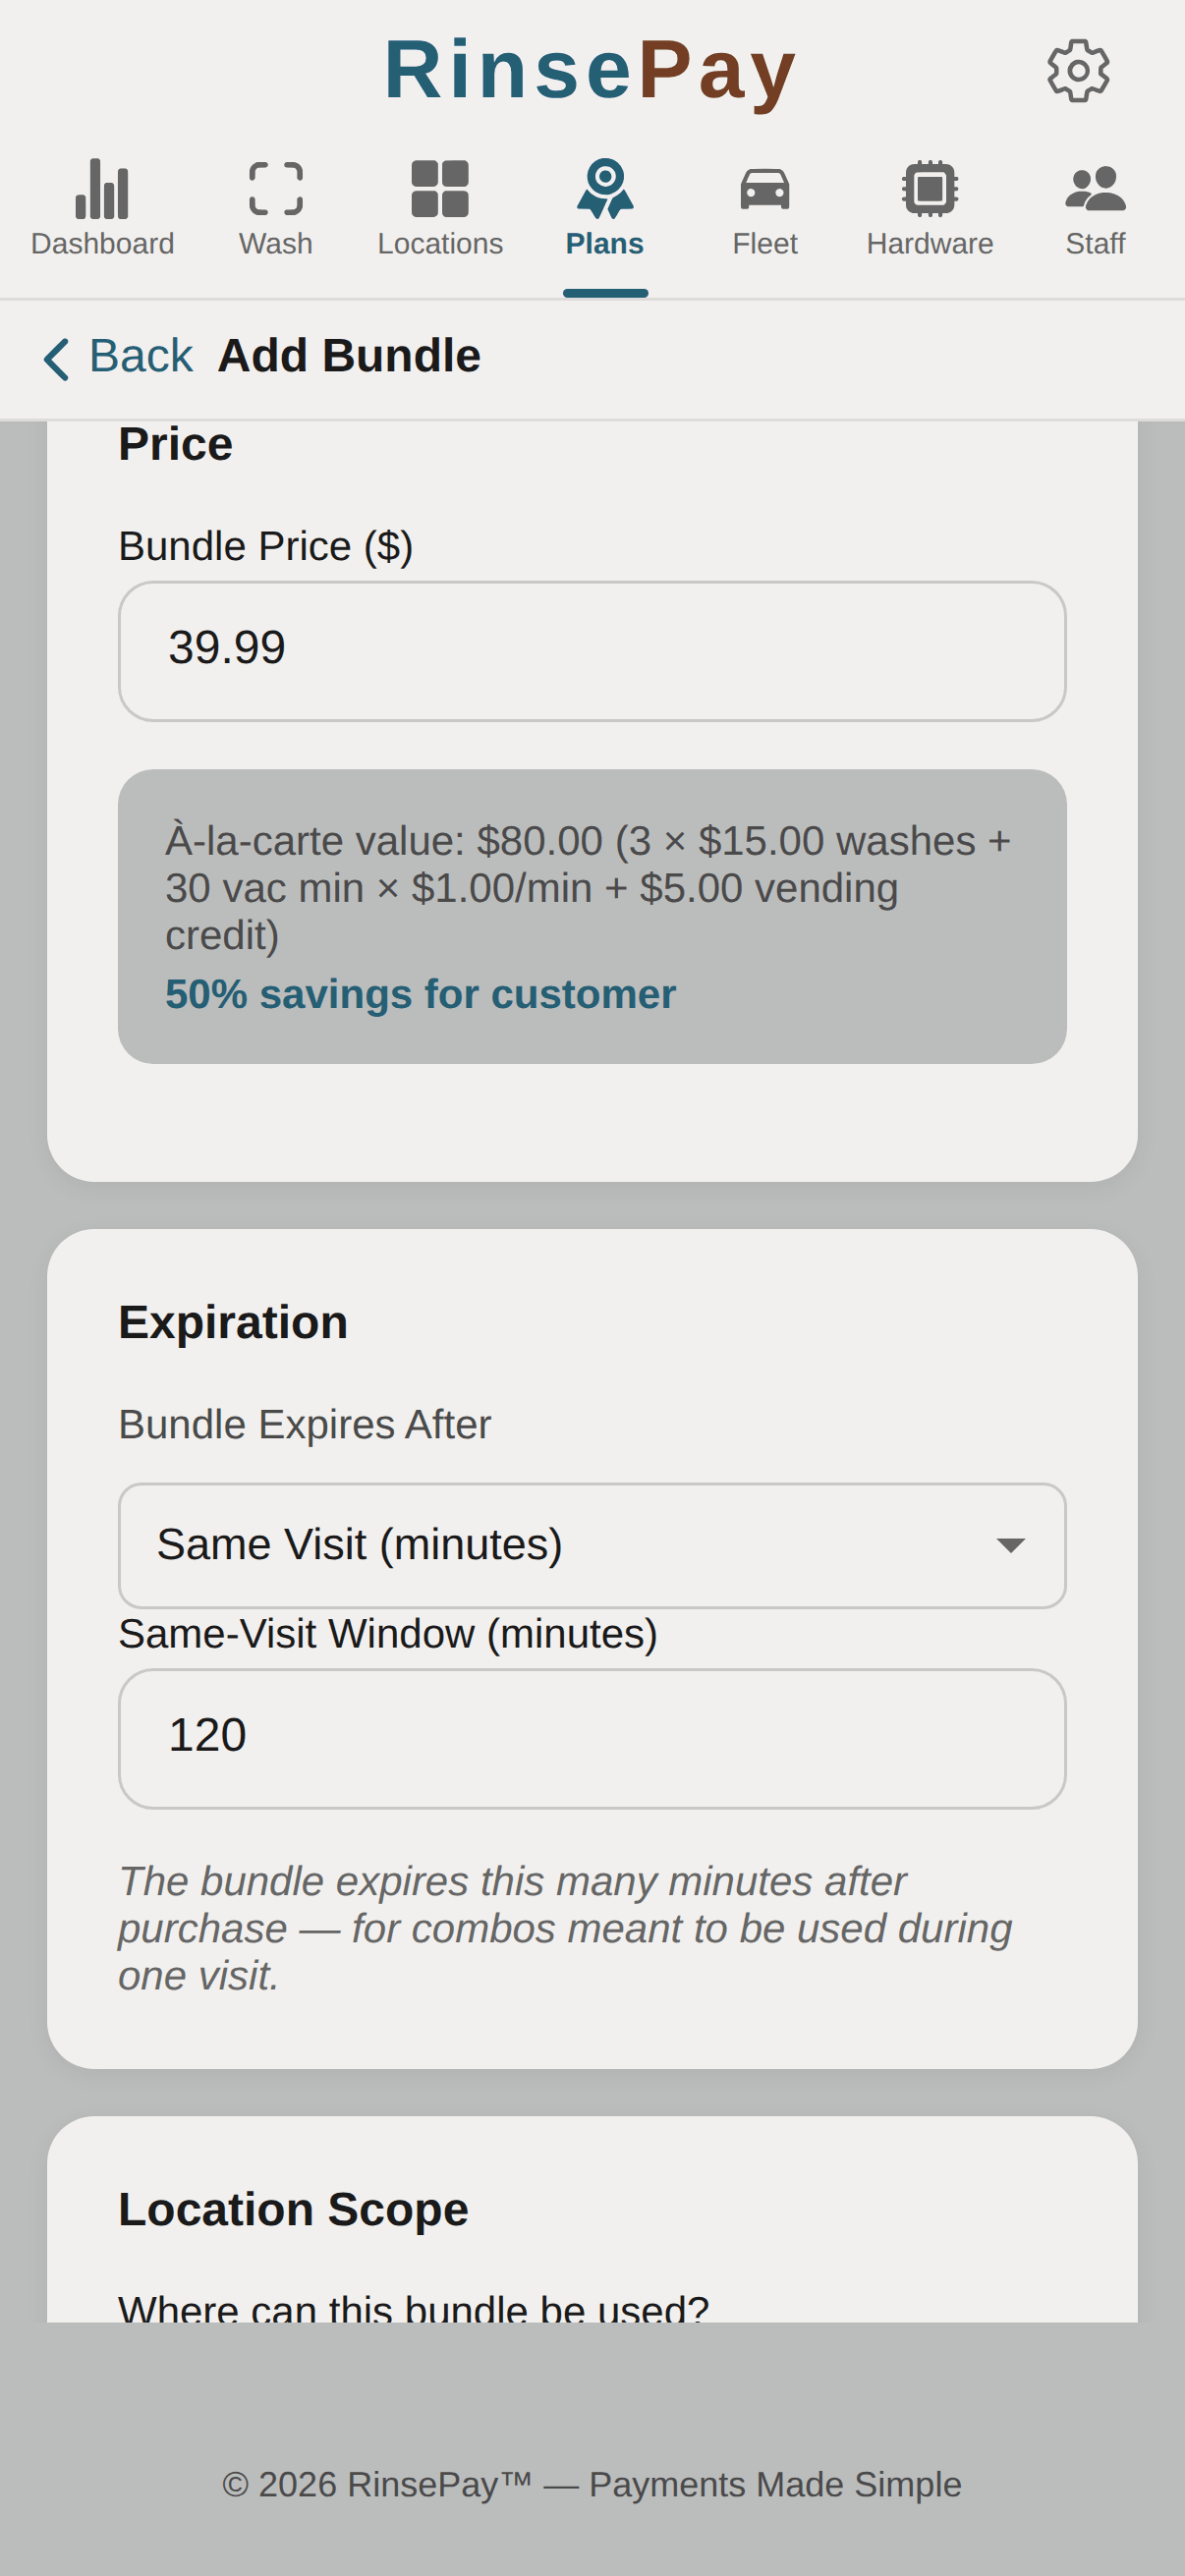
Name the bundle ("5-Pack Premium", "Clean Car Combo") and add its items: a wash count on the tier you choose, vacuum minutes, vending credit — any mix. On the vacuum-minutes line, the "Must be used in one session" option makes the minutes a single count-down session — stopping early forfeits the rest — instead of a pool drawn on across visits. Then set the bundle price; the editor shows the à-la-carte sum and the customer's savings next to it so the discount you're offering is obvious.
Pick how long a bundle stays valid after purchase — never, a number of days (most owners go 12 months), or a same-visit window (e.g. 120 minutes) for combo deals meant to be used before the customer drives off. Bundles are tied to the purchasing account and can't be transferred.
Once the bundle is created, customers see it as an option when they scan the bay's QR code. They buy in one tap and their included washes are ready to use immediately.
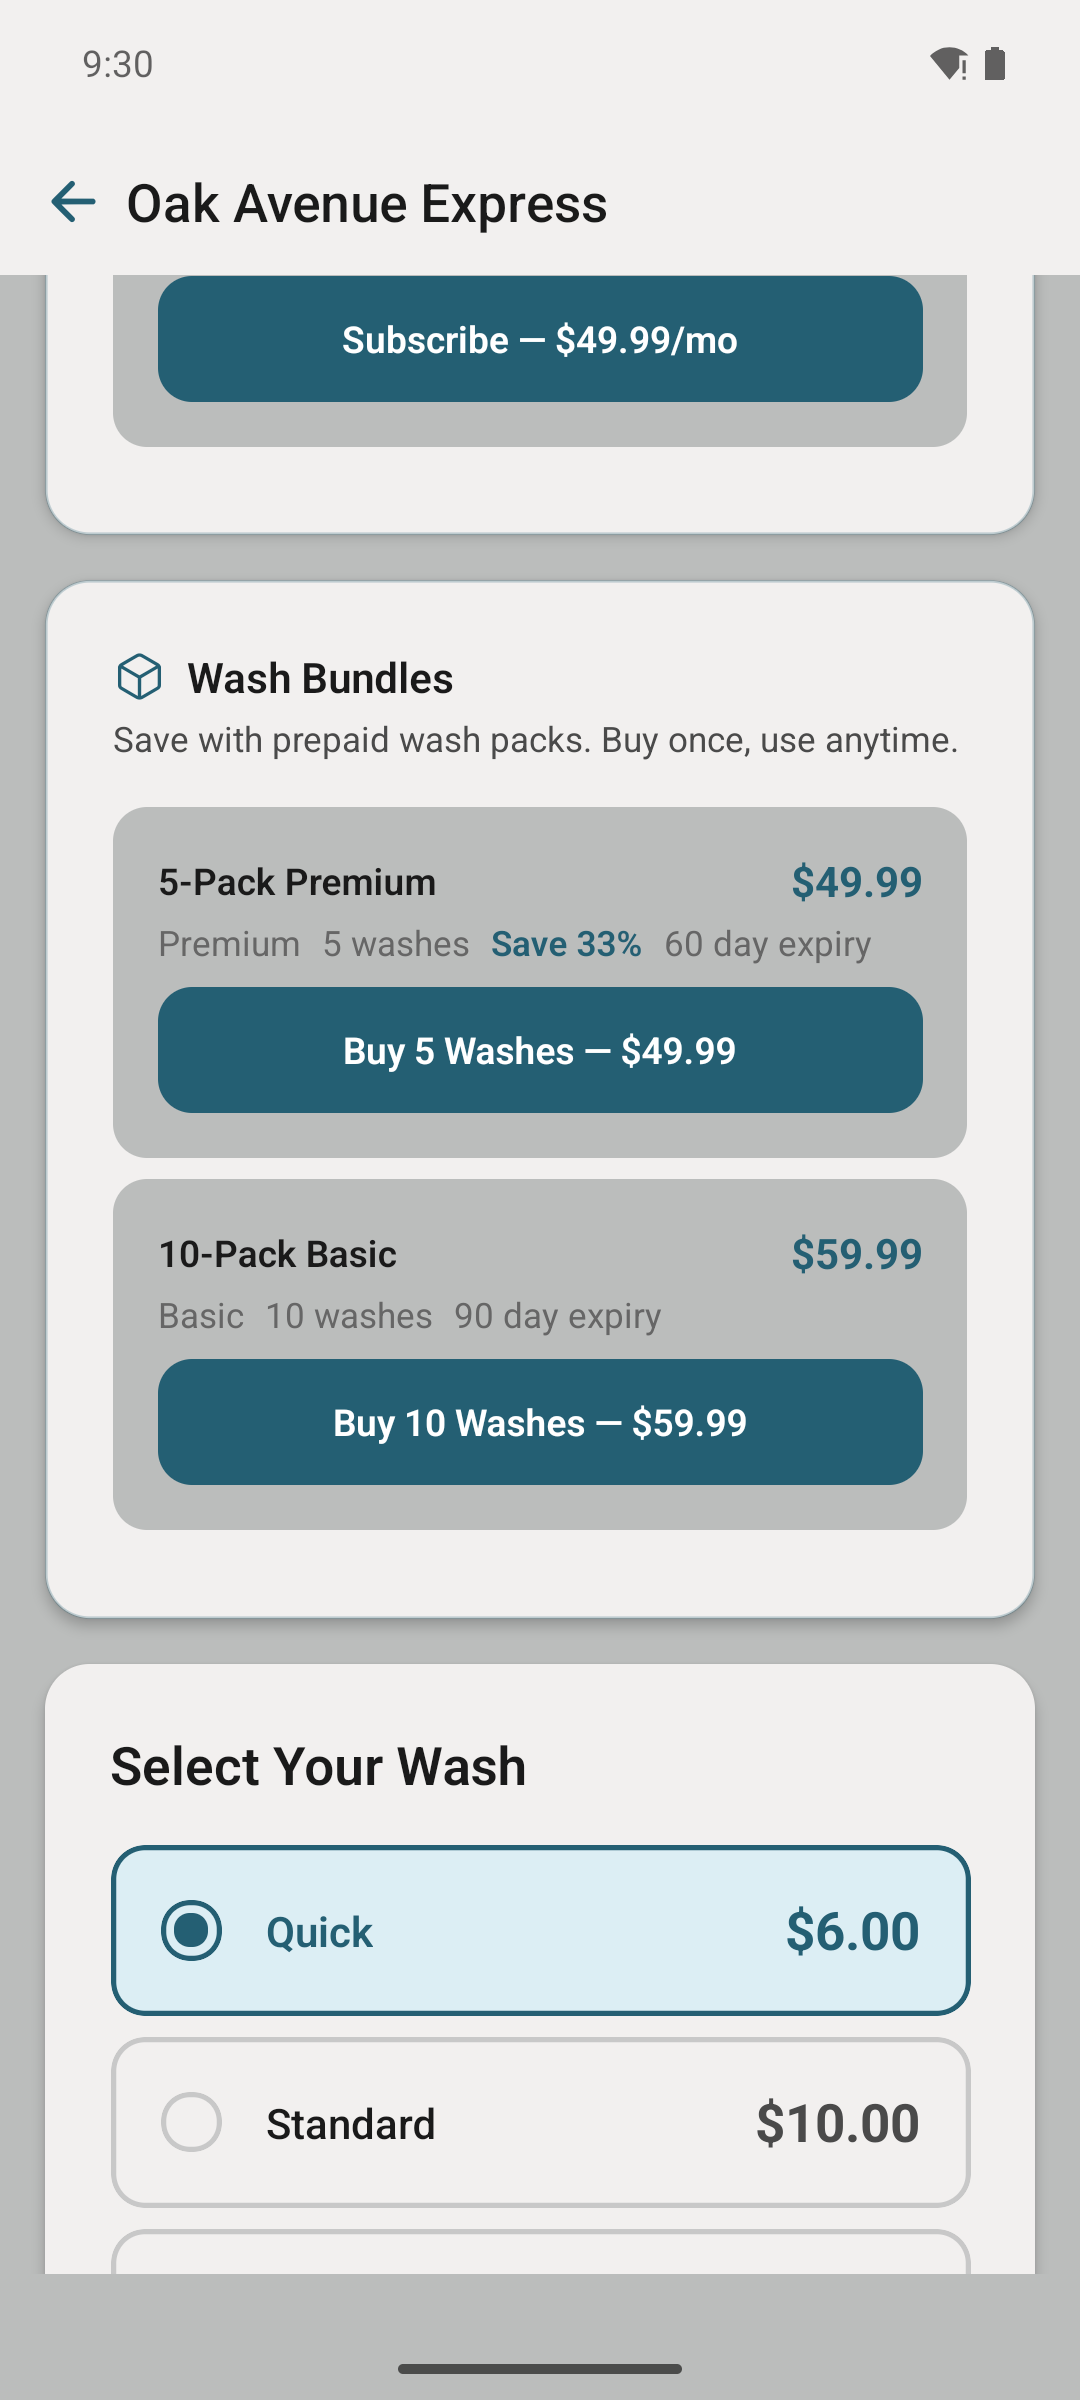
The dashboard shows units sold, revenue, and redemption rate per bundle. Iterate pricing based on what moves.
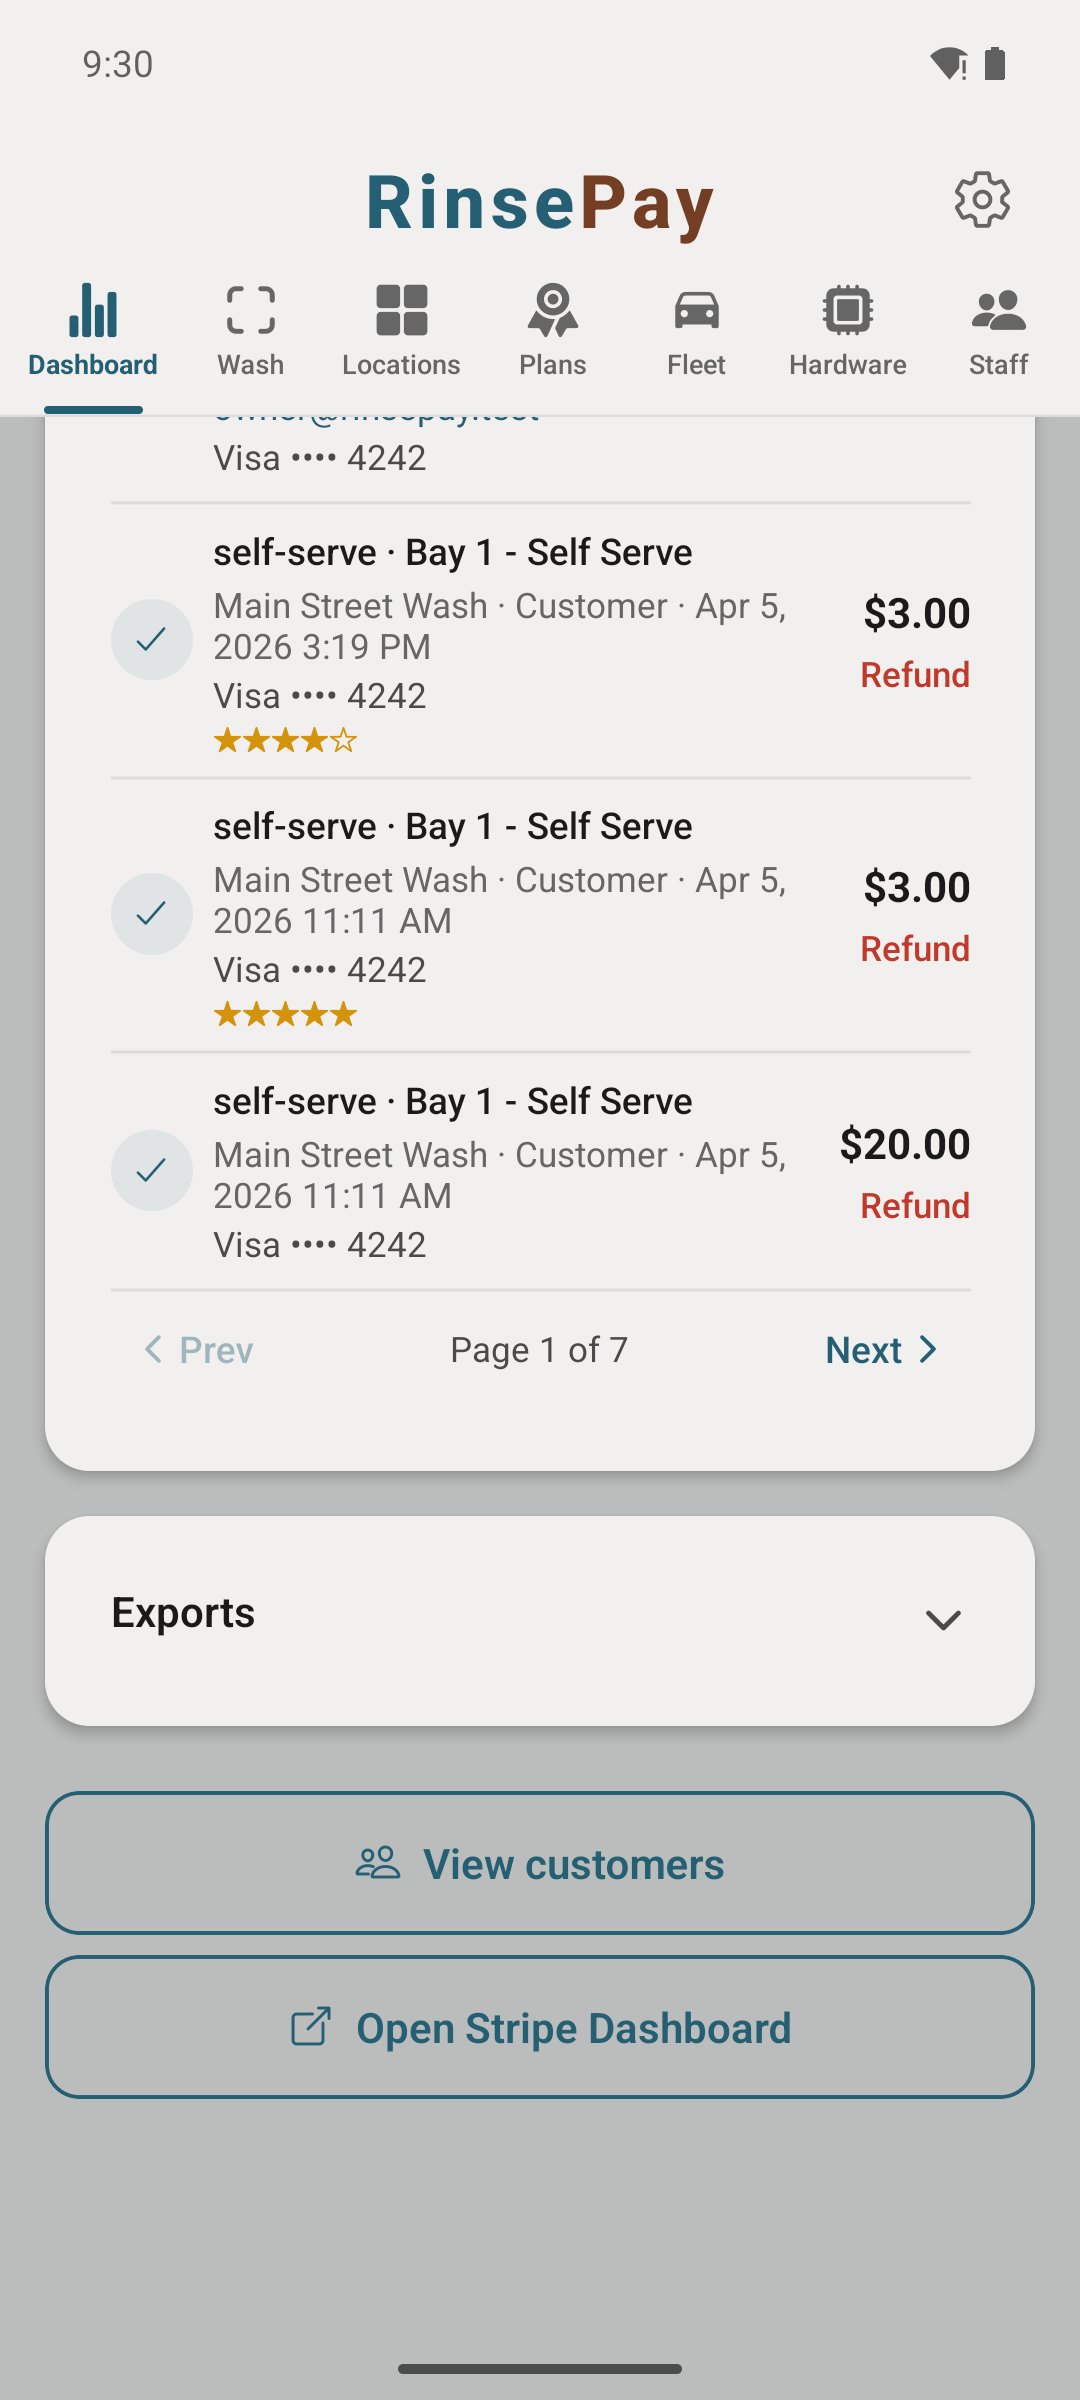
Monthly memberships turn one-off customers into recurring revenue.
The Subscriptions tab lists every membership plan and current active-member count.
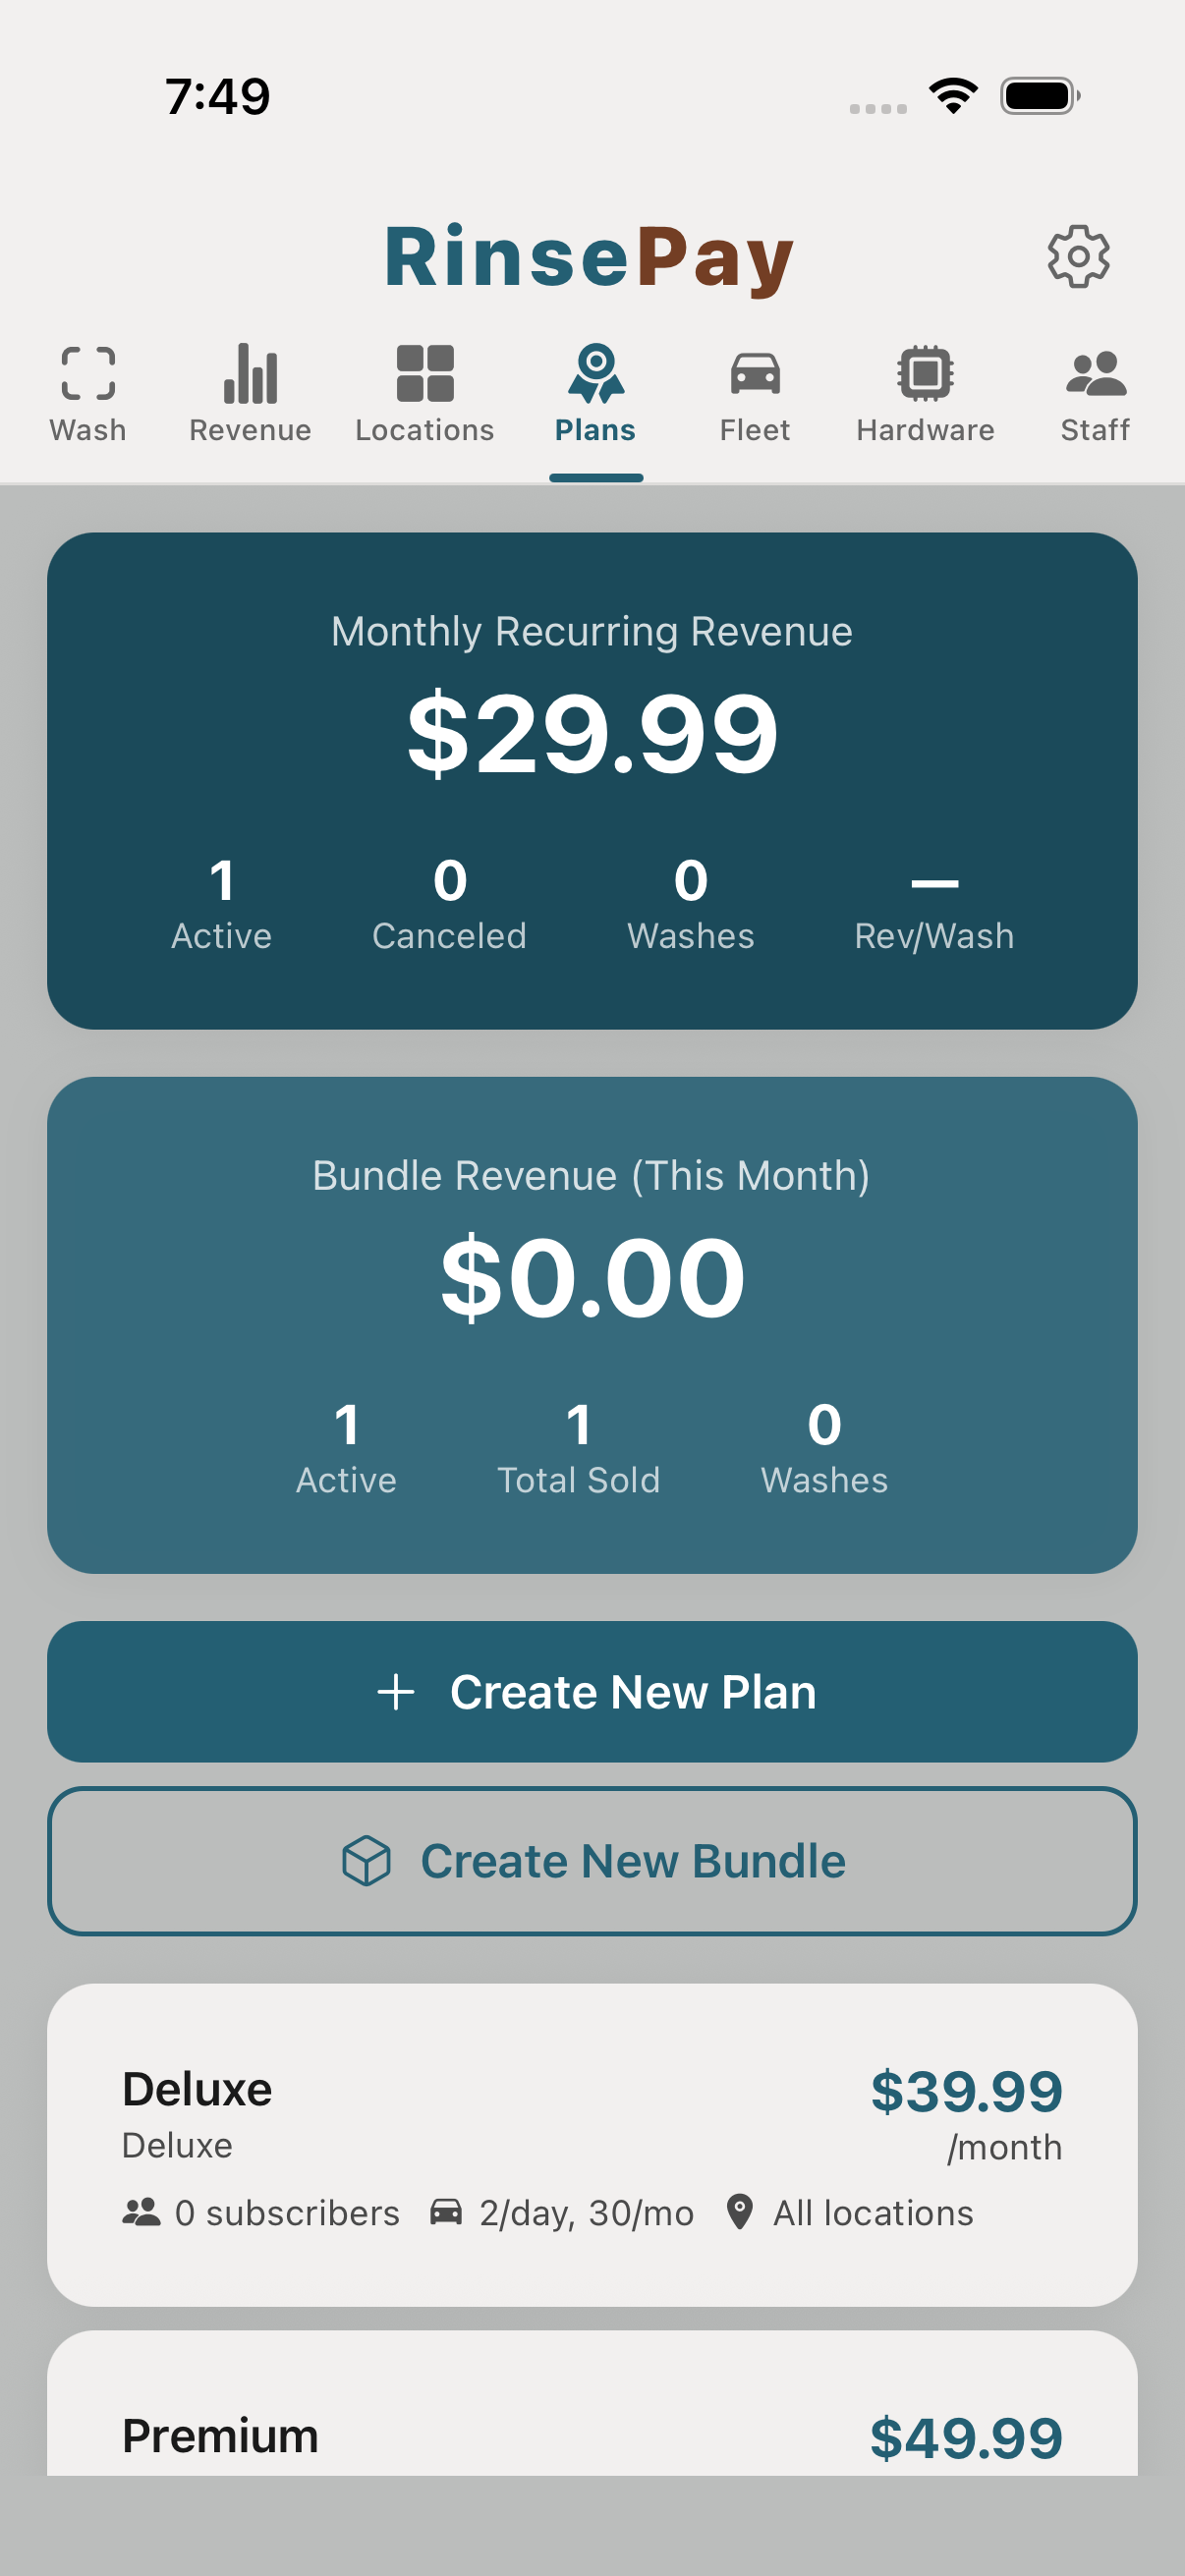
Name the plan ("Unlimited Premium — $39/mo"), pick the automatic-wash tier it covers, and set the monthly price.
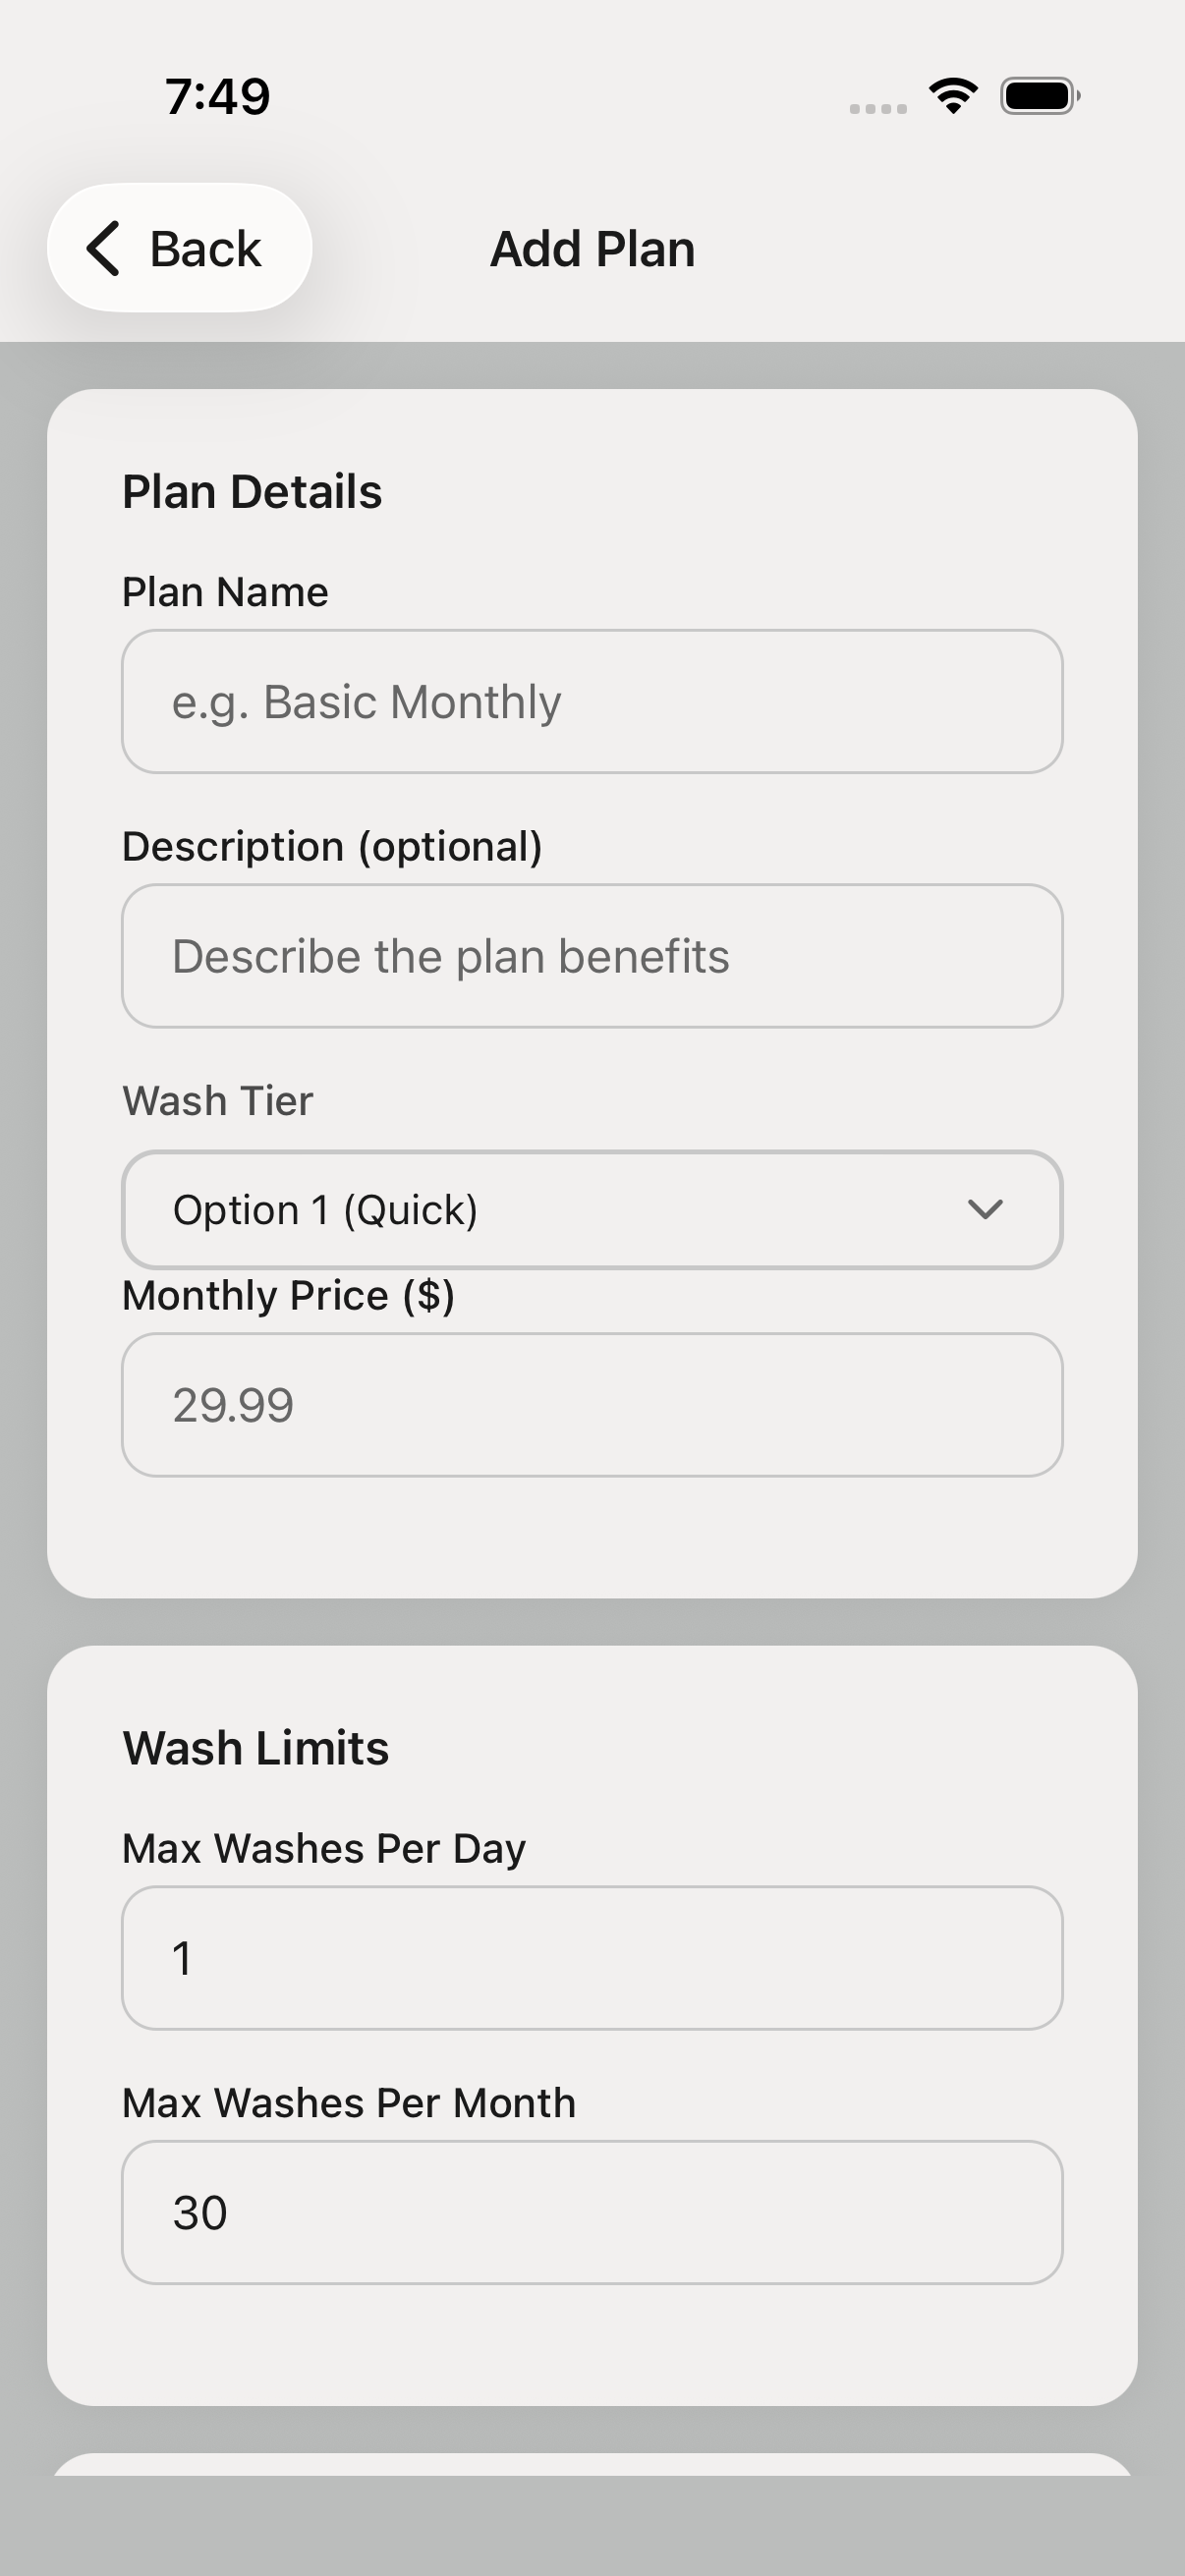
Subscriptions bill monthly and auto-renew until the customer cancels. Cancellation is one tap in the customer app.
Once the plan is published, customers see it when they scan a wash QR code and can subscribe right then. One tap and they're on the plan.
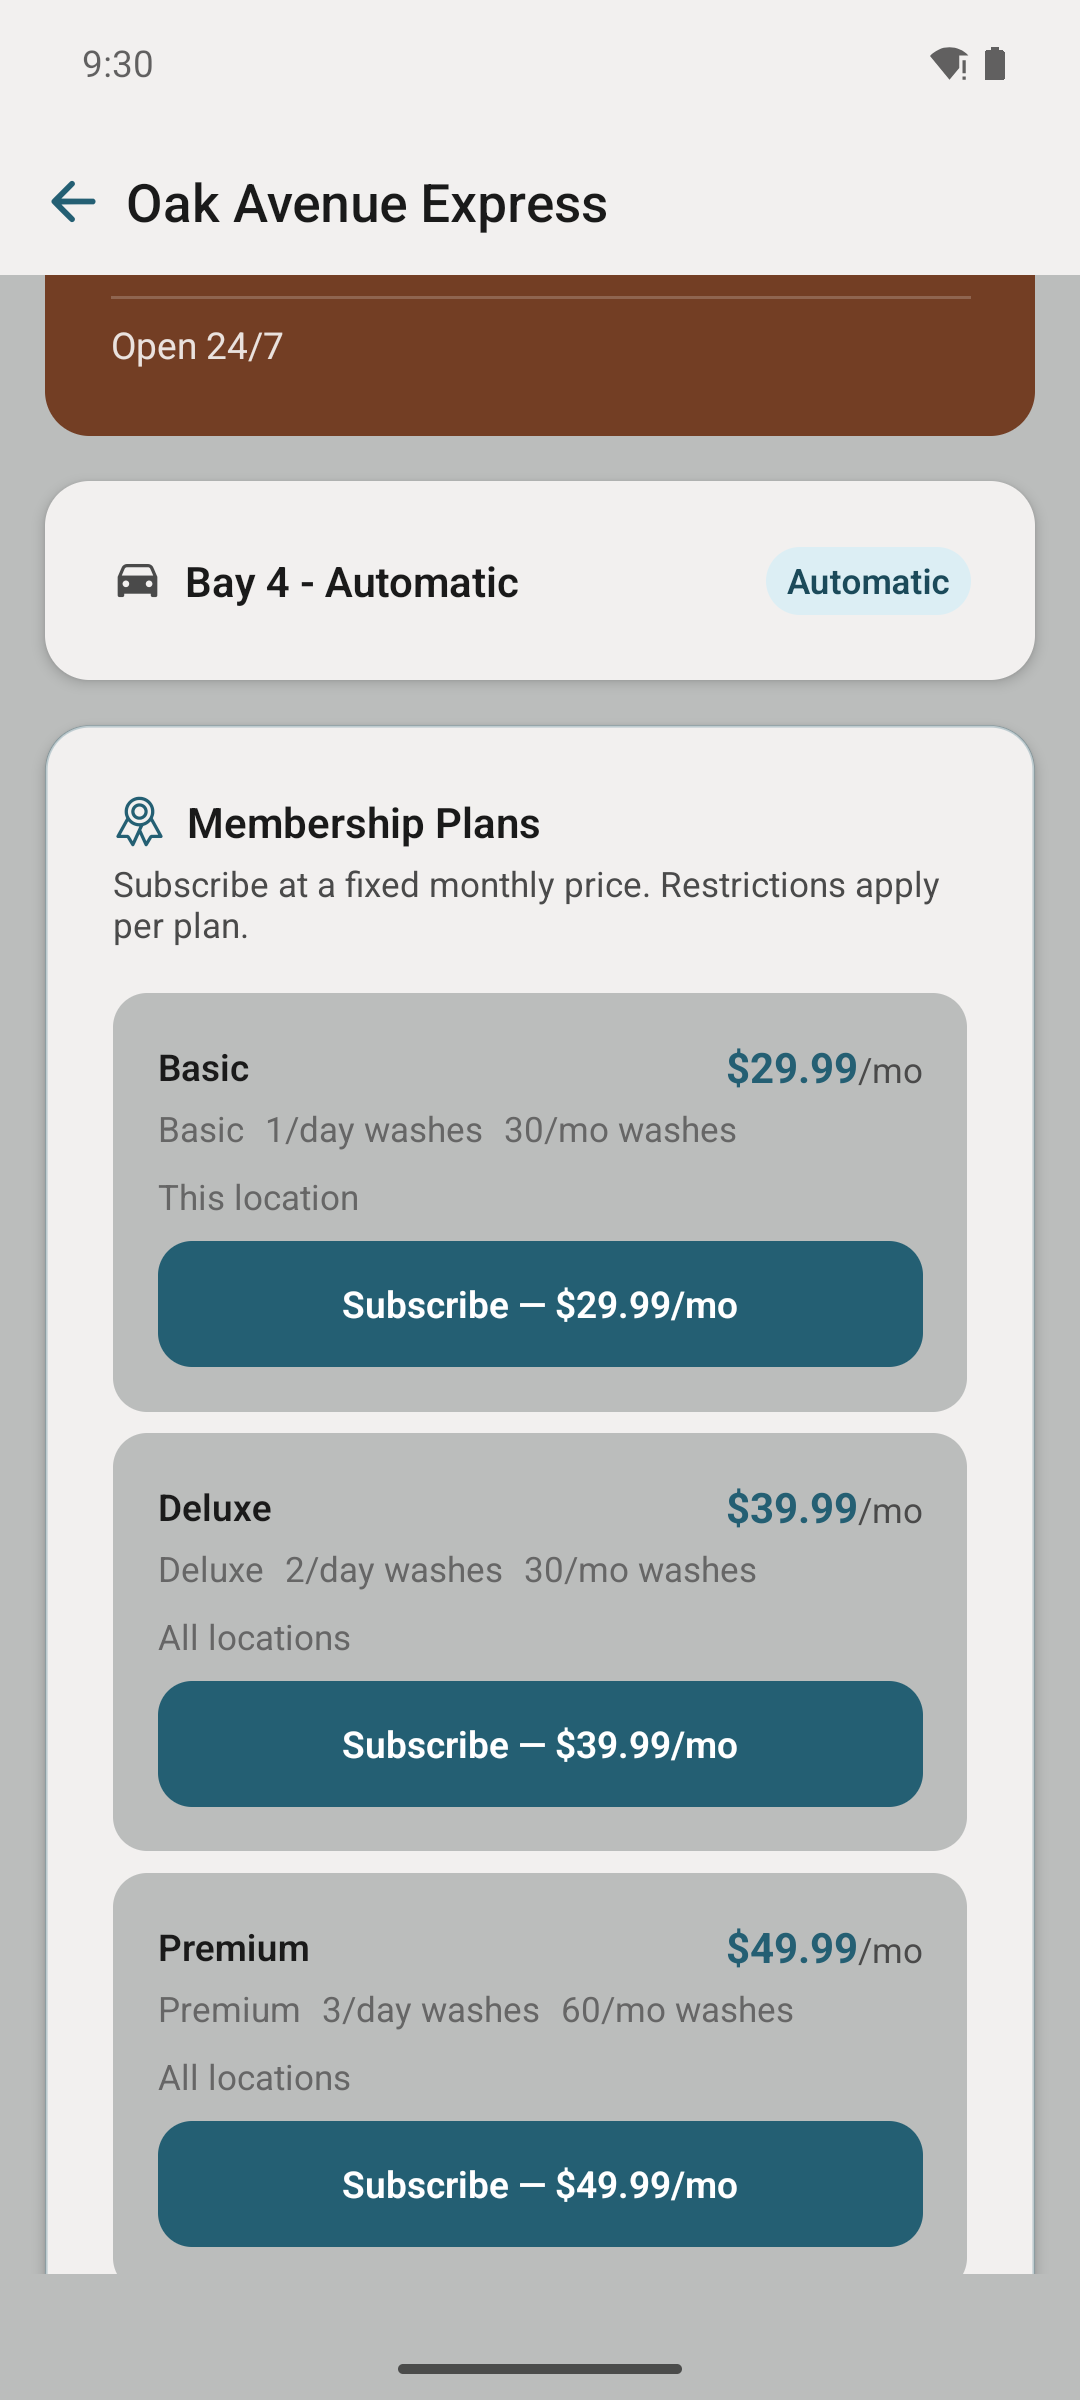
The dashboard shows monthly recurring revenue, net-new members, and cancellations.
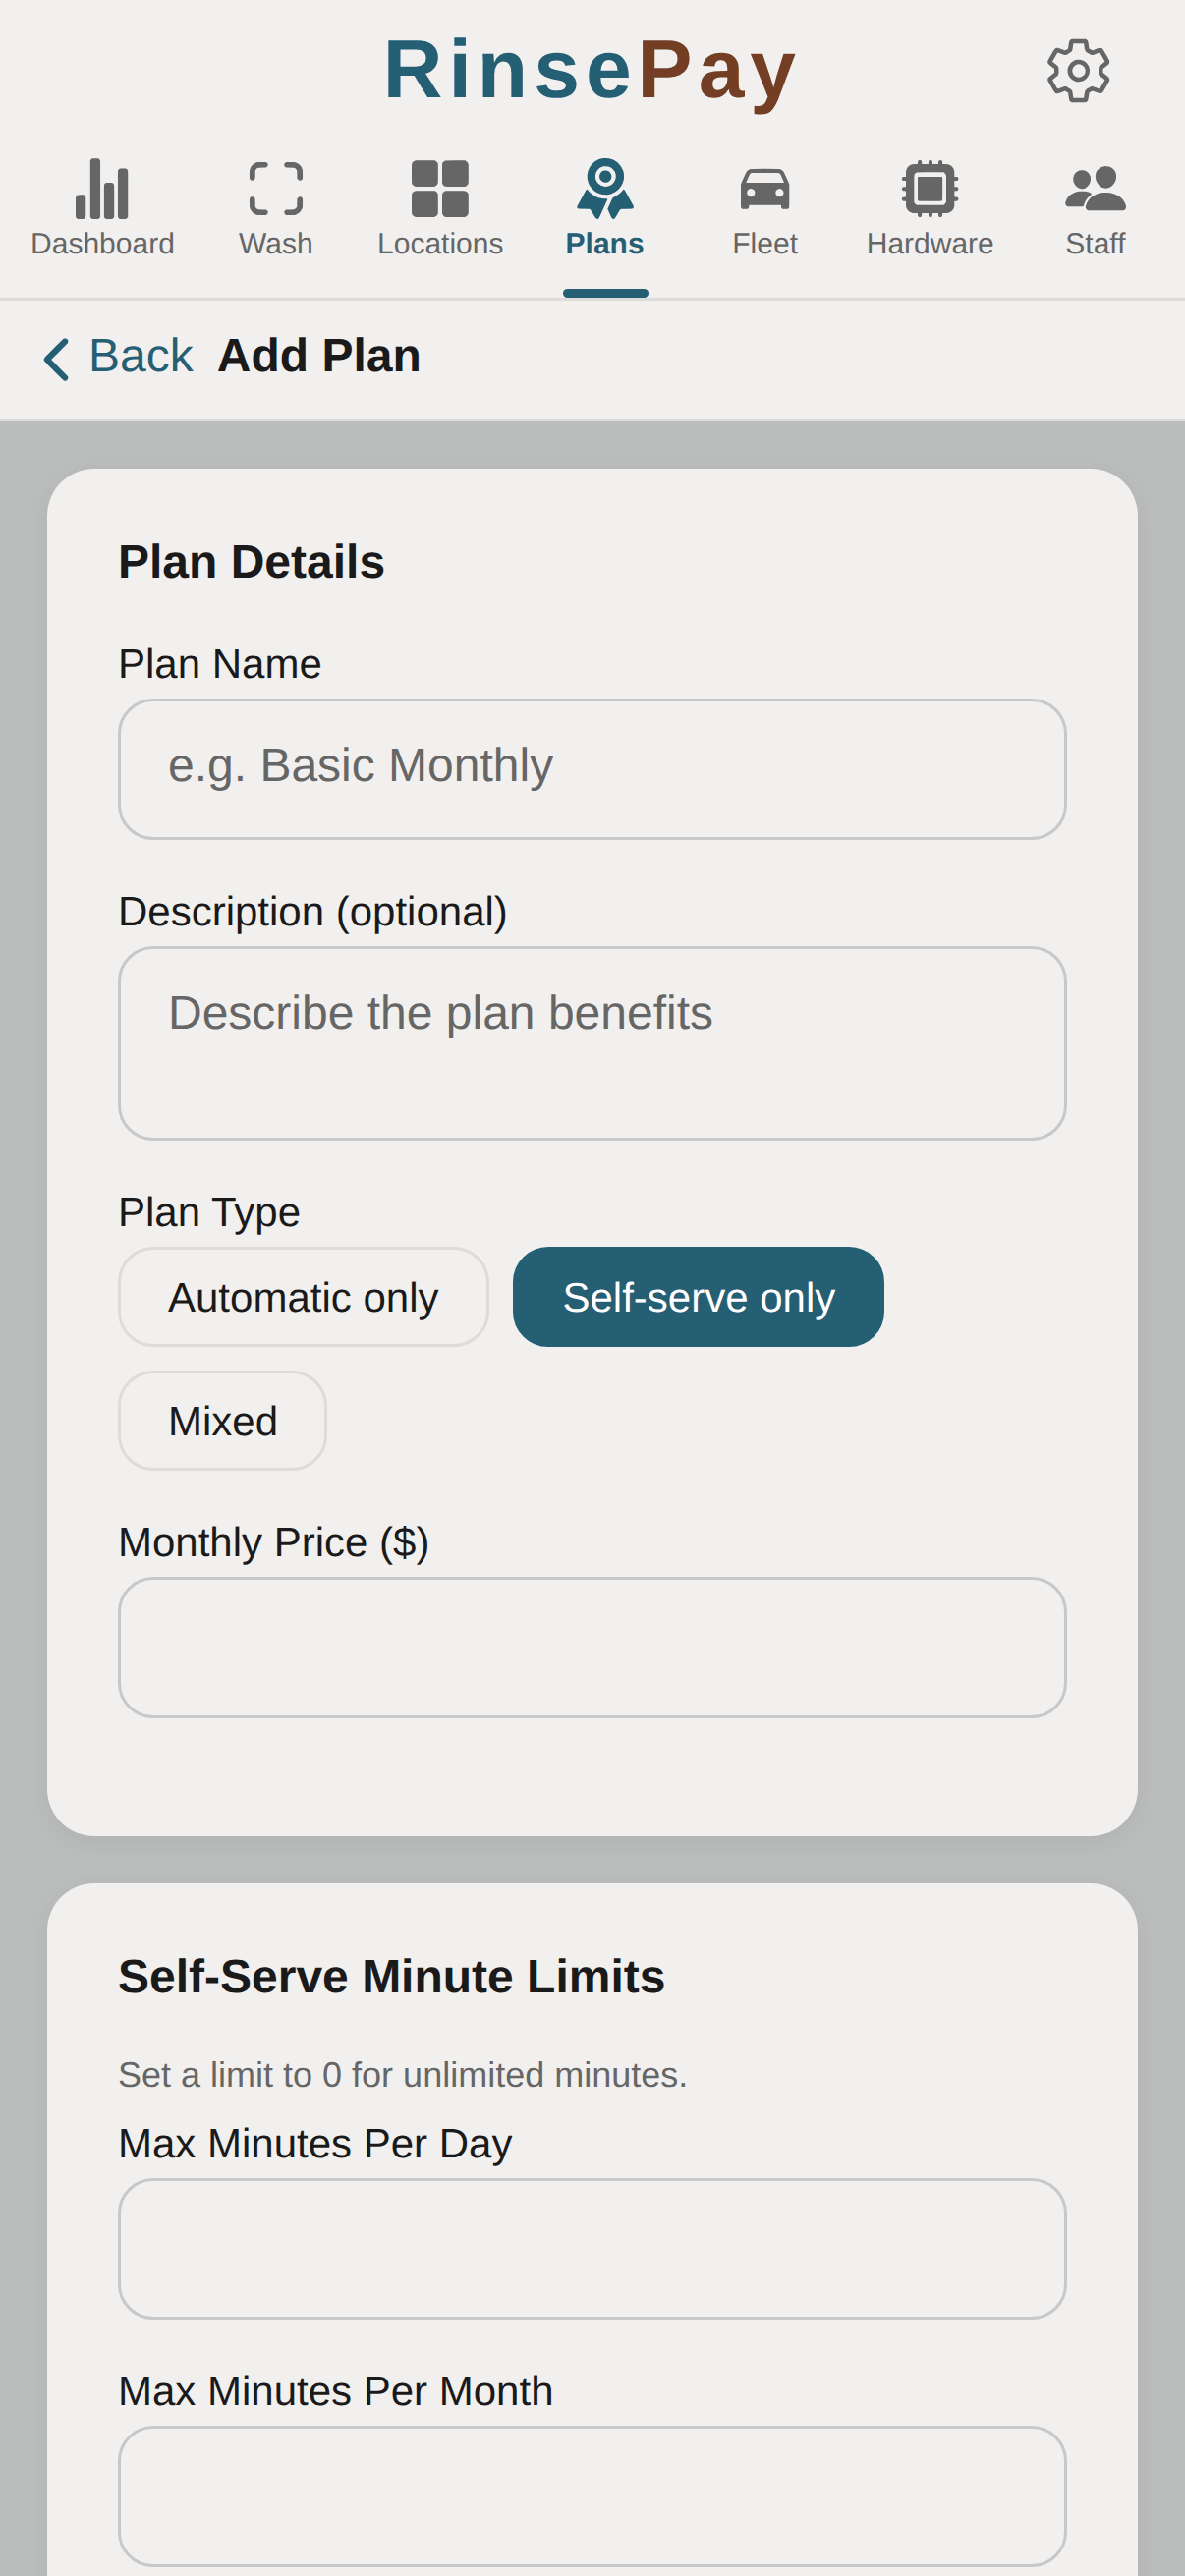
For self-serve bays, create a minute-based plan instead of a per-wash tier — members get an included pool of wash minutes each day and month (e.g. "20 min/day, 300 min/mo"). Pick the plan type when you create the plan; automatic and self-serve members are tracked side by side.
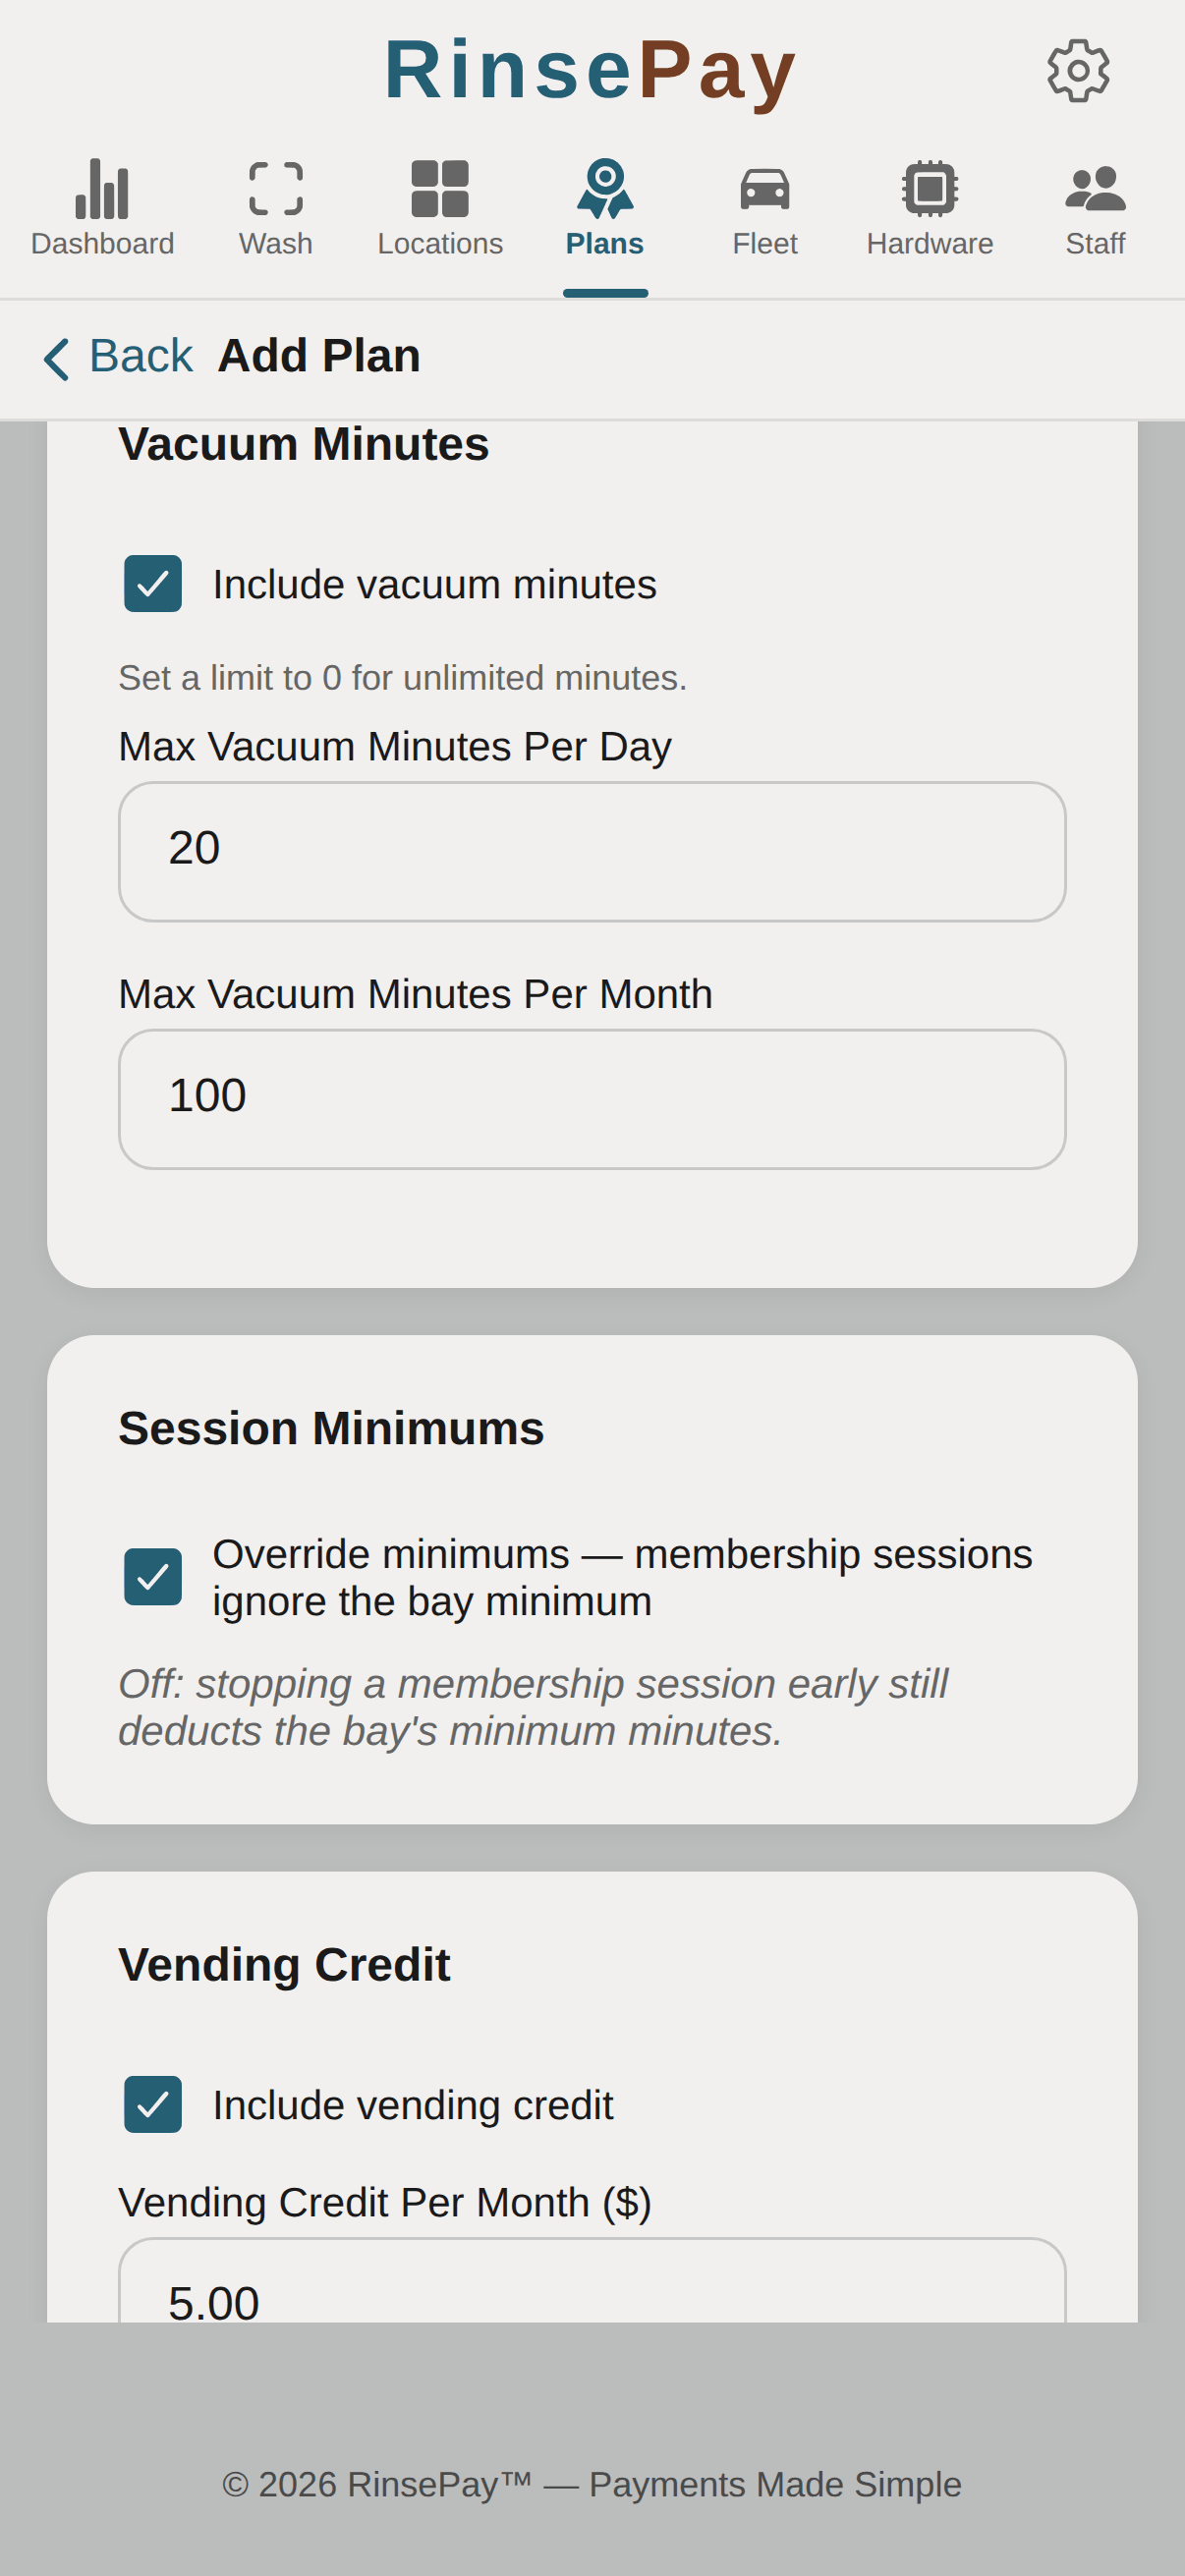
Any membership plan can also include a vacuum-minute bucket (per-day and/or per-month caps, 0 = unlimited) and a monthly vending credit allowance. Members redeem them right at the vacuum or vending machine — the app draws from the plan first, no charge. The "Override minimums" toggle controls what happens when a member stops a session early: off, the bay or vacuum's minimum minutes are still deducted; on, membership sessions ignore the unit's minimum and deduct only the time used.
A customer who washes, vacuums, and grabs a snack makes three purchases — and each separate card charge costs you a fixed processing fee. Visit Billing combines everything a customer buys in one visit into a single card charge. Customers notice nothing: they pay per selection in the app exactly as before and see their normal history — just one line on their card statement, backed by an itemized receipt email that answers "why one charge of $17" before they ask.
Open the location's edit screen and find the Visit Billing section. It's off by default — leave it off and nothing changes. Pick a mode to enable it:
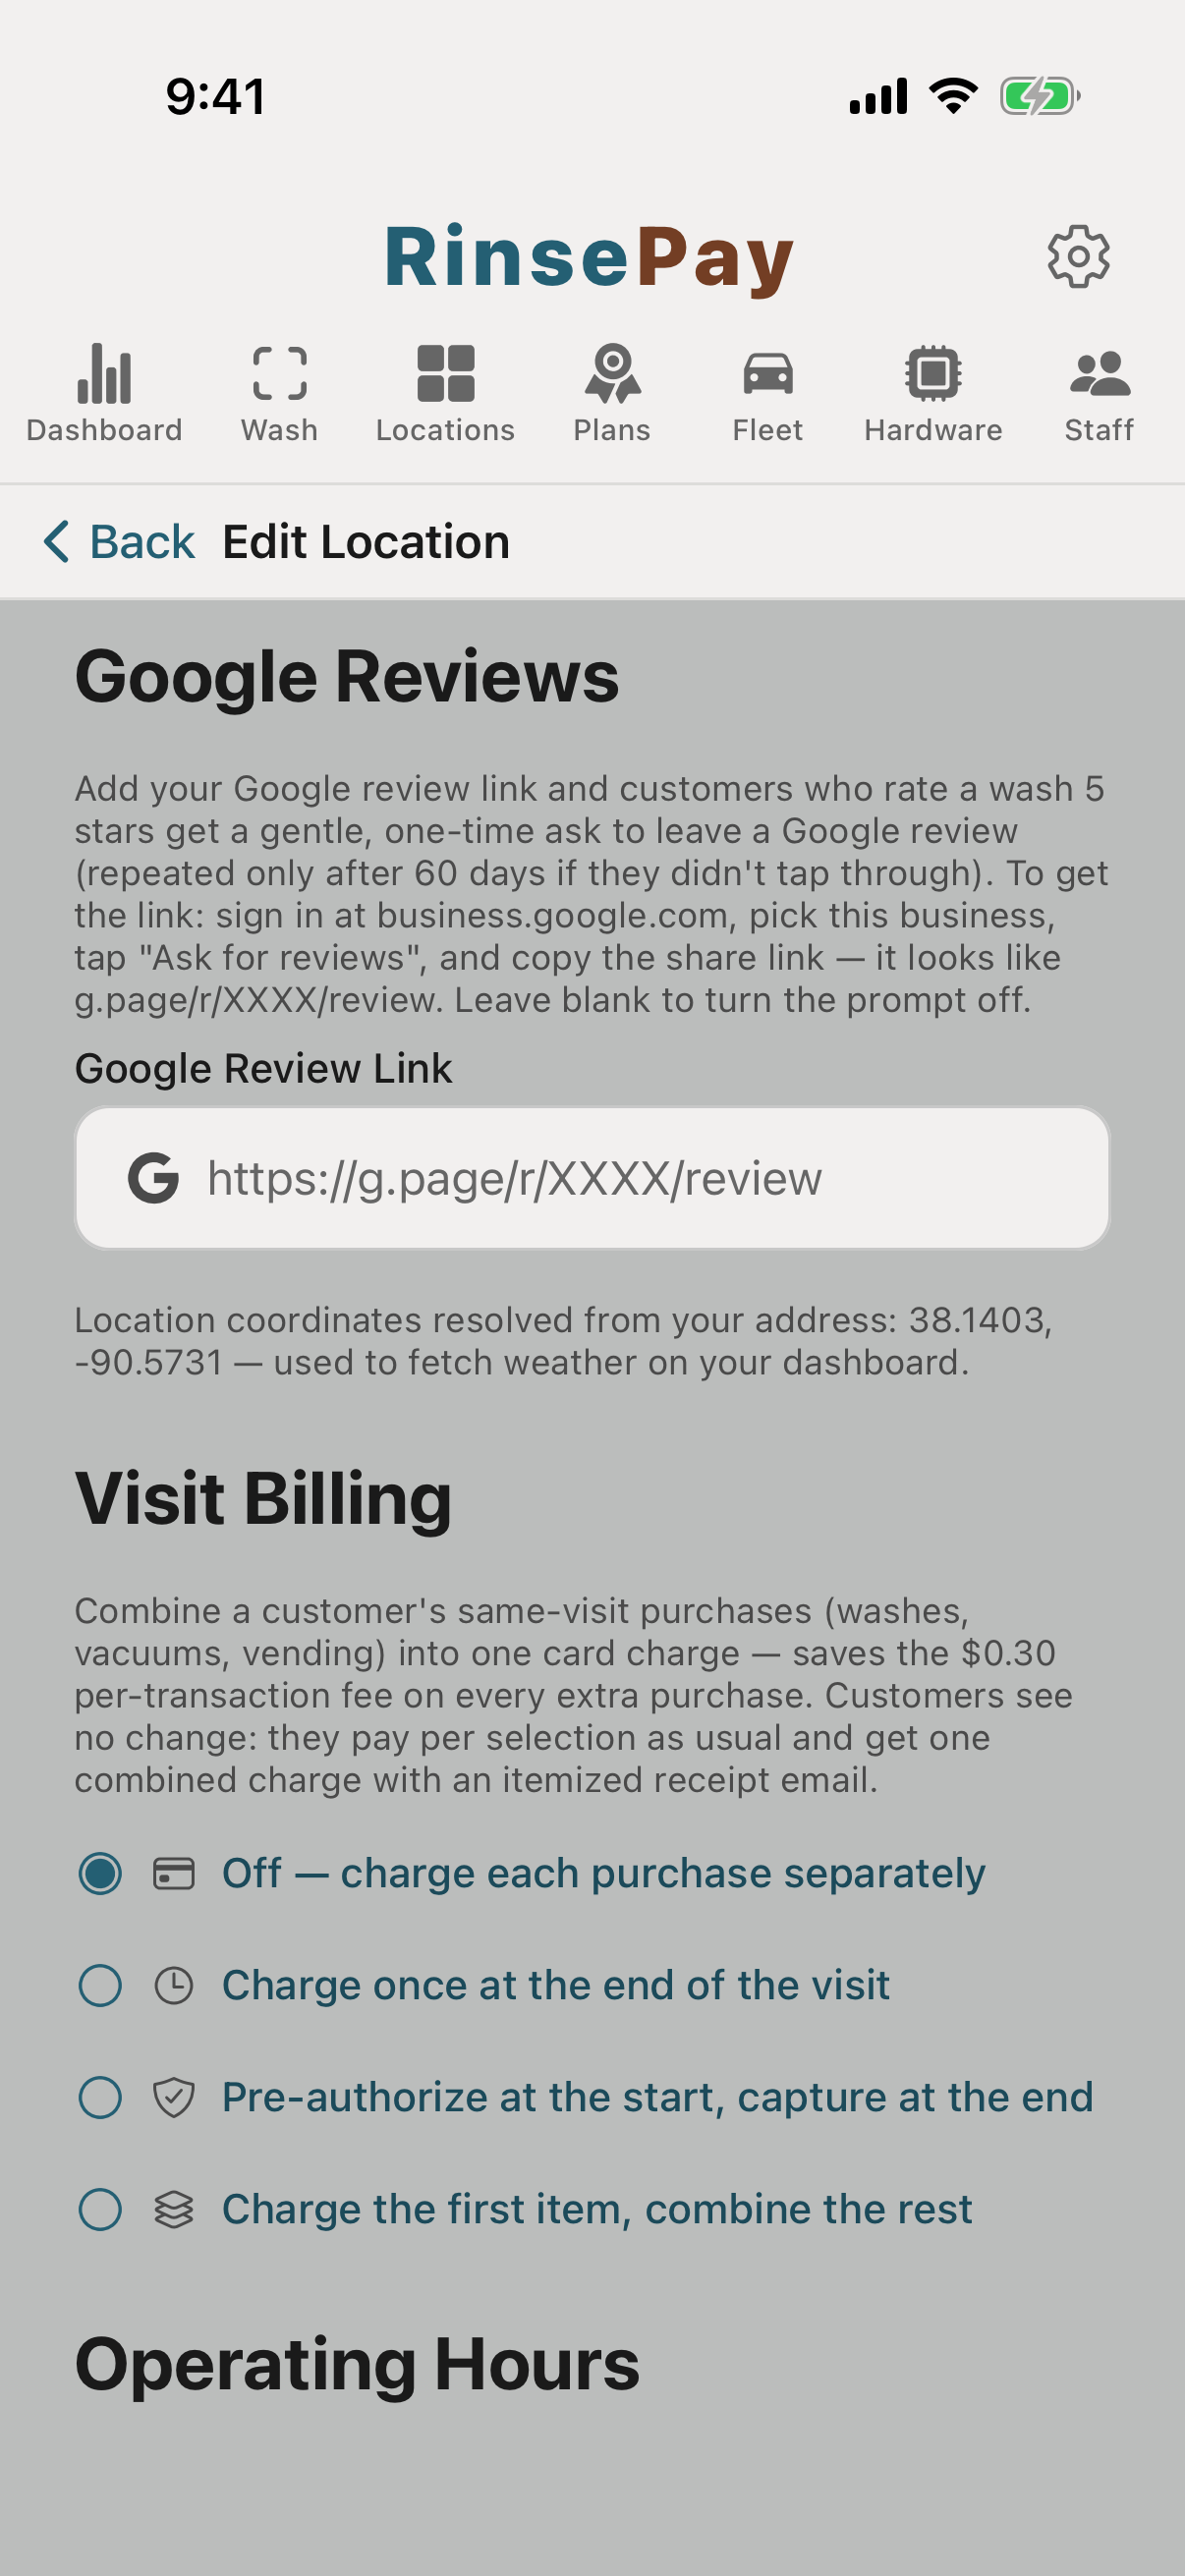
A visit closes automatically after an idle window of no purchases (default 45 minutes — long enough for a wash, a vacuum, and a soda). You can also set an auto-charge threshold: the moment a visit's total reaches that amount it settles immediately and a fresh visit begins, capping how much any one charge can be. Recommended with charge-at-close mode.
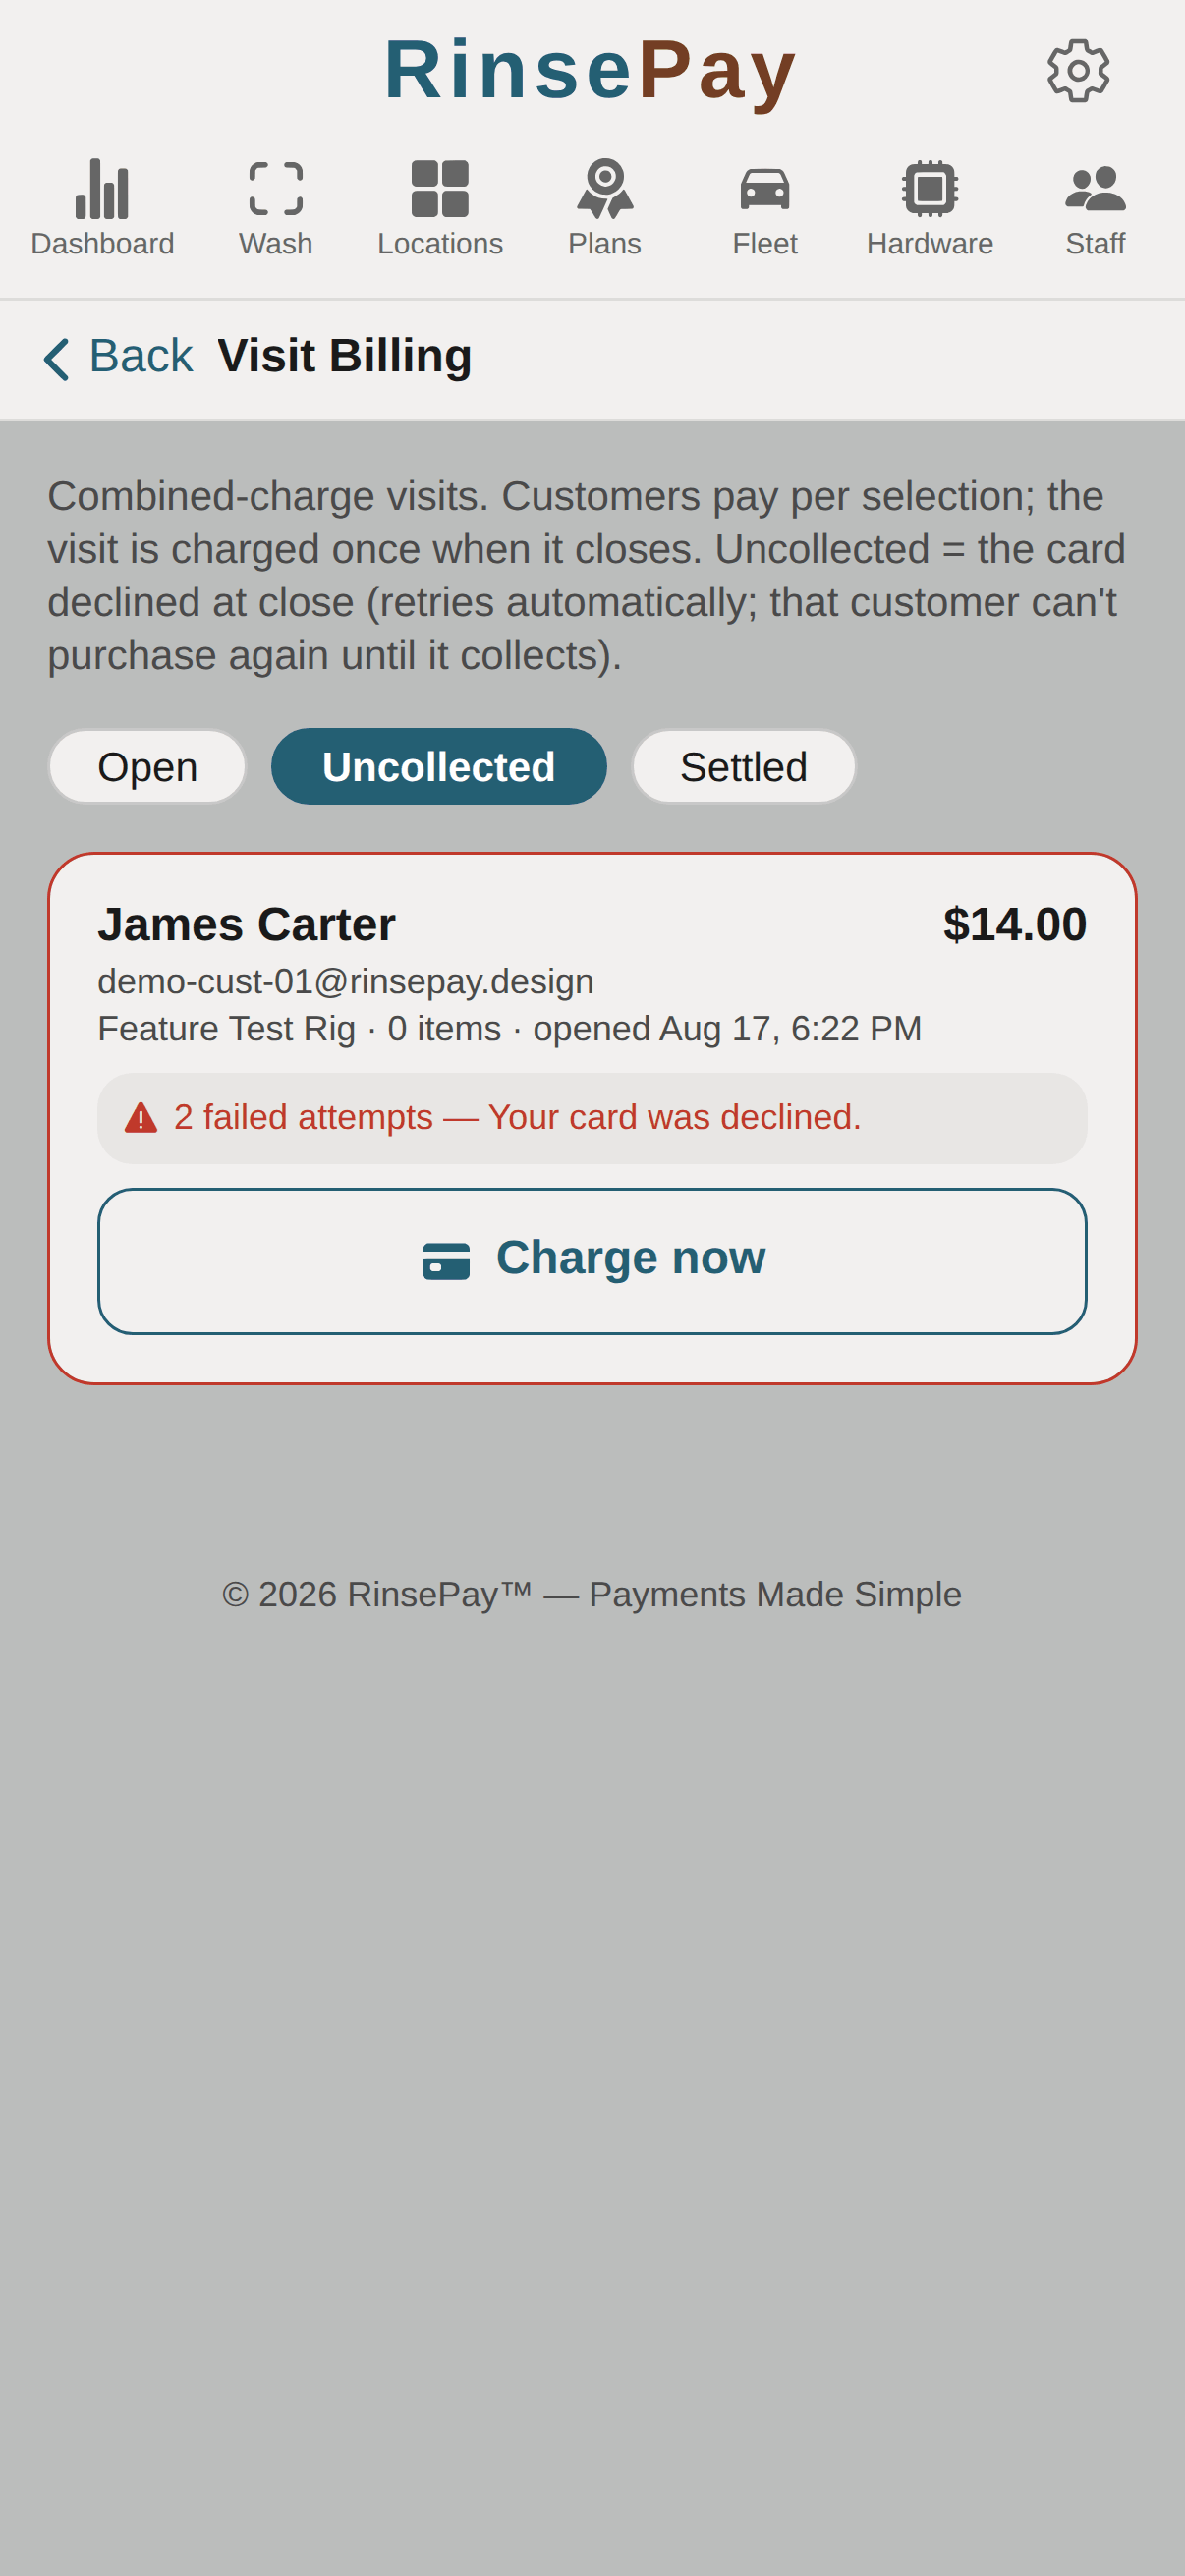
Everything Visit Billing is doing lives on the Visit Billing screen — open your dashboard and tap Visit Billing, right below View customers. It lists every open, uncollected, and settled visit. If a card declines when a visit settles, RinsePay retries automatically on a backoff schedule and emails the customer. The declined card can't be used for new purchases until the balance clears — other cards and prepaid benefits still work, and a successful payment on another card immediately retries the outstanding balance. Any uncollected visit has a Charge now button to retry on the spot.
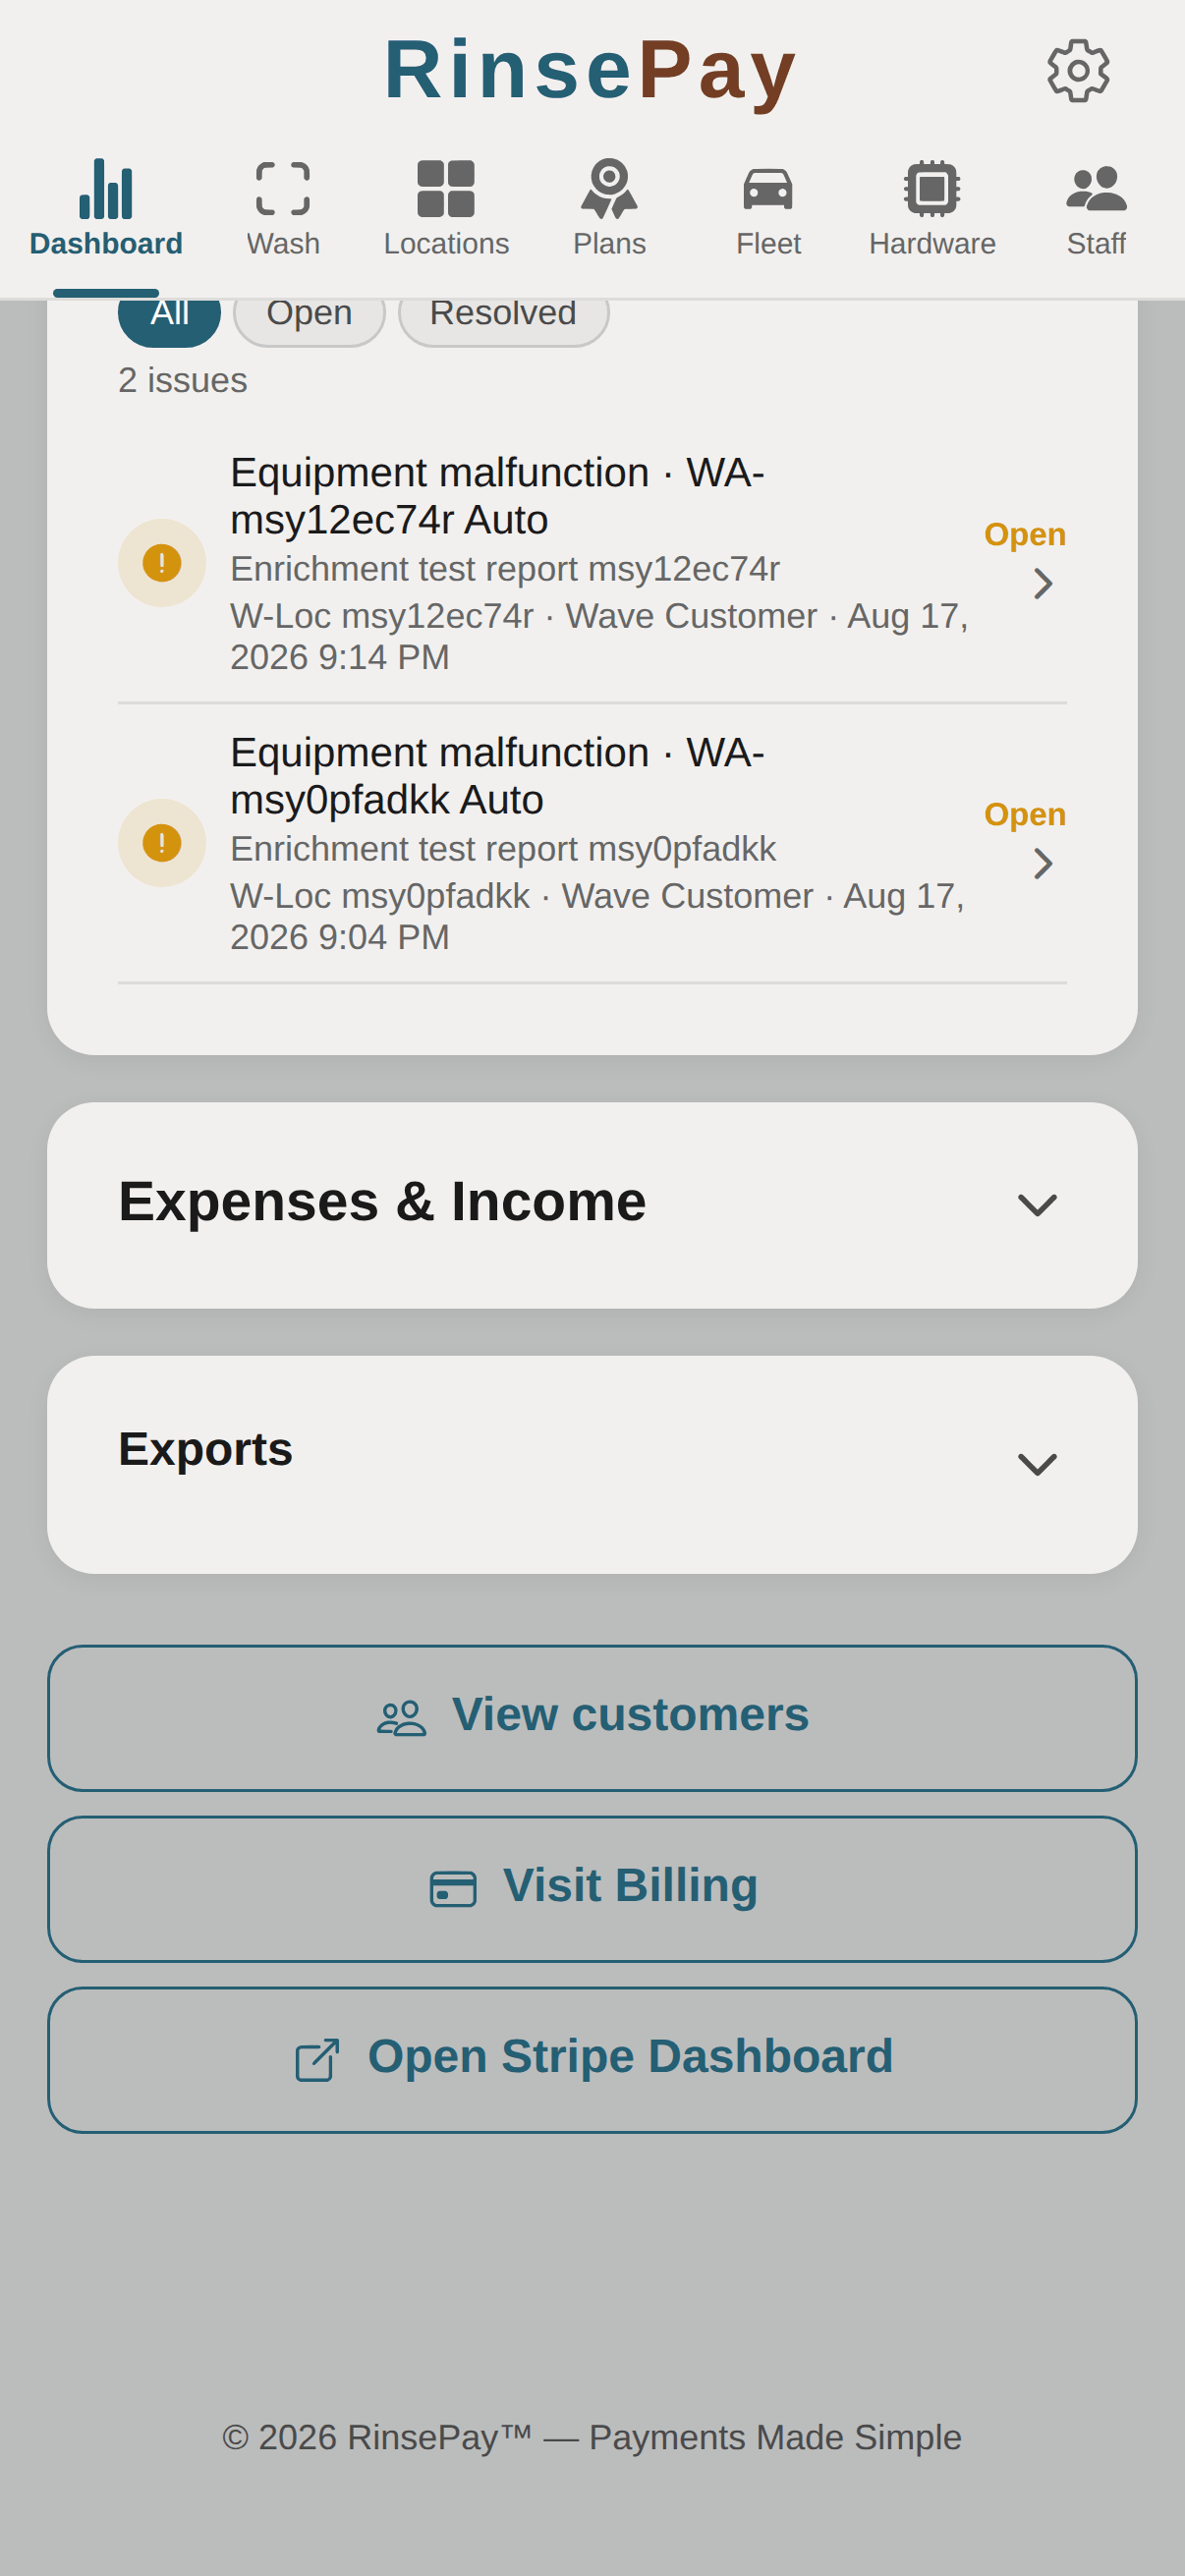
Even though the card sees one charge, your dashboard, P&L, sales-tax report, and exports still show every purchase as its own line with fees apportioned exactly — nothing about your reporting changes. Refunds work per line item, too.
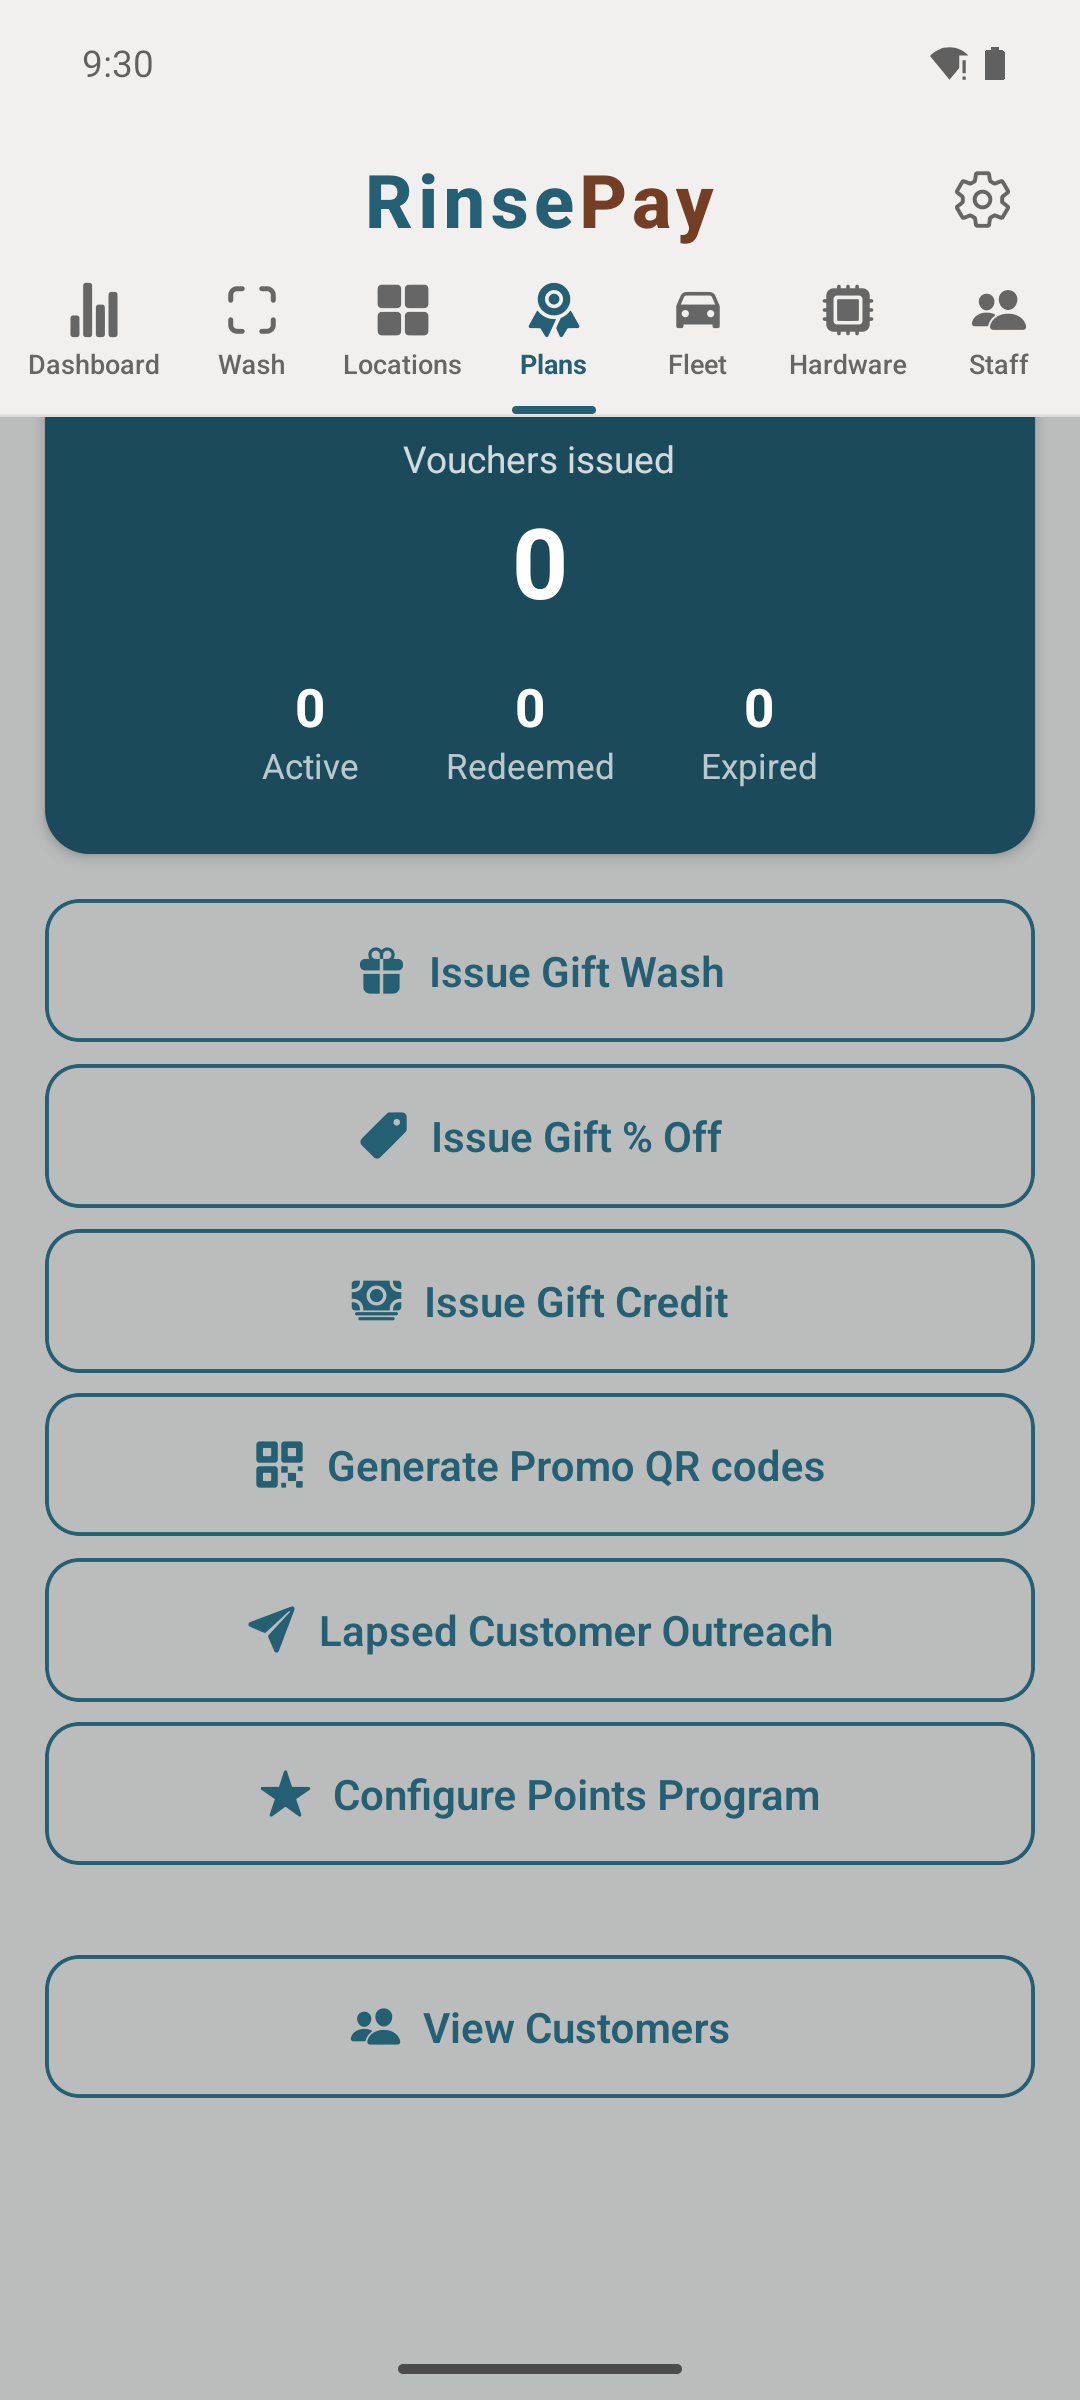
Hand out gifts, run promos, and print scannable promo QR codes — all from Plans → Gifts & Promos. Offers now cover the whole location: scope any gift or promo to specific wash tiers, self-serve bays, vacuums, and vending machines. Every gift and promo is one-time per customer, scoped where you choose, and expires on your schedule.
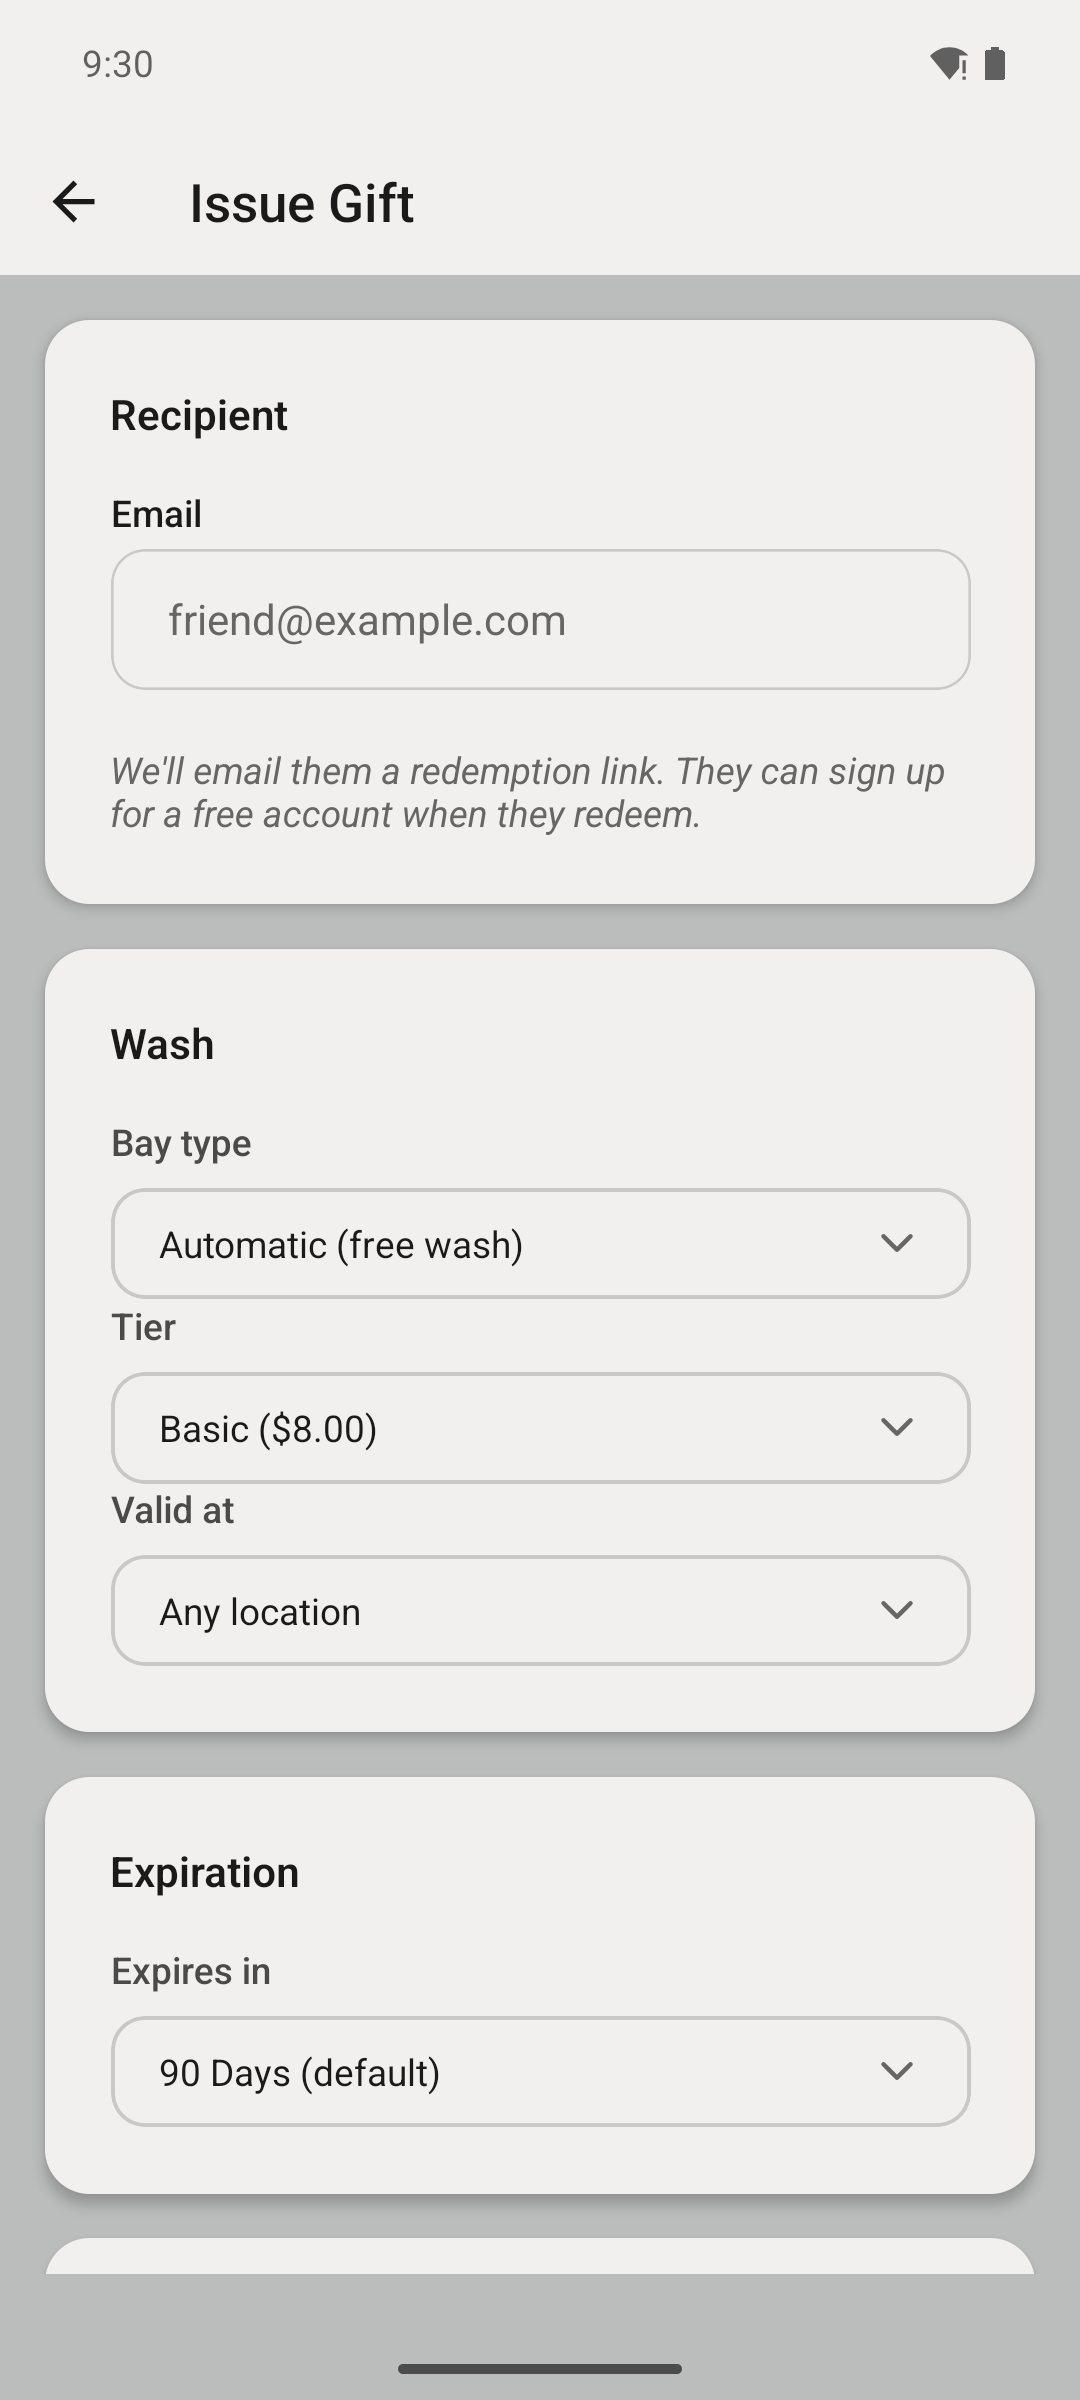
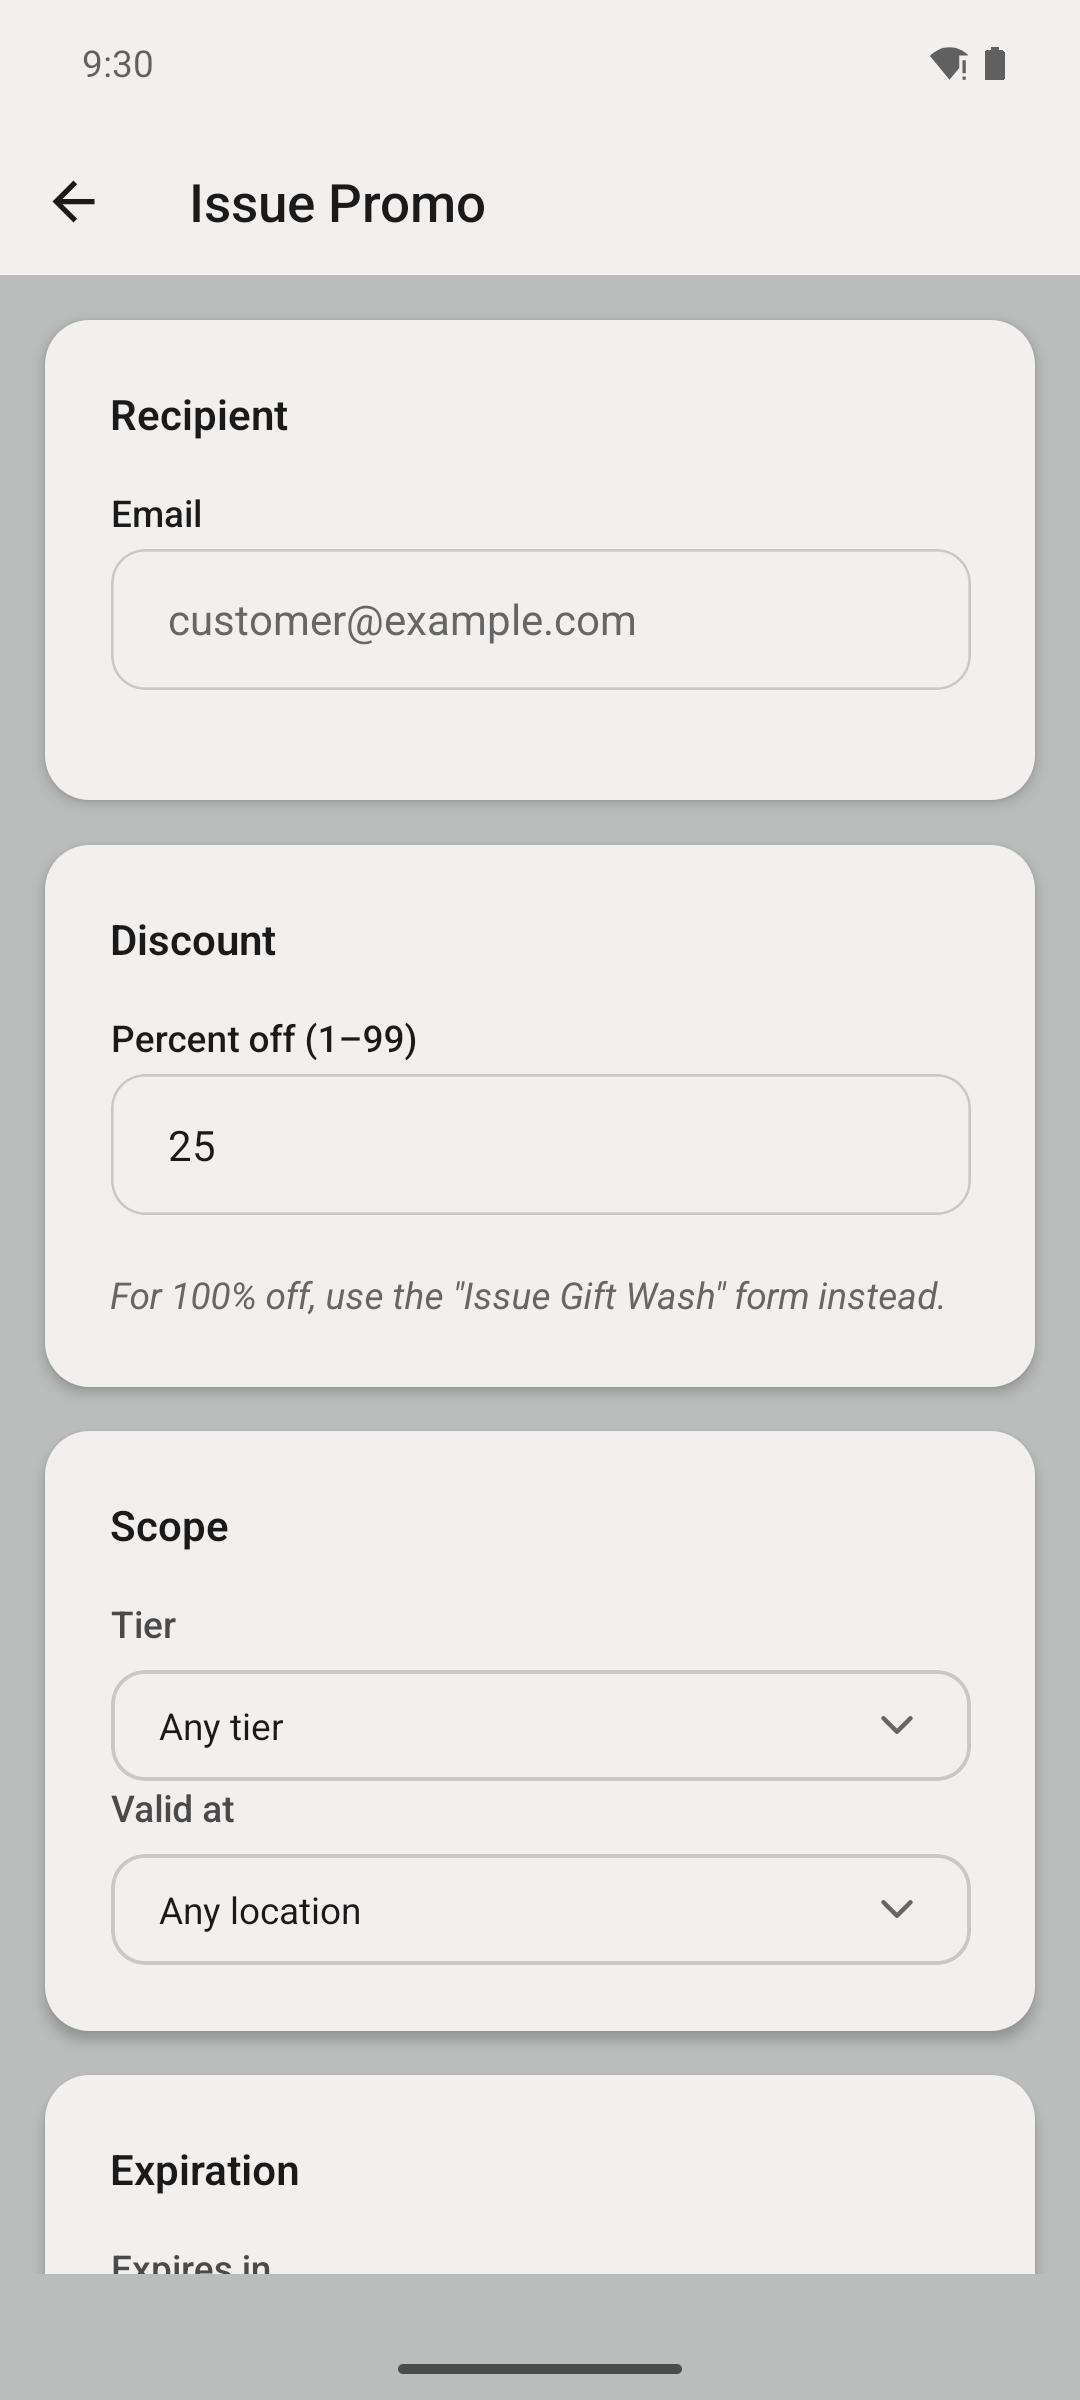
Enter a recipient's email and pick the offer kind — five to choose from:
They get a redemption link by email and can claim it with a free account — no charge to them, no platform fee to you.
Create a promo for a percentage off (e.g. 25% off Ultimate) and scope it to the tiers, self-serve bays, vacuums, or vending machines you want it to hit. Set how many total redemptions and one-per-customer limits, and an expiration. Great for grand openings and win-them-back blasts.
Generate a branded, single- or multi-use QR code — a free wash, percent off, free bay or vacuum minutes, free vending credit, or instant gift credit dollars — and print it on flyers, mailers, or pump-toppers. Customers scan it to claim the offer straight to their account, and the QR's usage drill-down shows exactly how many claims each print run produced.
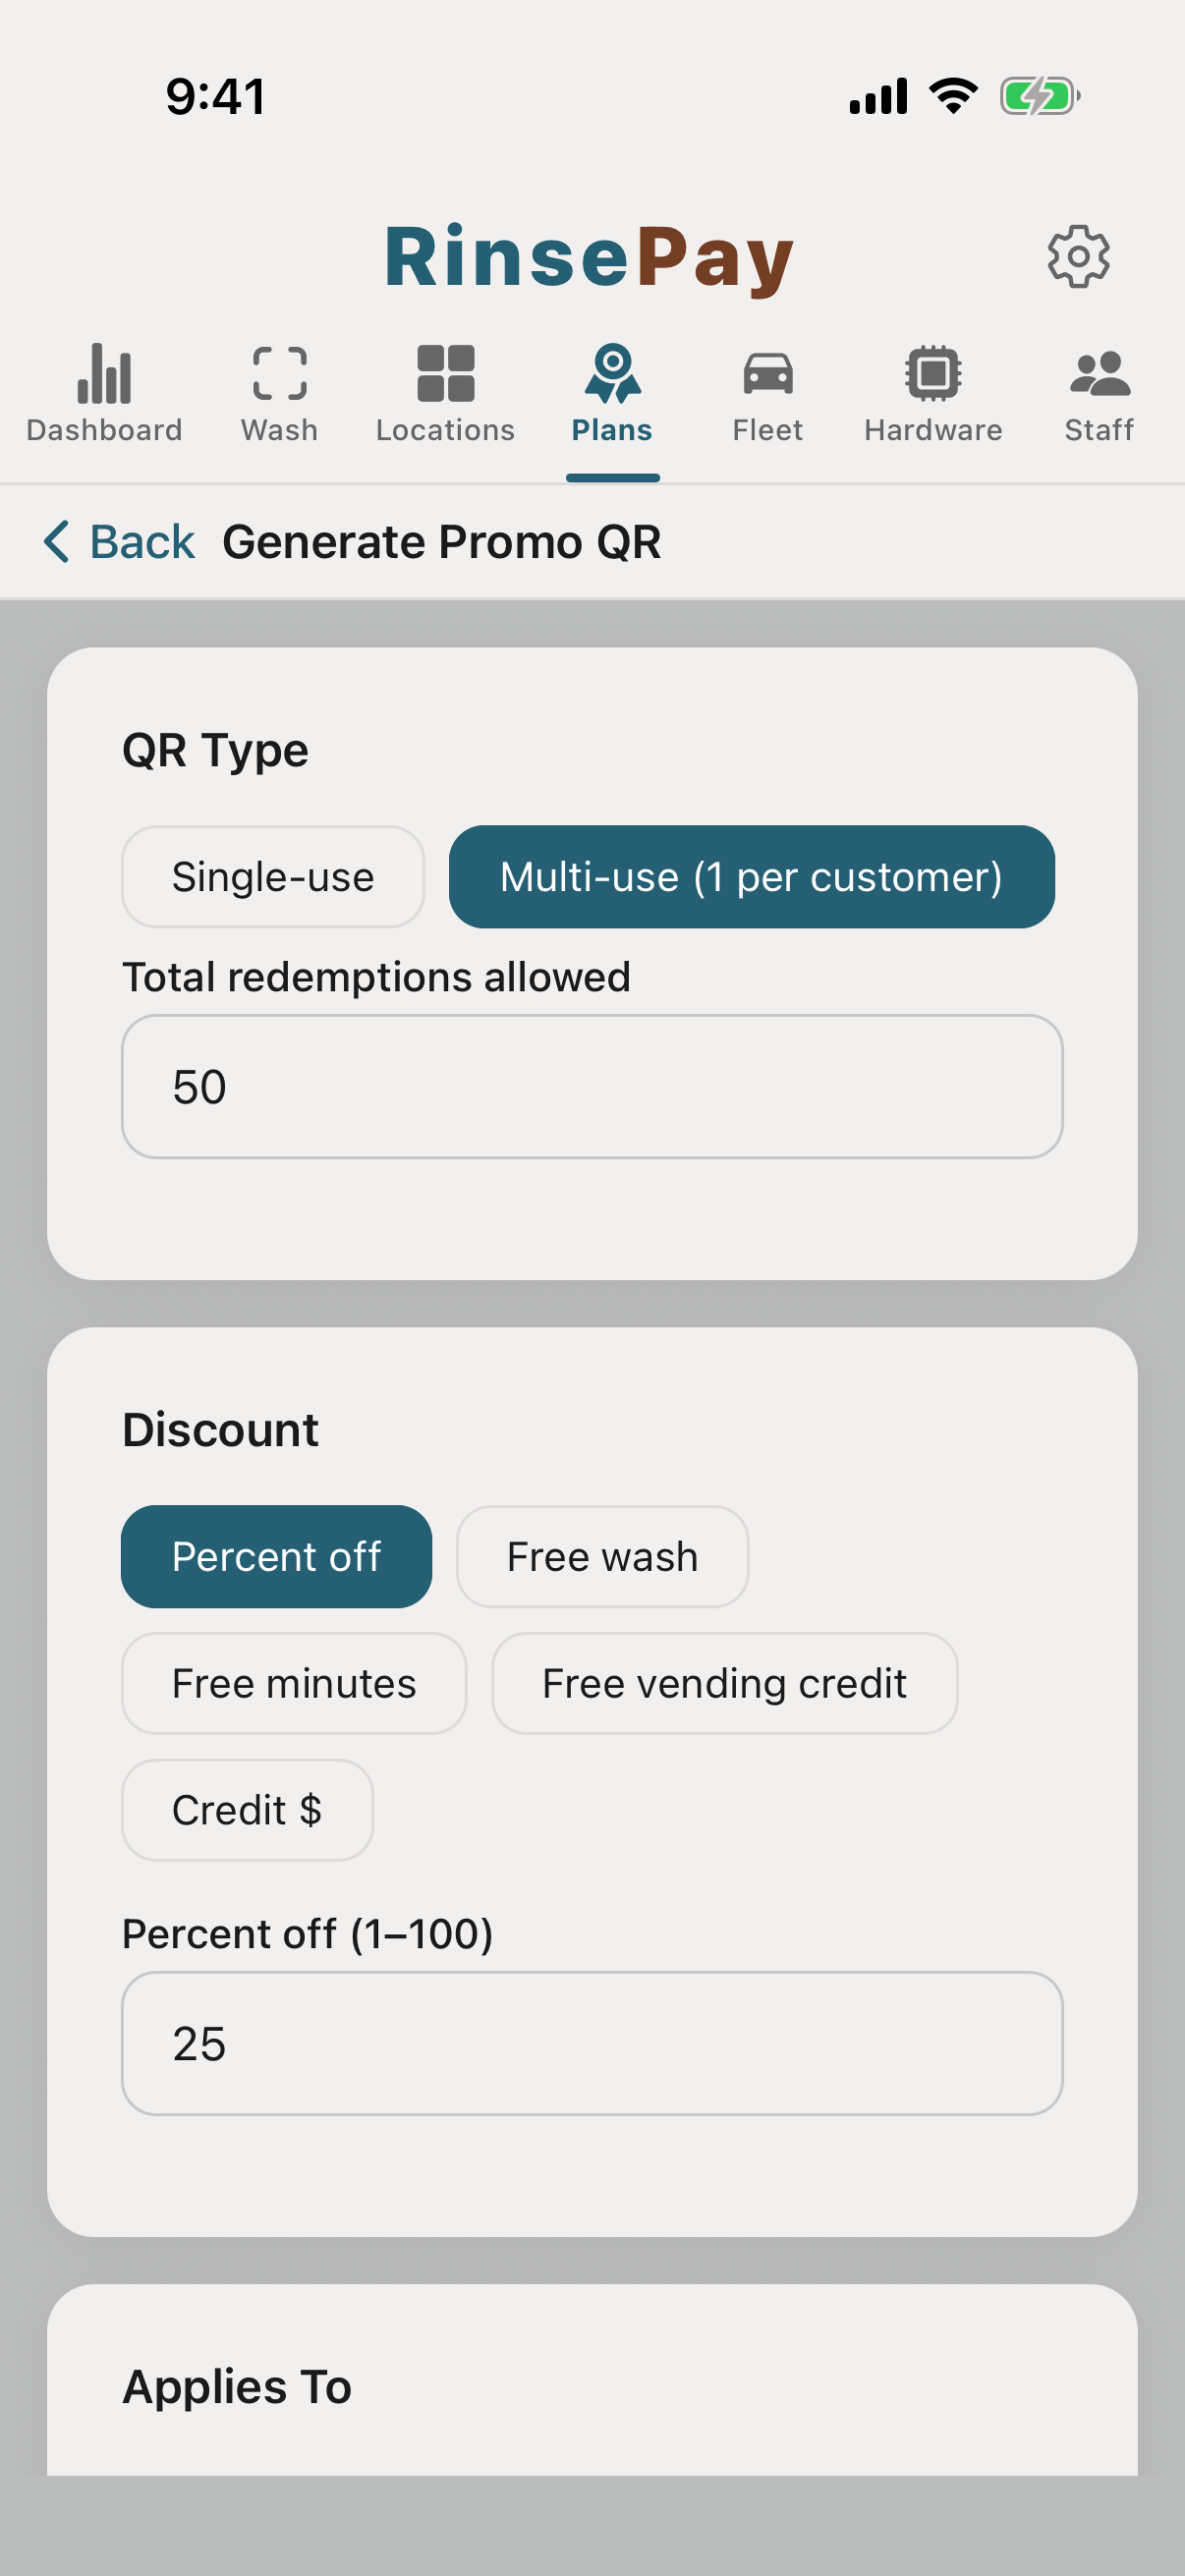
Tapping a gift/promo link (or scanning the QR) adds it to the customer's account. They can also paste a code into "Paste wash URL or code" on the Scan tab. The offer then shows automatically on the pay screen wherever it applies — the matching wash tier, self-serve bay, vacuum, or vending machine. Credit gifts skip the pay screen entirely: the balance lands on the account the moment they claim.
Turn every wash into points customers can redeem, and send prepaid wash credit as a thank-you or make-good.
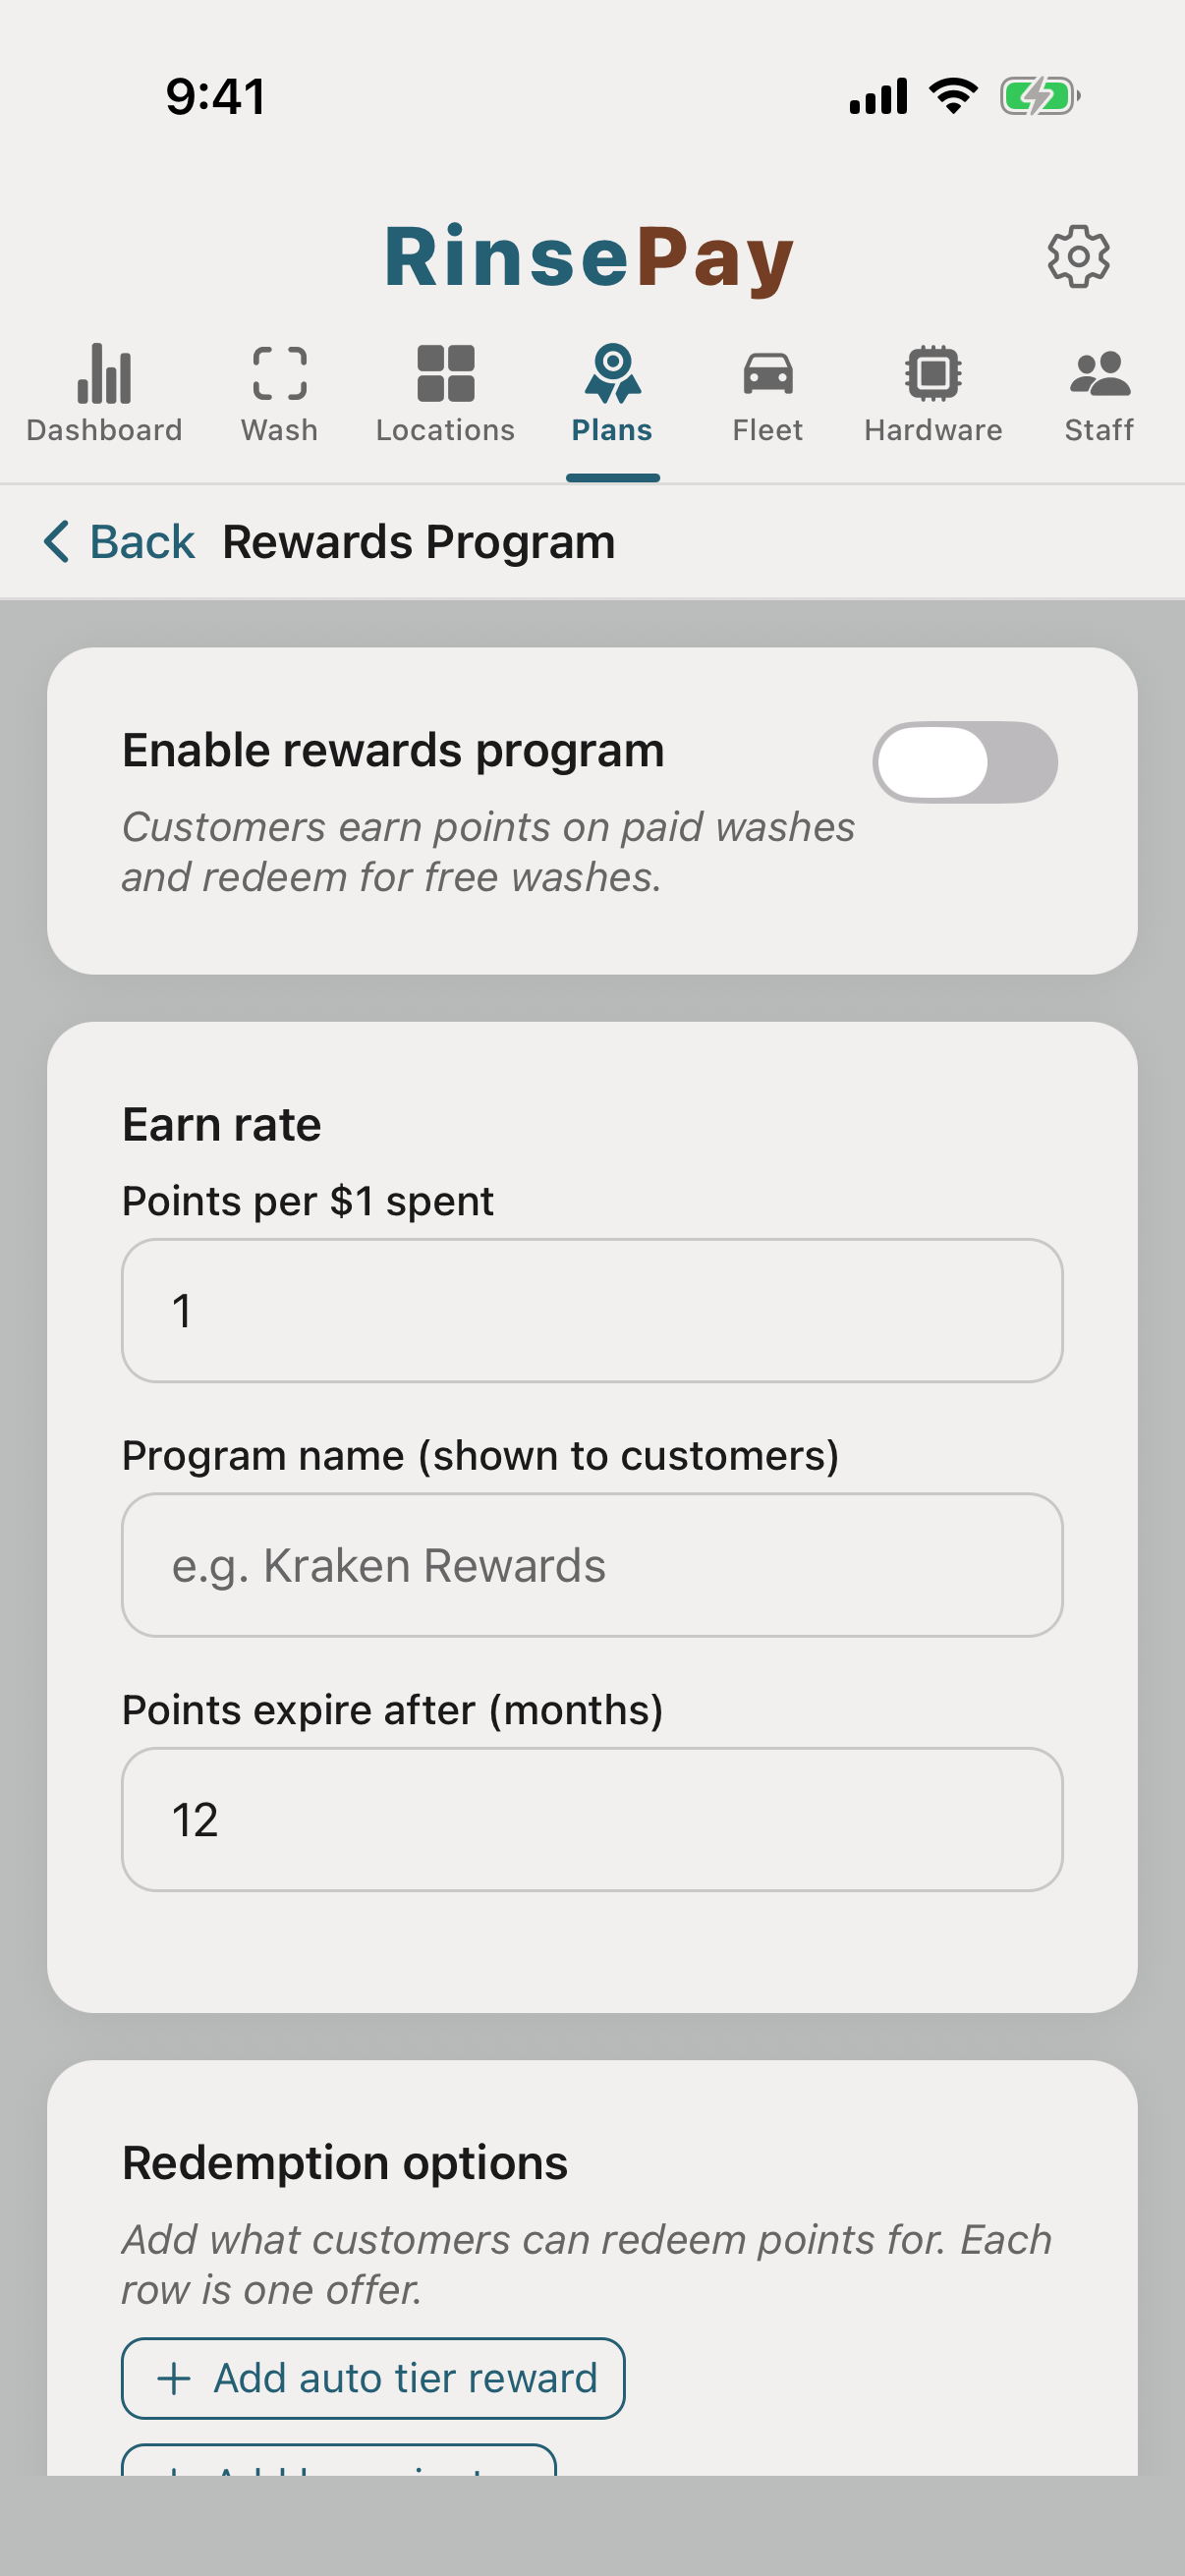
Set how many points a customer earns per dollar, then build your redemption menu. A redemption row can be a free wash tier, self-serve minutes, vacuum minutes, or vending credit — e.g. 500 points = a free Deluxe, 200 points = 10 vacuum minutes, 200 points = $2 of vending. Customers earn on every paid purchase and redeem straight from their Rewards tab.
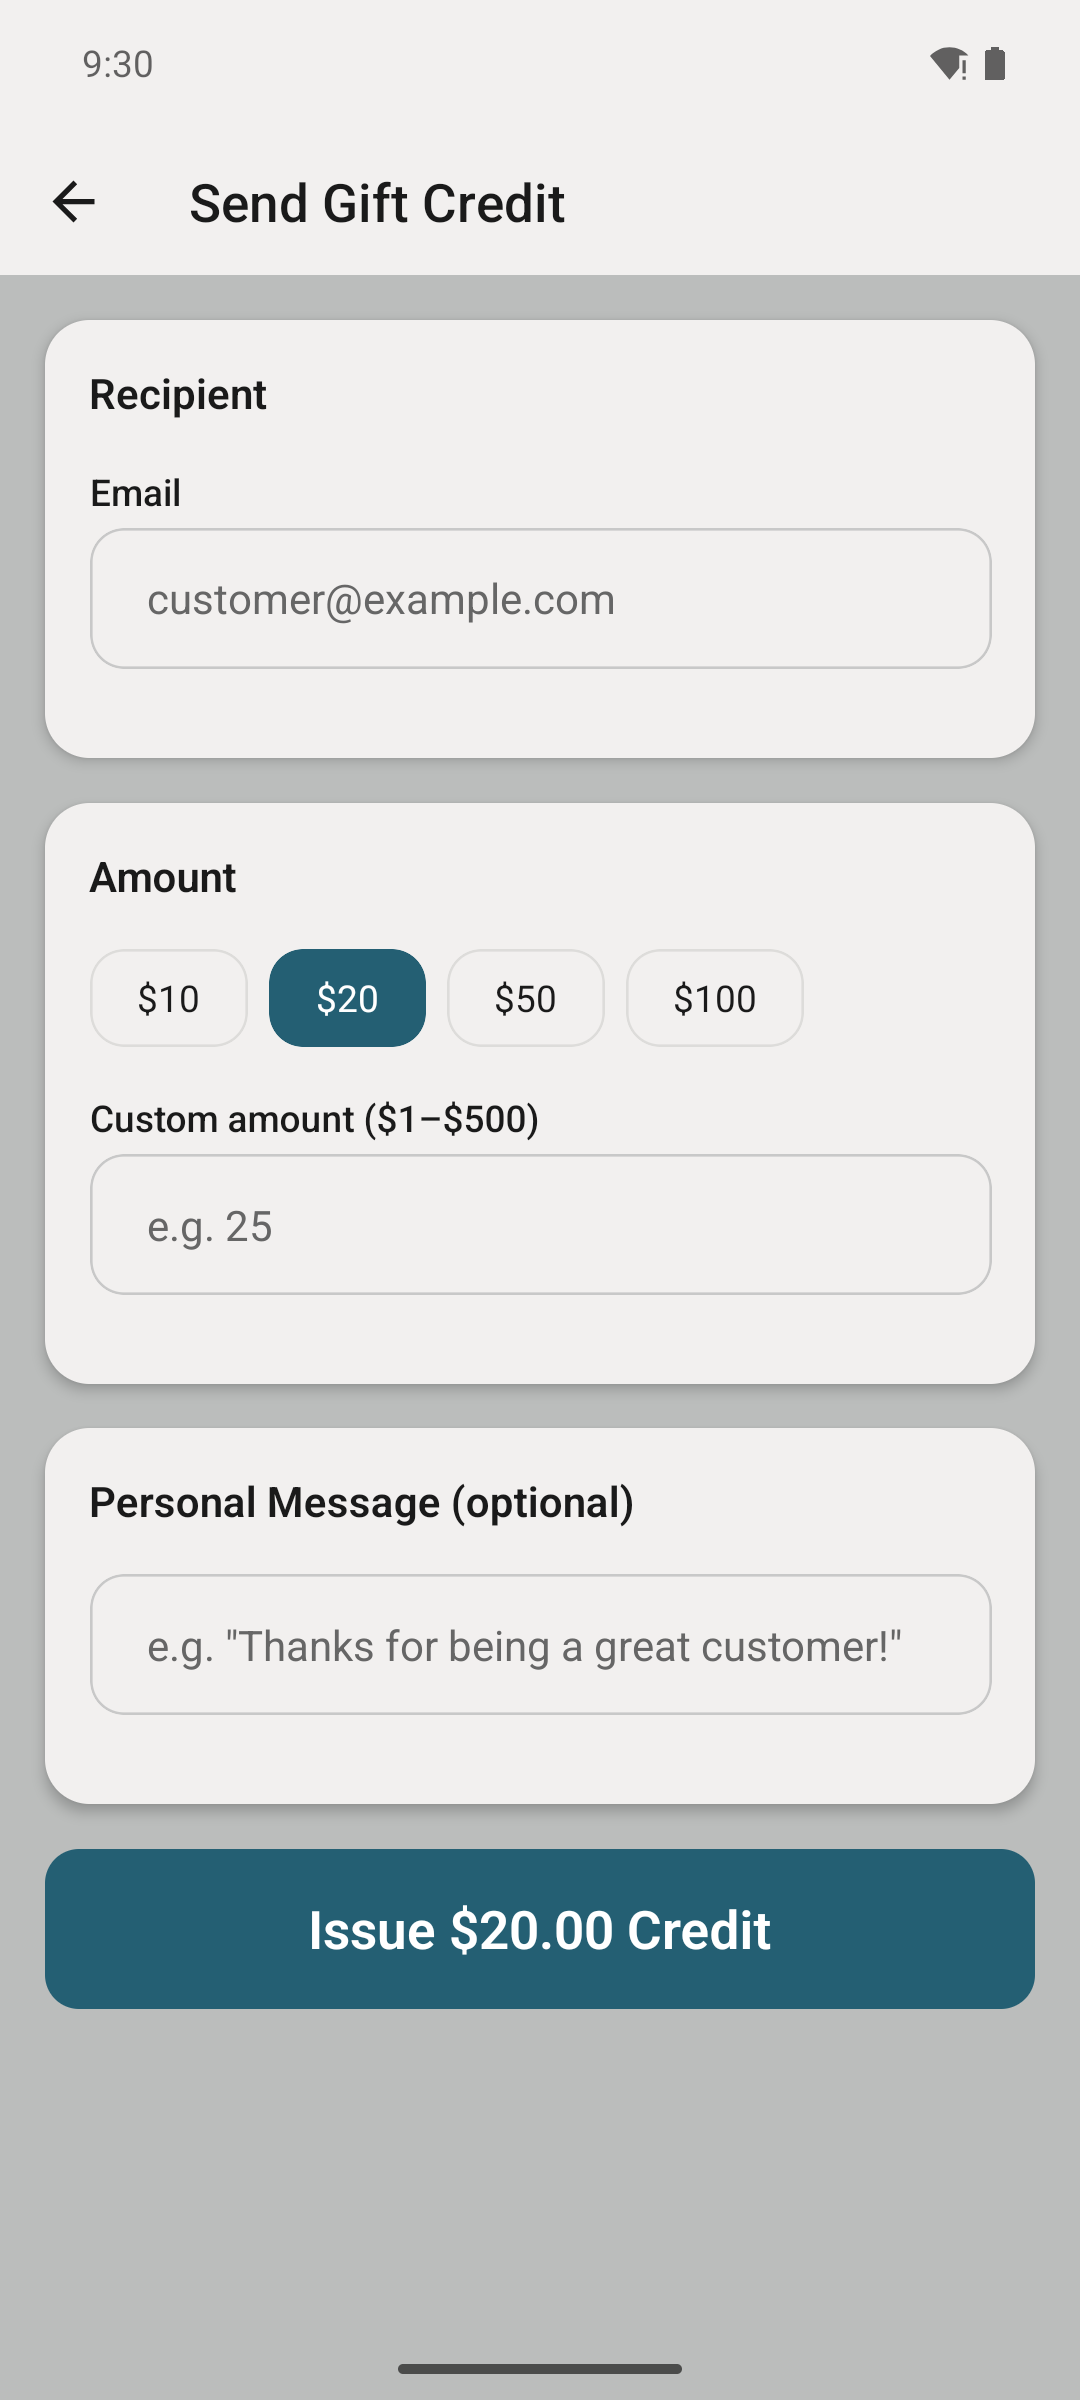
Comp a customer prepaid wash credit (no charge to you beyond the wash itself) — perfect for service recovery or VIPs. They see the balance instantly and it applies automatically at checkout. You can also comp equipment directly: start a free wash or vacuum session from the Scan tab, or push free vending credit straight to a machine while the customer stands in front of it.
The customer's Rewards tab shows their points balance, wash credit, and what they can redeem — and lets them gift a wash to a friend.
Automatically reach customers who haven't washed in a while with a time-limited offer.
Choose how many days of inactivity triggers a winback (e.g. 30 days), the incentive to send — a percent-off promo, a gift wash, free bay or vacuum minutes, free vending credit, or gift-credit dollars deposited straight into their balance — and let RinsePay handle the outreach. Lapsed customers get a nudge with a one-tap offer.
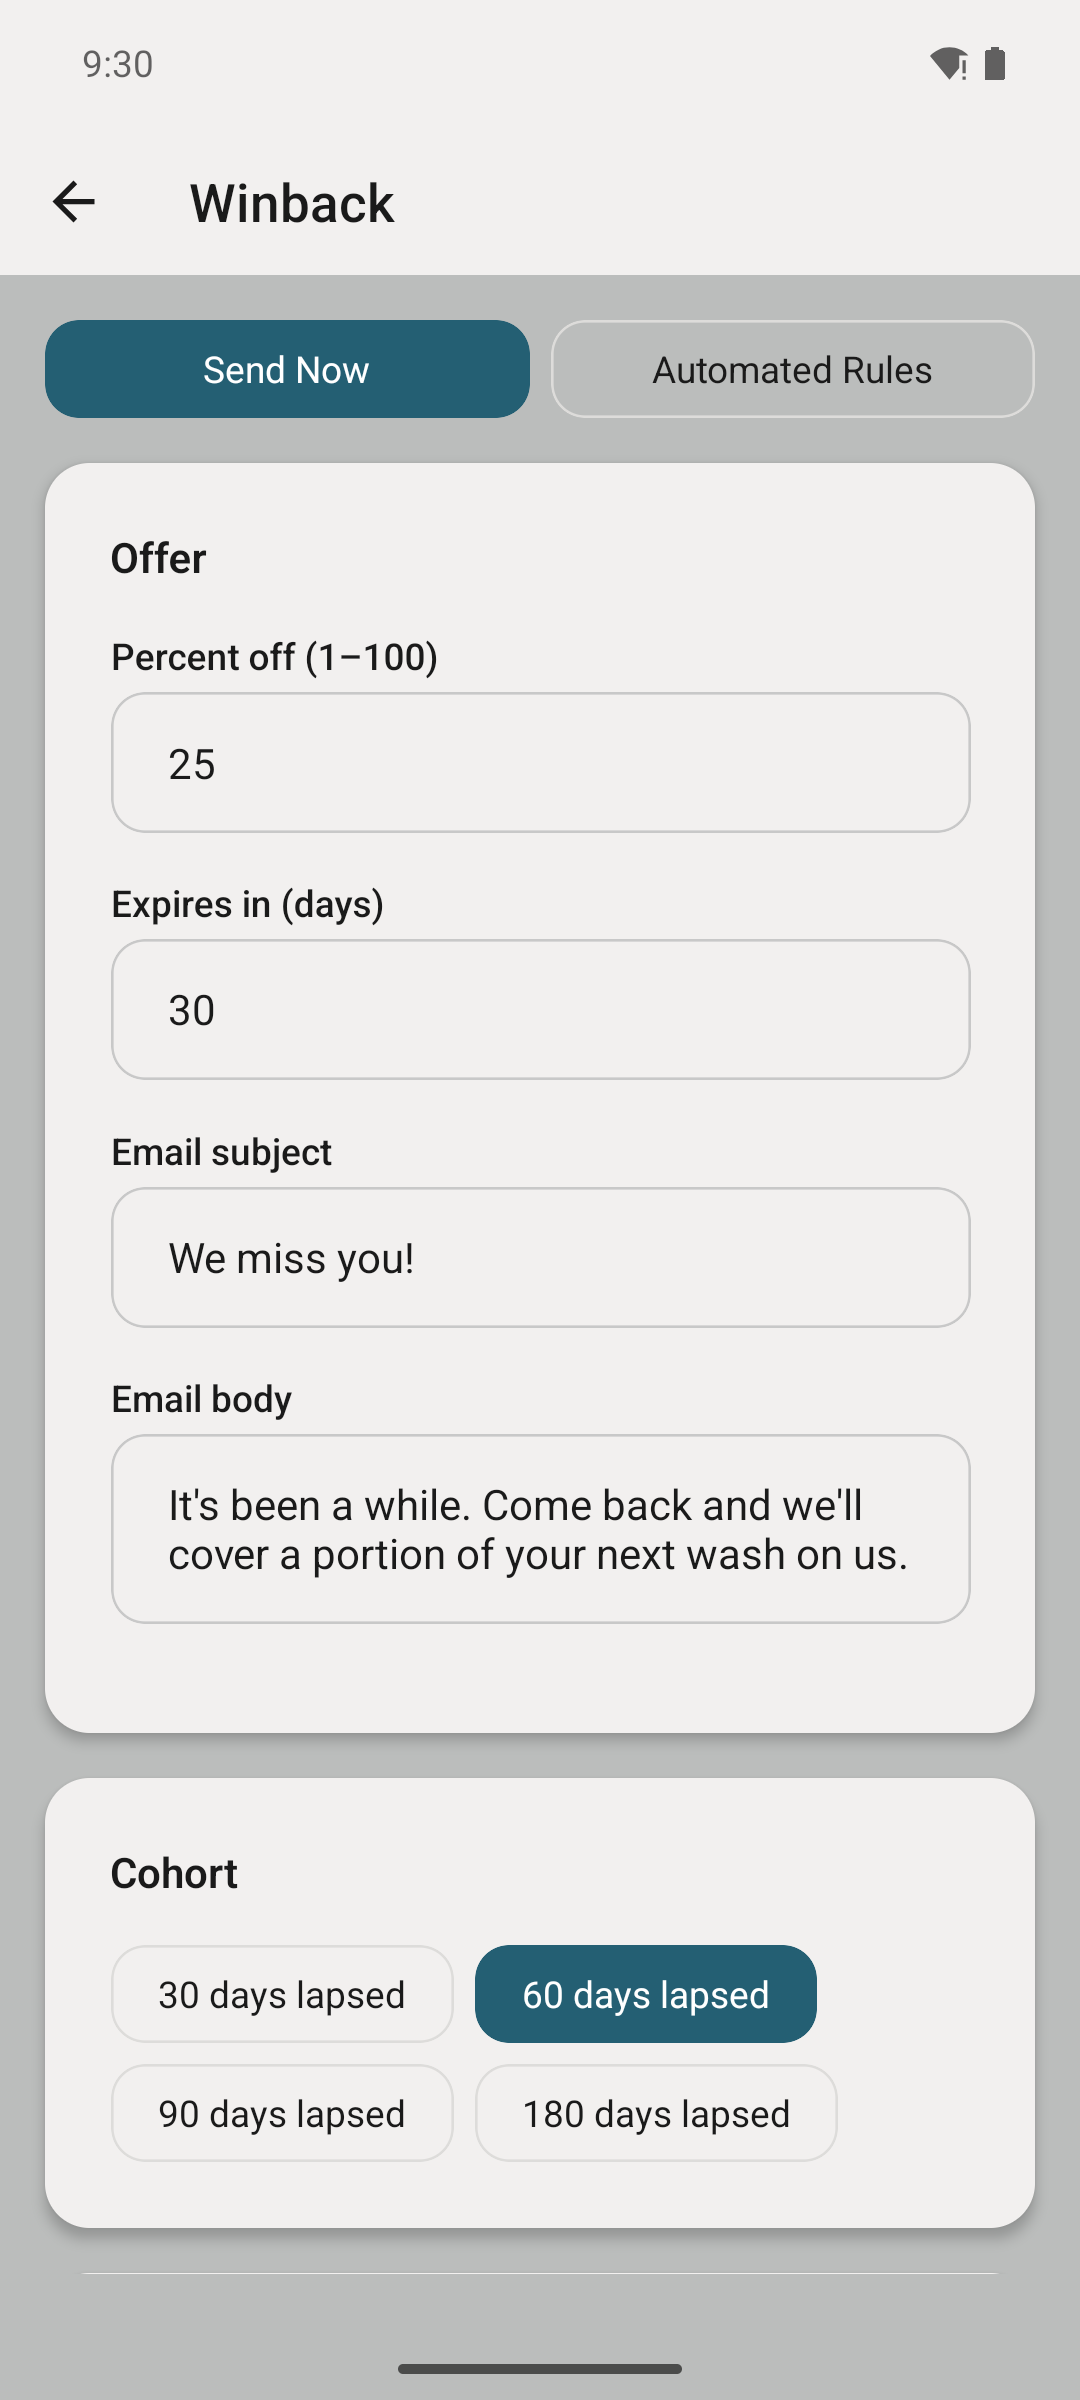
See how many lapsed customers came back and what the campaign earned, so you can tune the offer and timing.
Every report is one tap from the dashboard, resolved in your timezone, for any date range — built to hand straight to your accountant.
Pick a date range (today, last 7/30 days, month, year-to-date, or custom), then export. Choose the locations you want included — leave all selected to capture owner-wide revenue like bundles and memberships.
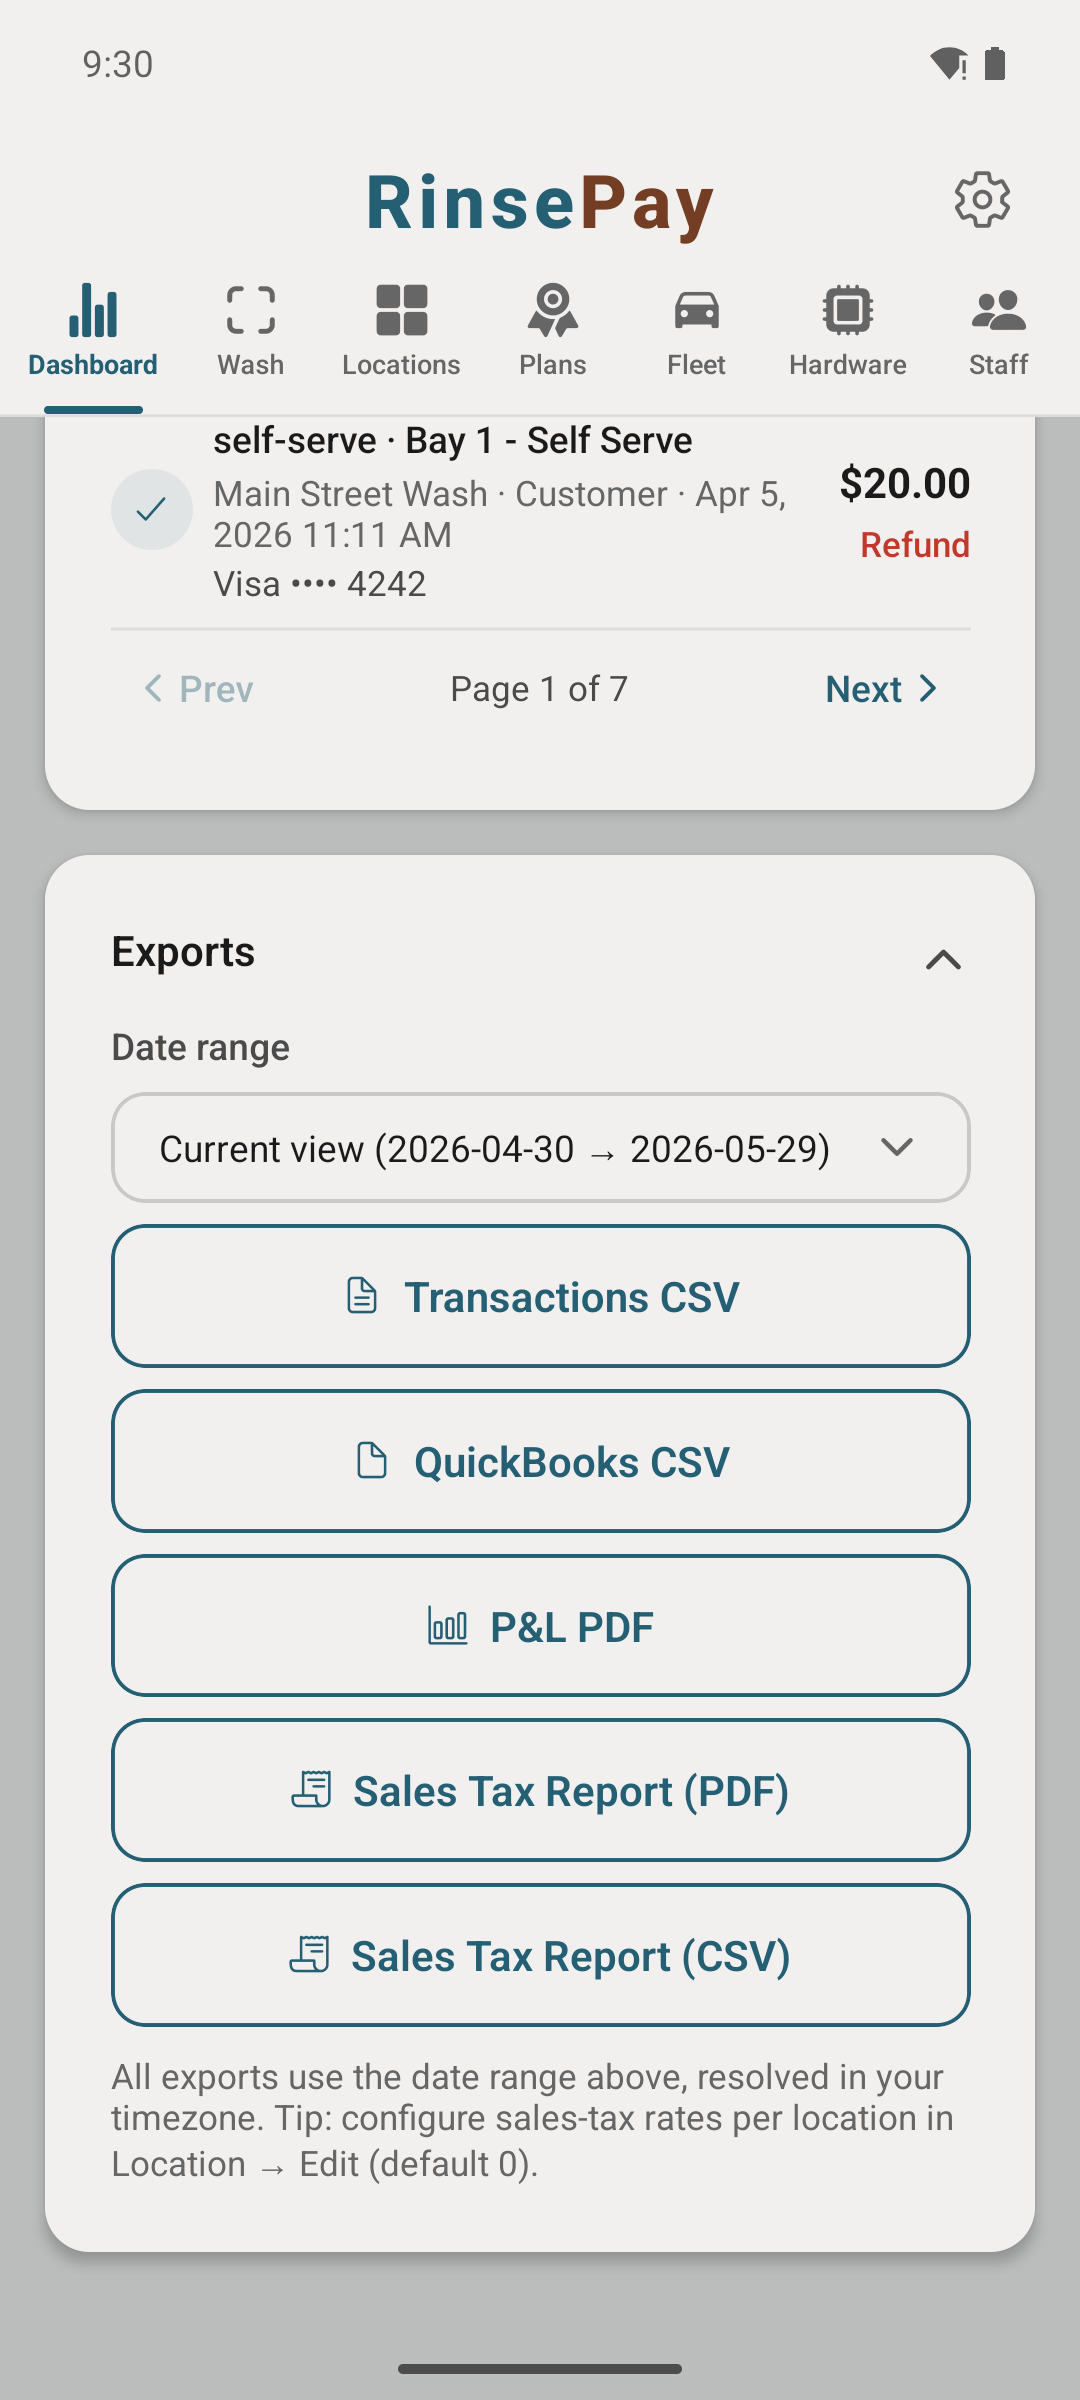
The P&L breaks revenue down by location and by income type (automatic by tier, self-serve, vacuums, vending, fleet, subscriptions, bundles) and nets out Stripe processing fees so "net" is your real take-home. The Sales Tax report (PDF or CSV) backs out tax per location, and Transactions exports as a plain CSV or a QuickBooks-ready CSV.
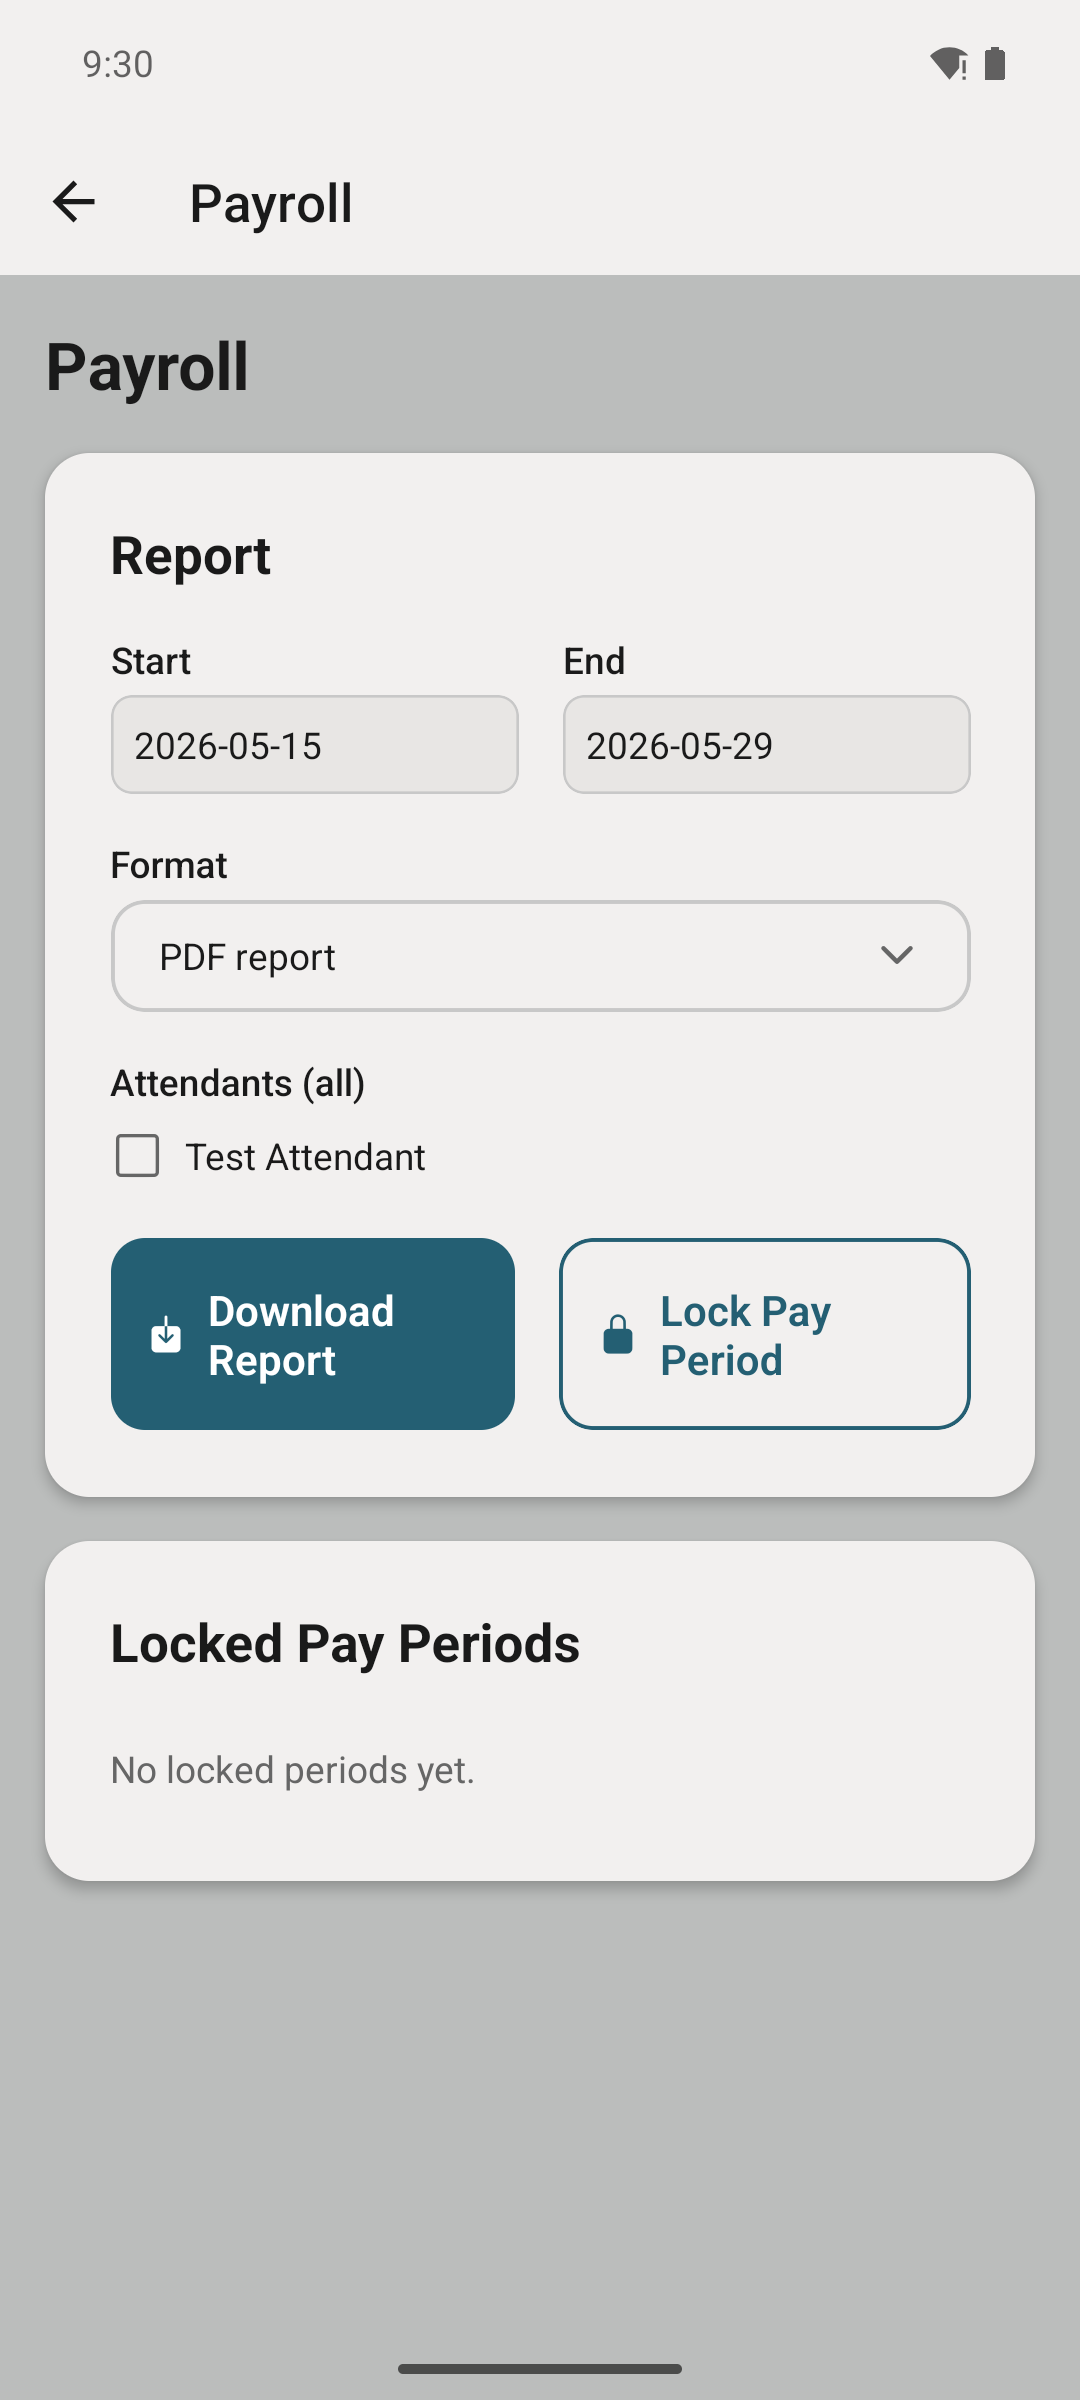
Export attendant hours and pay for any period as a PDF or a payroll-provider CSV (Gusto, QuickBooks, ADP, or generic). Timecards are editable with an audit trail before you run payroll.
Attendants help you run the bays: issue refunds, start washes to test equipment, report problems. They use a stripped-down version of the owner app.
From the owner app, Staff lists every attendant on your team. Tap Add attendant to add one.
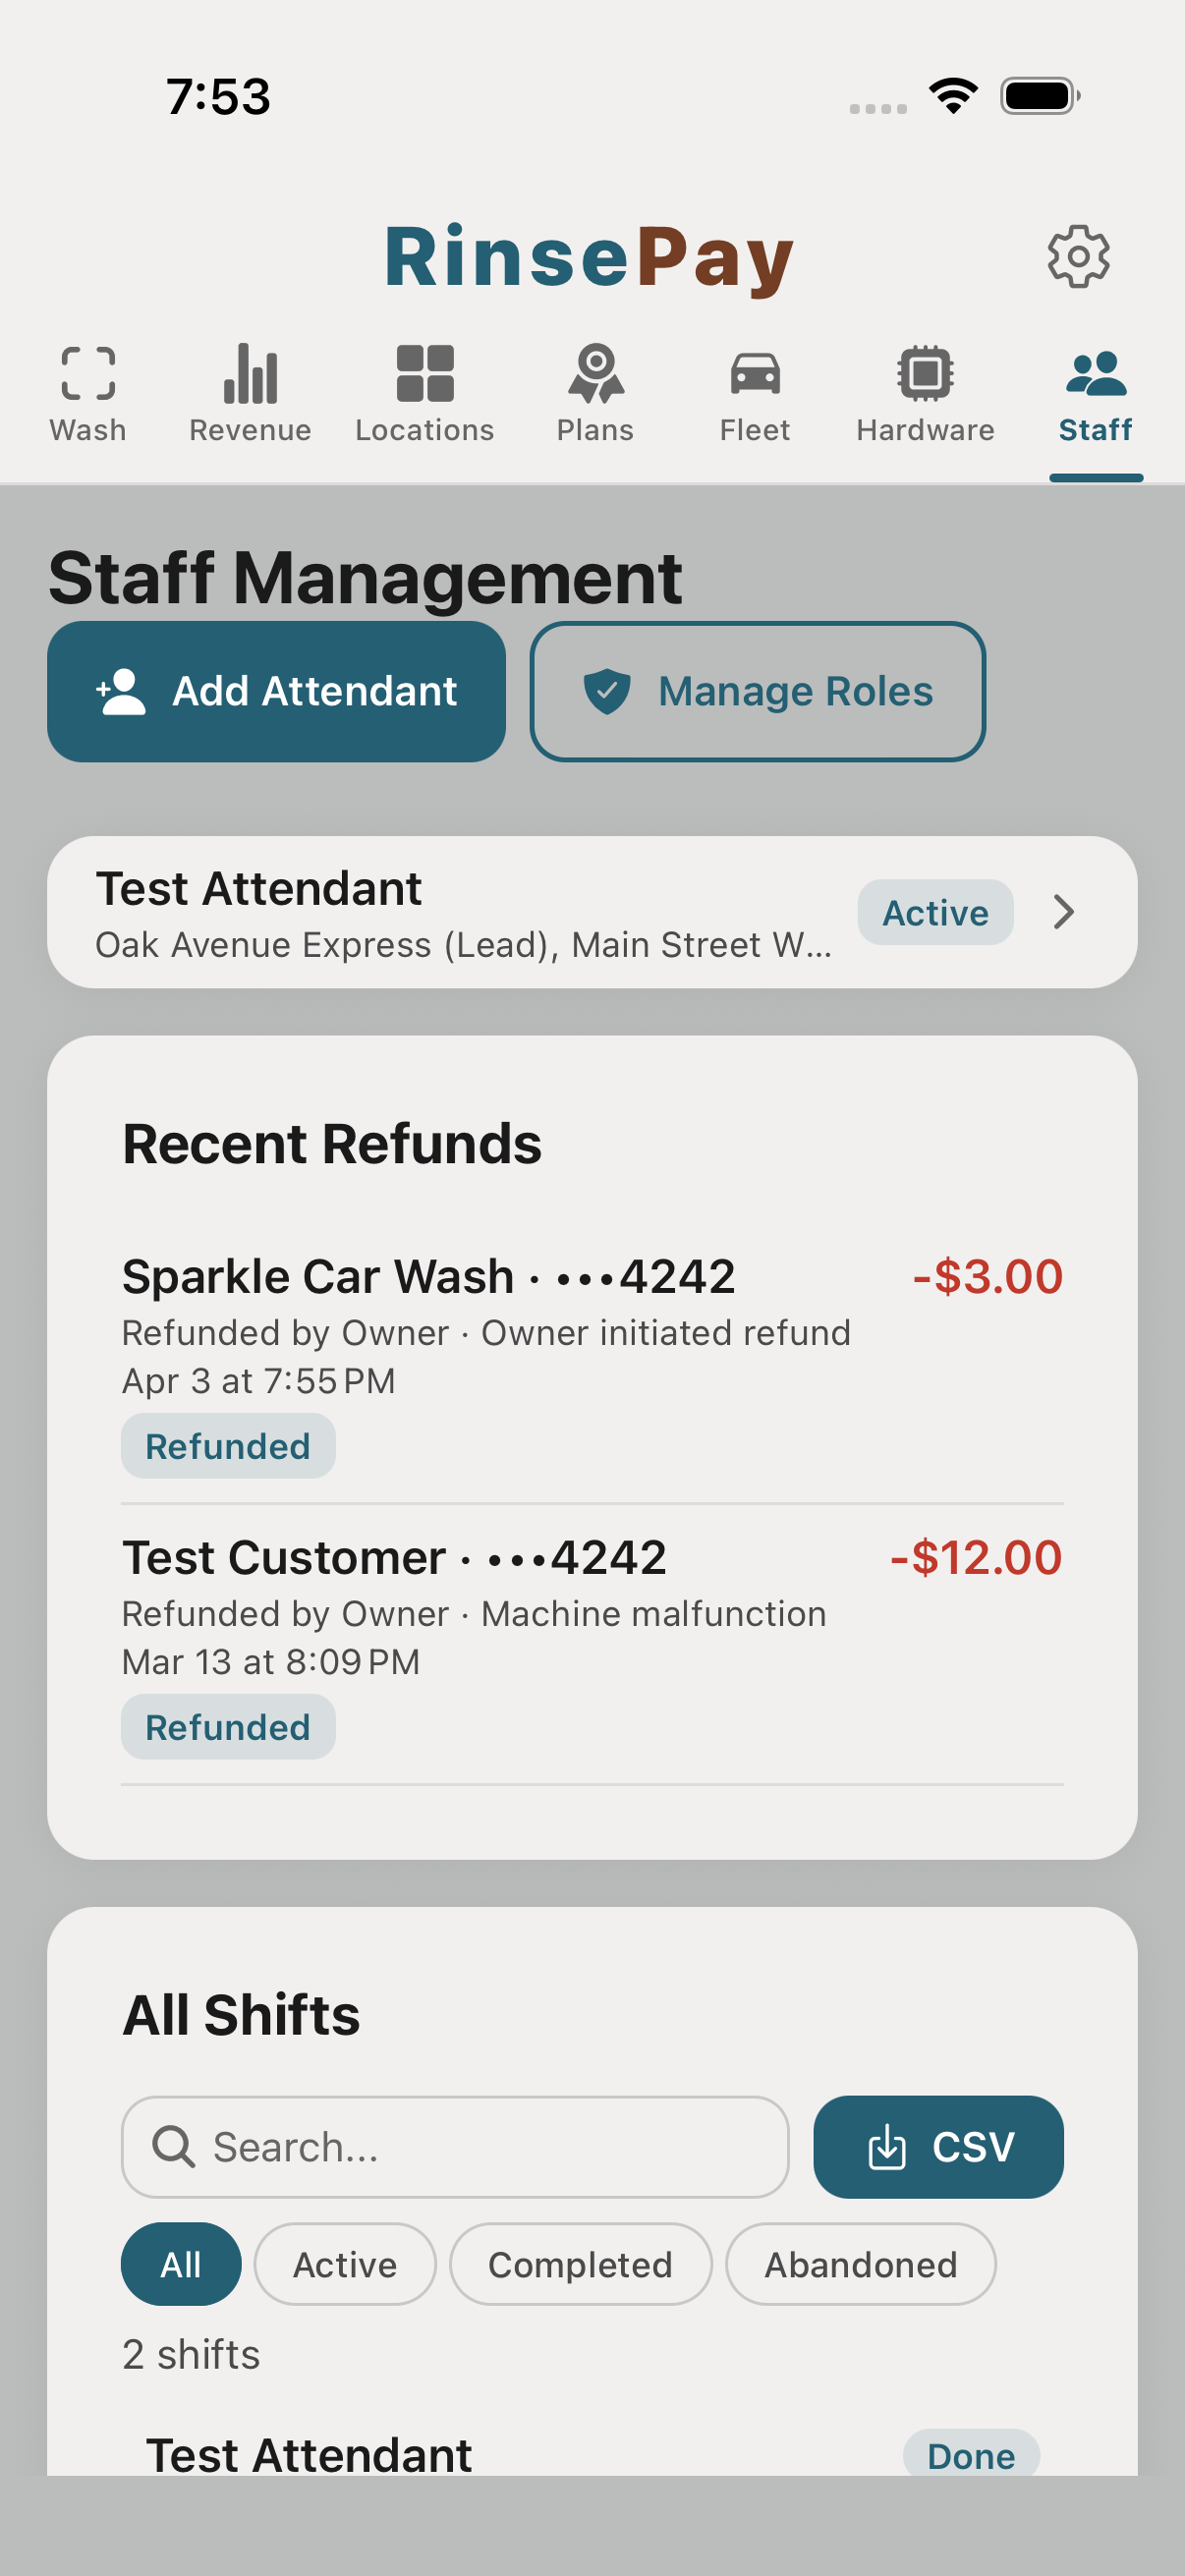
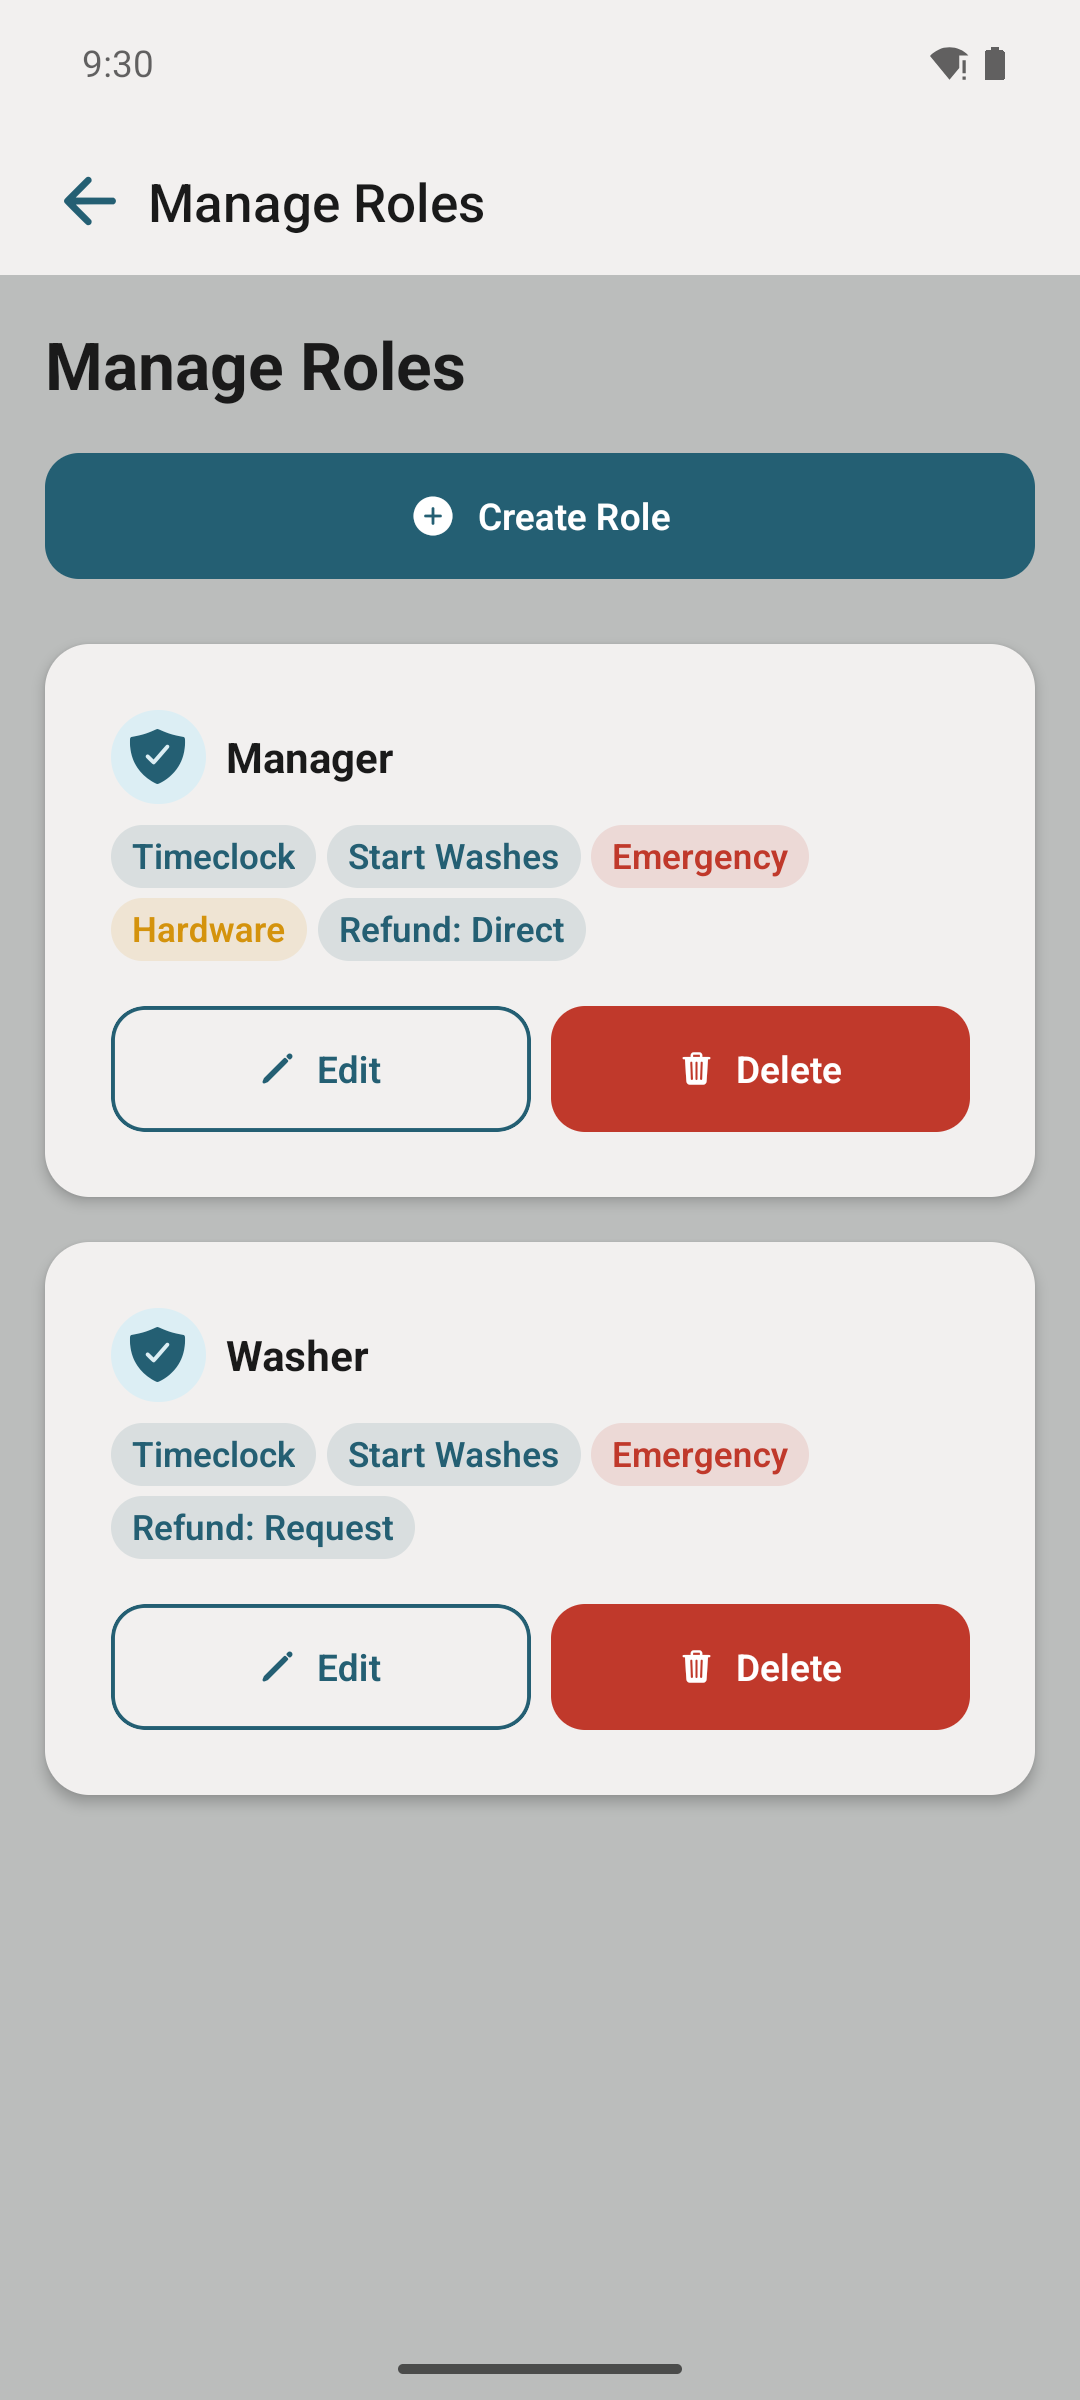
Tap Manage Roles → Create Role. Name the role ("Shift Lead", "Entry Attendant") and pick the permissions it grants:
You'll assign each worker to a role in the next step — so permissions travel with the role, not the person.
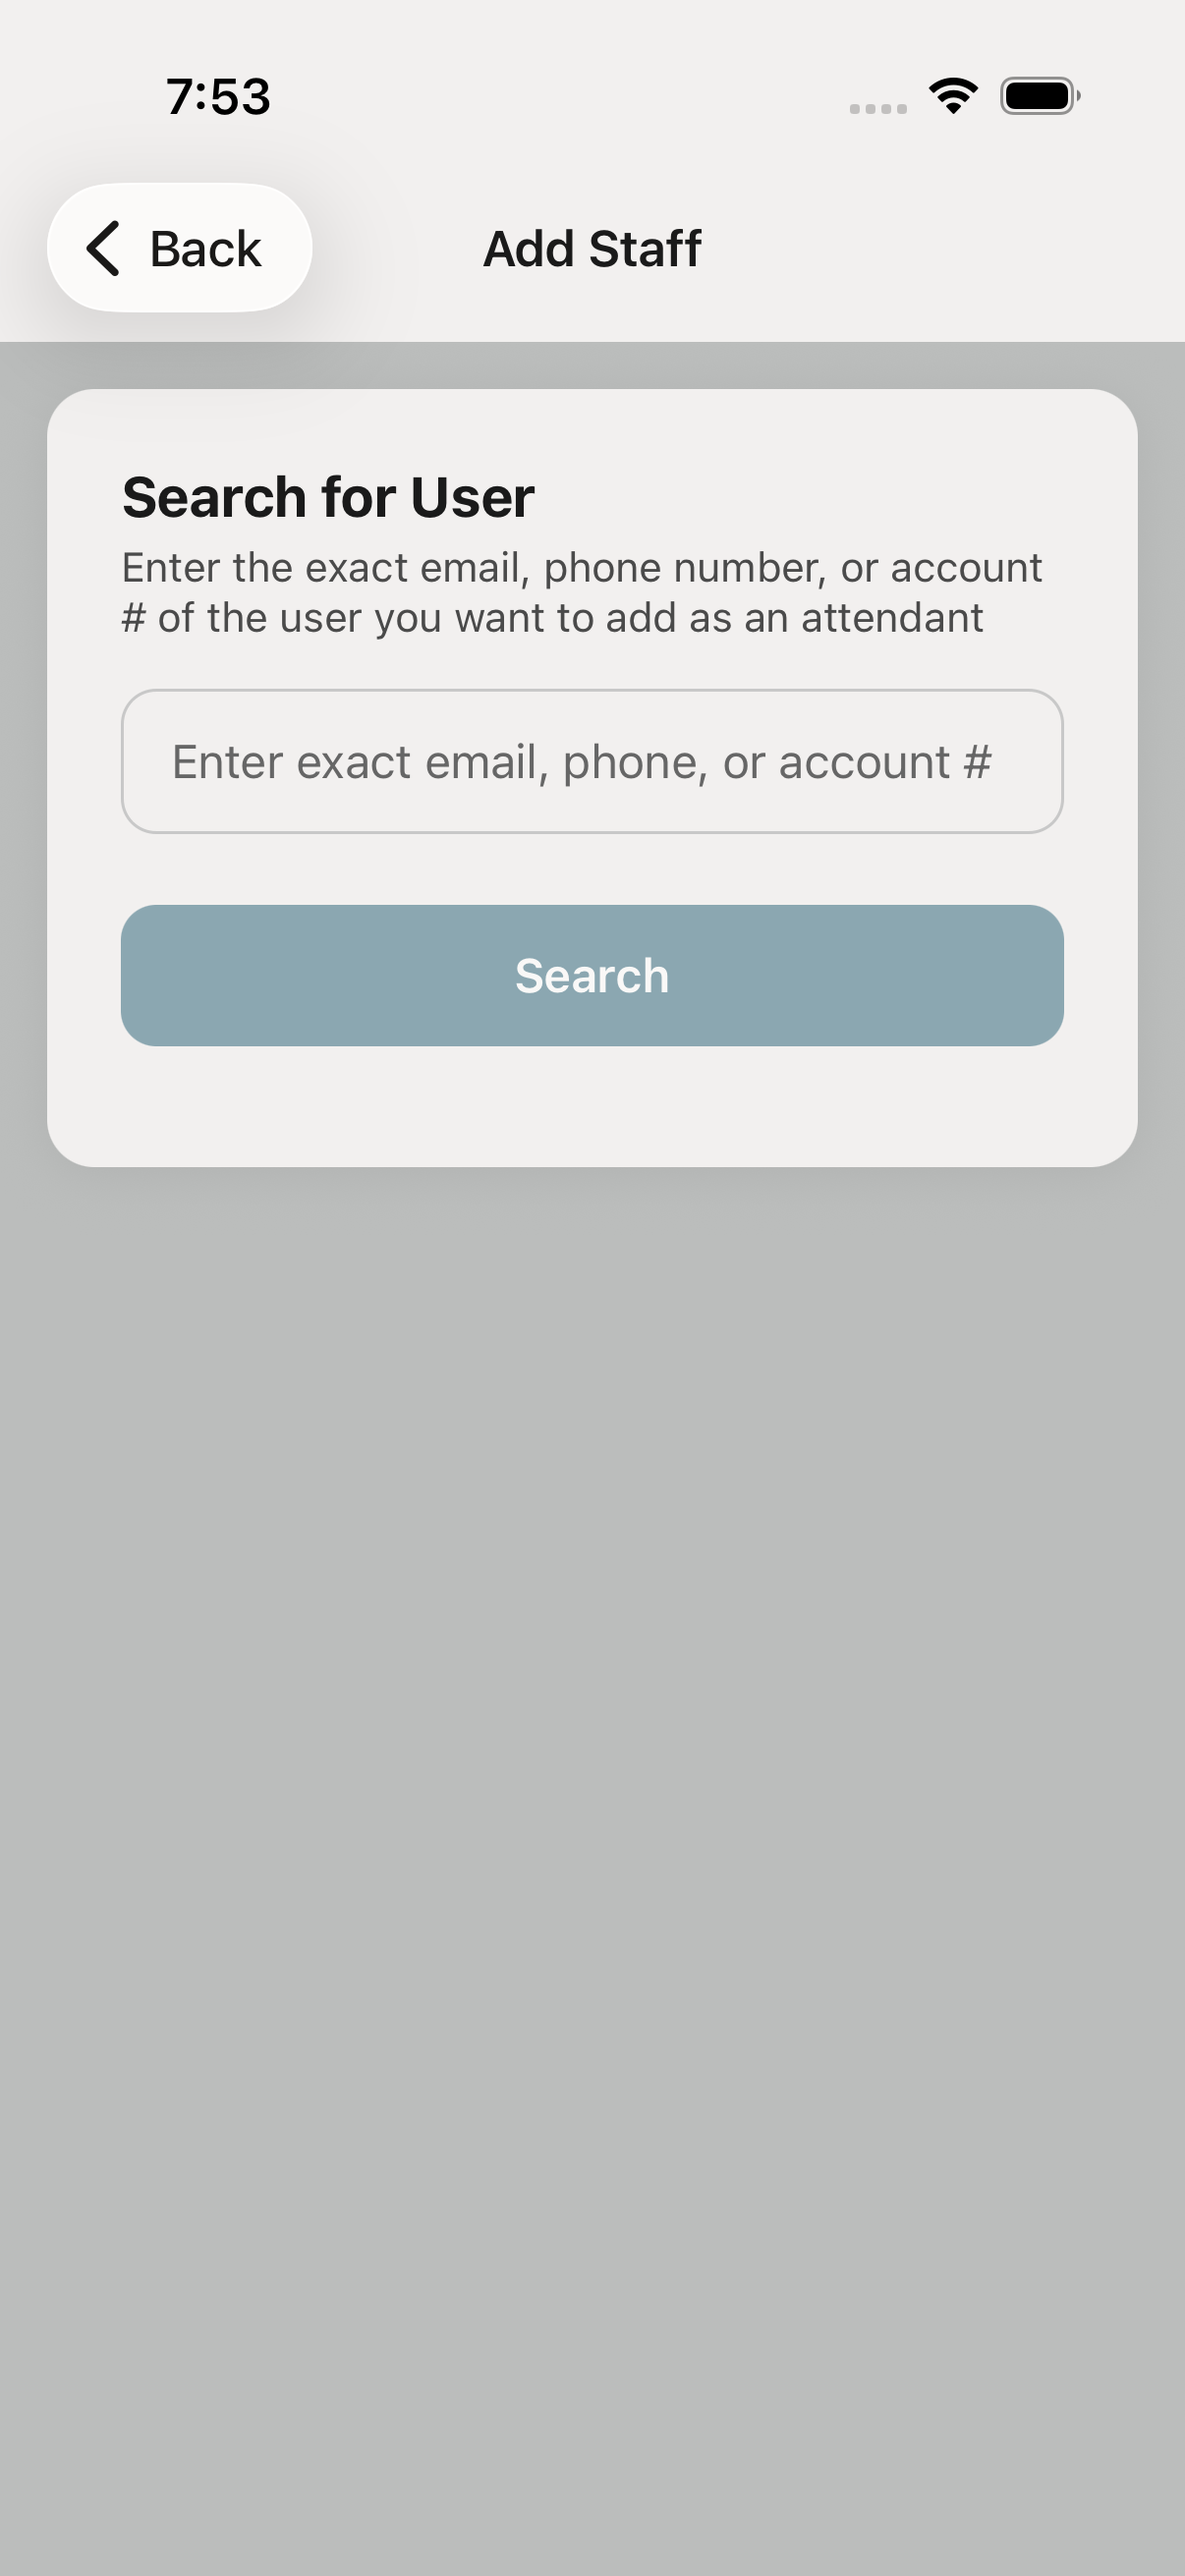
Tell each worker to install RinsePay and sign up as a regular customer using their email. Once they have an account, you can add them to Staff.
Back in Staff → Add attendant, enter the worker's email (the one they signed up with). They're now linked to your location and see the attendant toolset in-app.
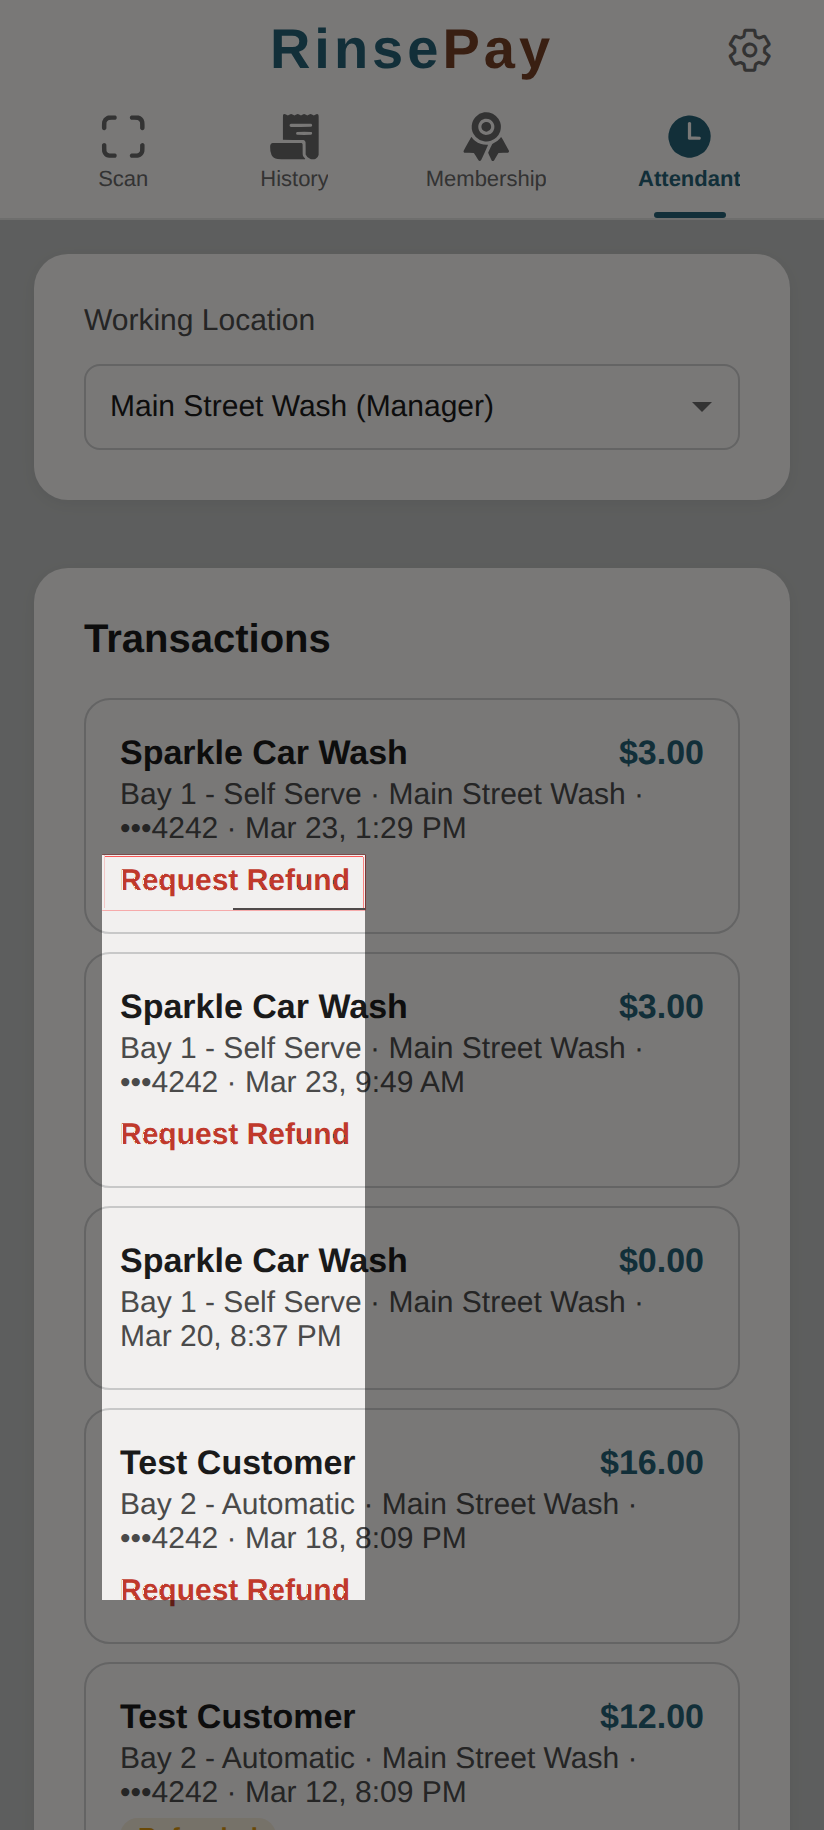
When a customer needs a refund, the attendant opens the sales list, finds the purchase in question, and refunds it (or requests owner approval, depending on their permission). Attendants can also start equipment without a charge — bays and vacuums — push free vending credit to a machine, and hand out reward QR codes from templates you define (a percent off, a free wash, or free minutes — great for service recovery at the bay).
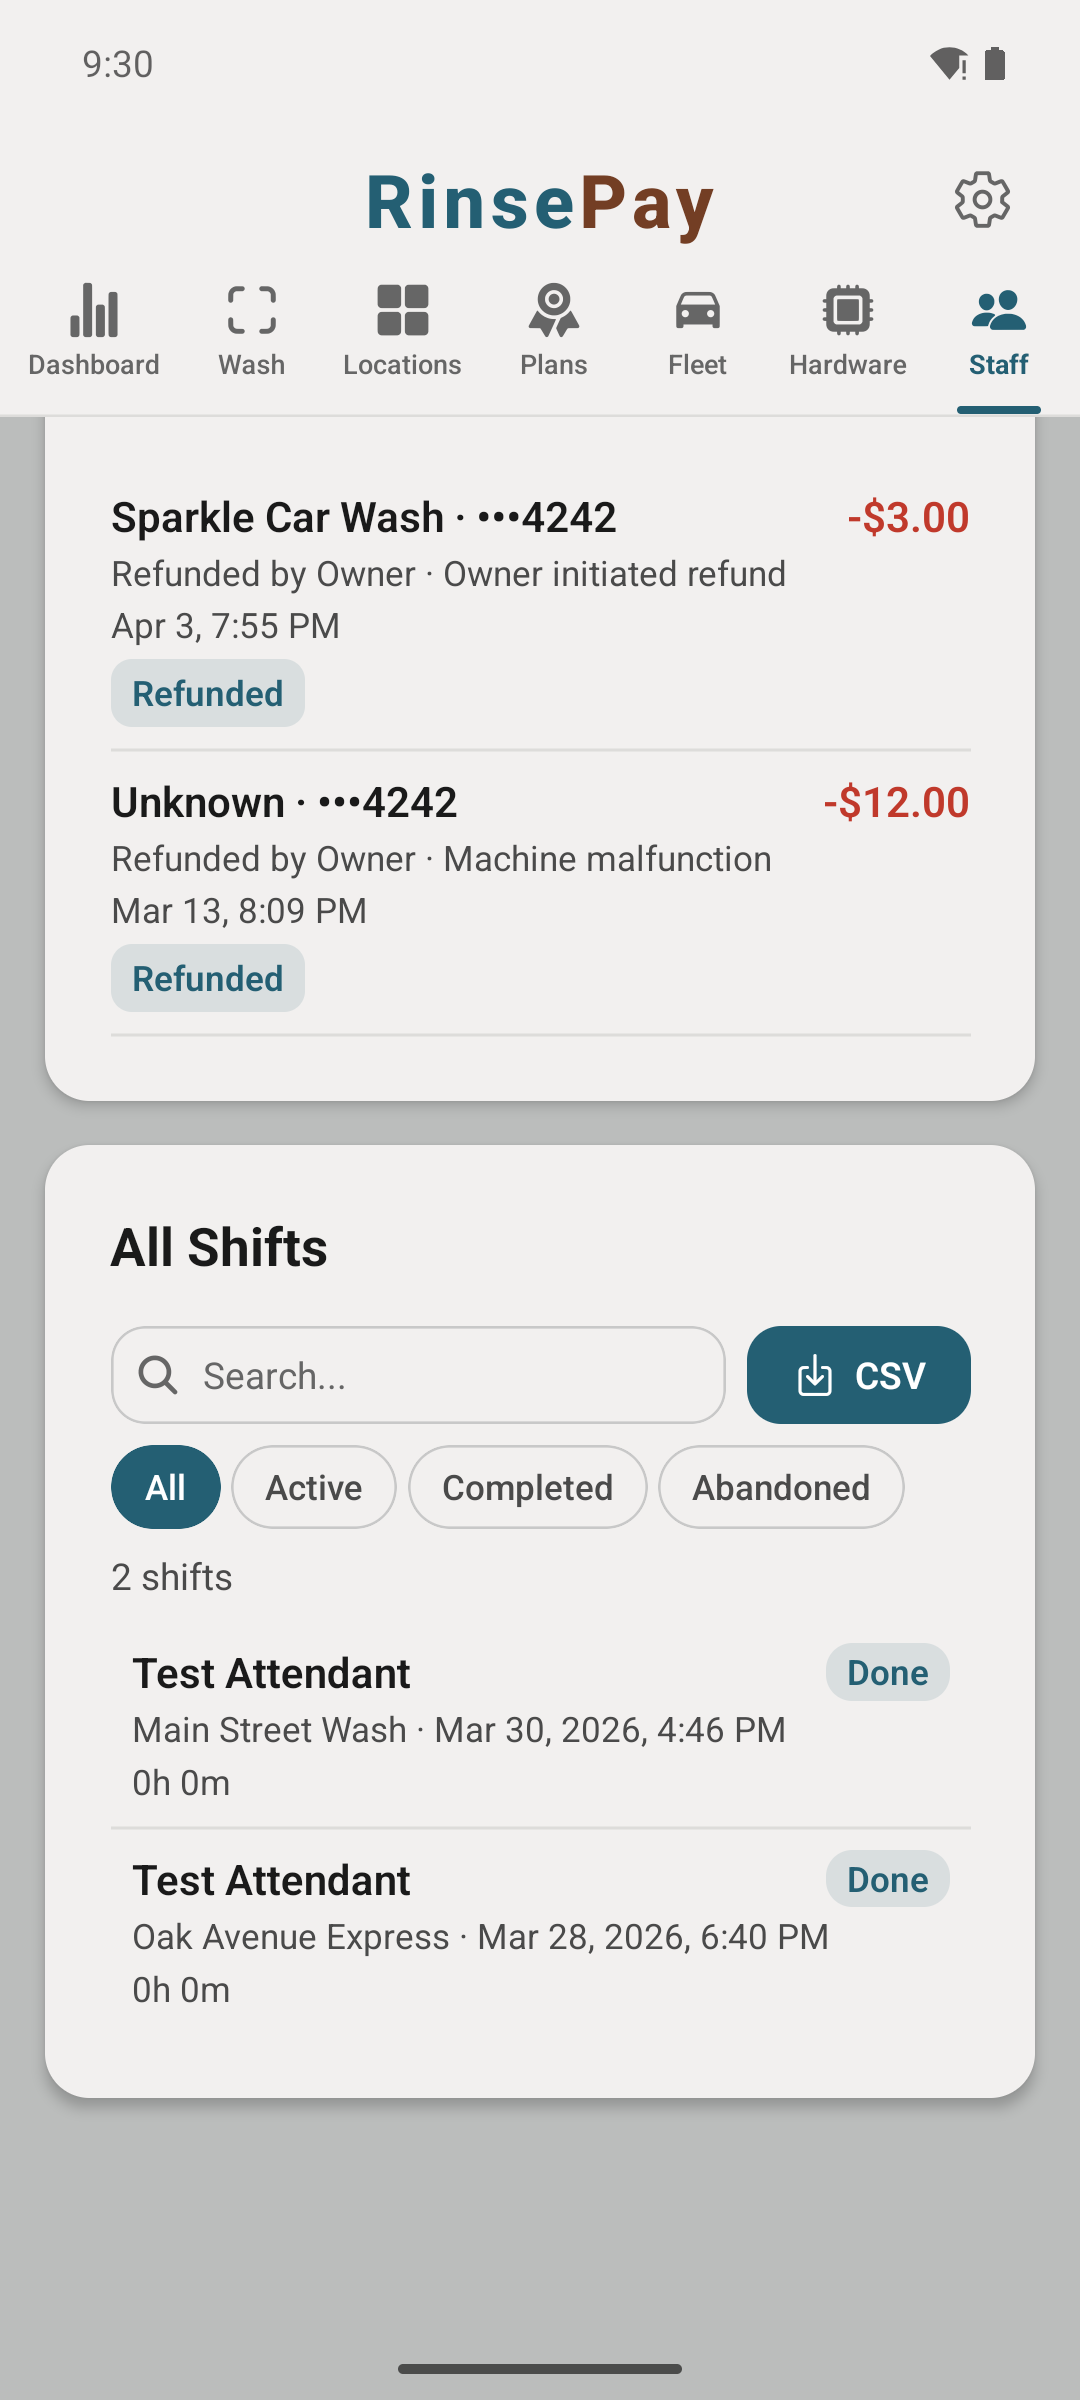
Every attendant shift is logged — who clocked in, where, for how long. Audit hours for payroll anytime from the Staff → Timeclock view.
You're running a fleet account for your company. Here's how to get set up and add your team.
Download RinsePay from the App Store or Google Play and create a regular customer account with the email you want to manage the fleet under. This is the same signup flow every RinsePay user goes through.
Scan the wash's Fleet Signup QR and submit a quick application — company name, billing contact, and a rough vehicle count. (No QR handy? Just give the owner your email and they'll add you directly.) Once the owner approves, you're set up as the fleet manager — nothing else to tap on your end.
Open RinsePay and tap the Fleet section. You'll see your company's account, its balance, and a members tab for adding teammates.
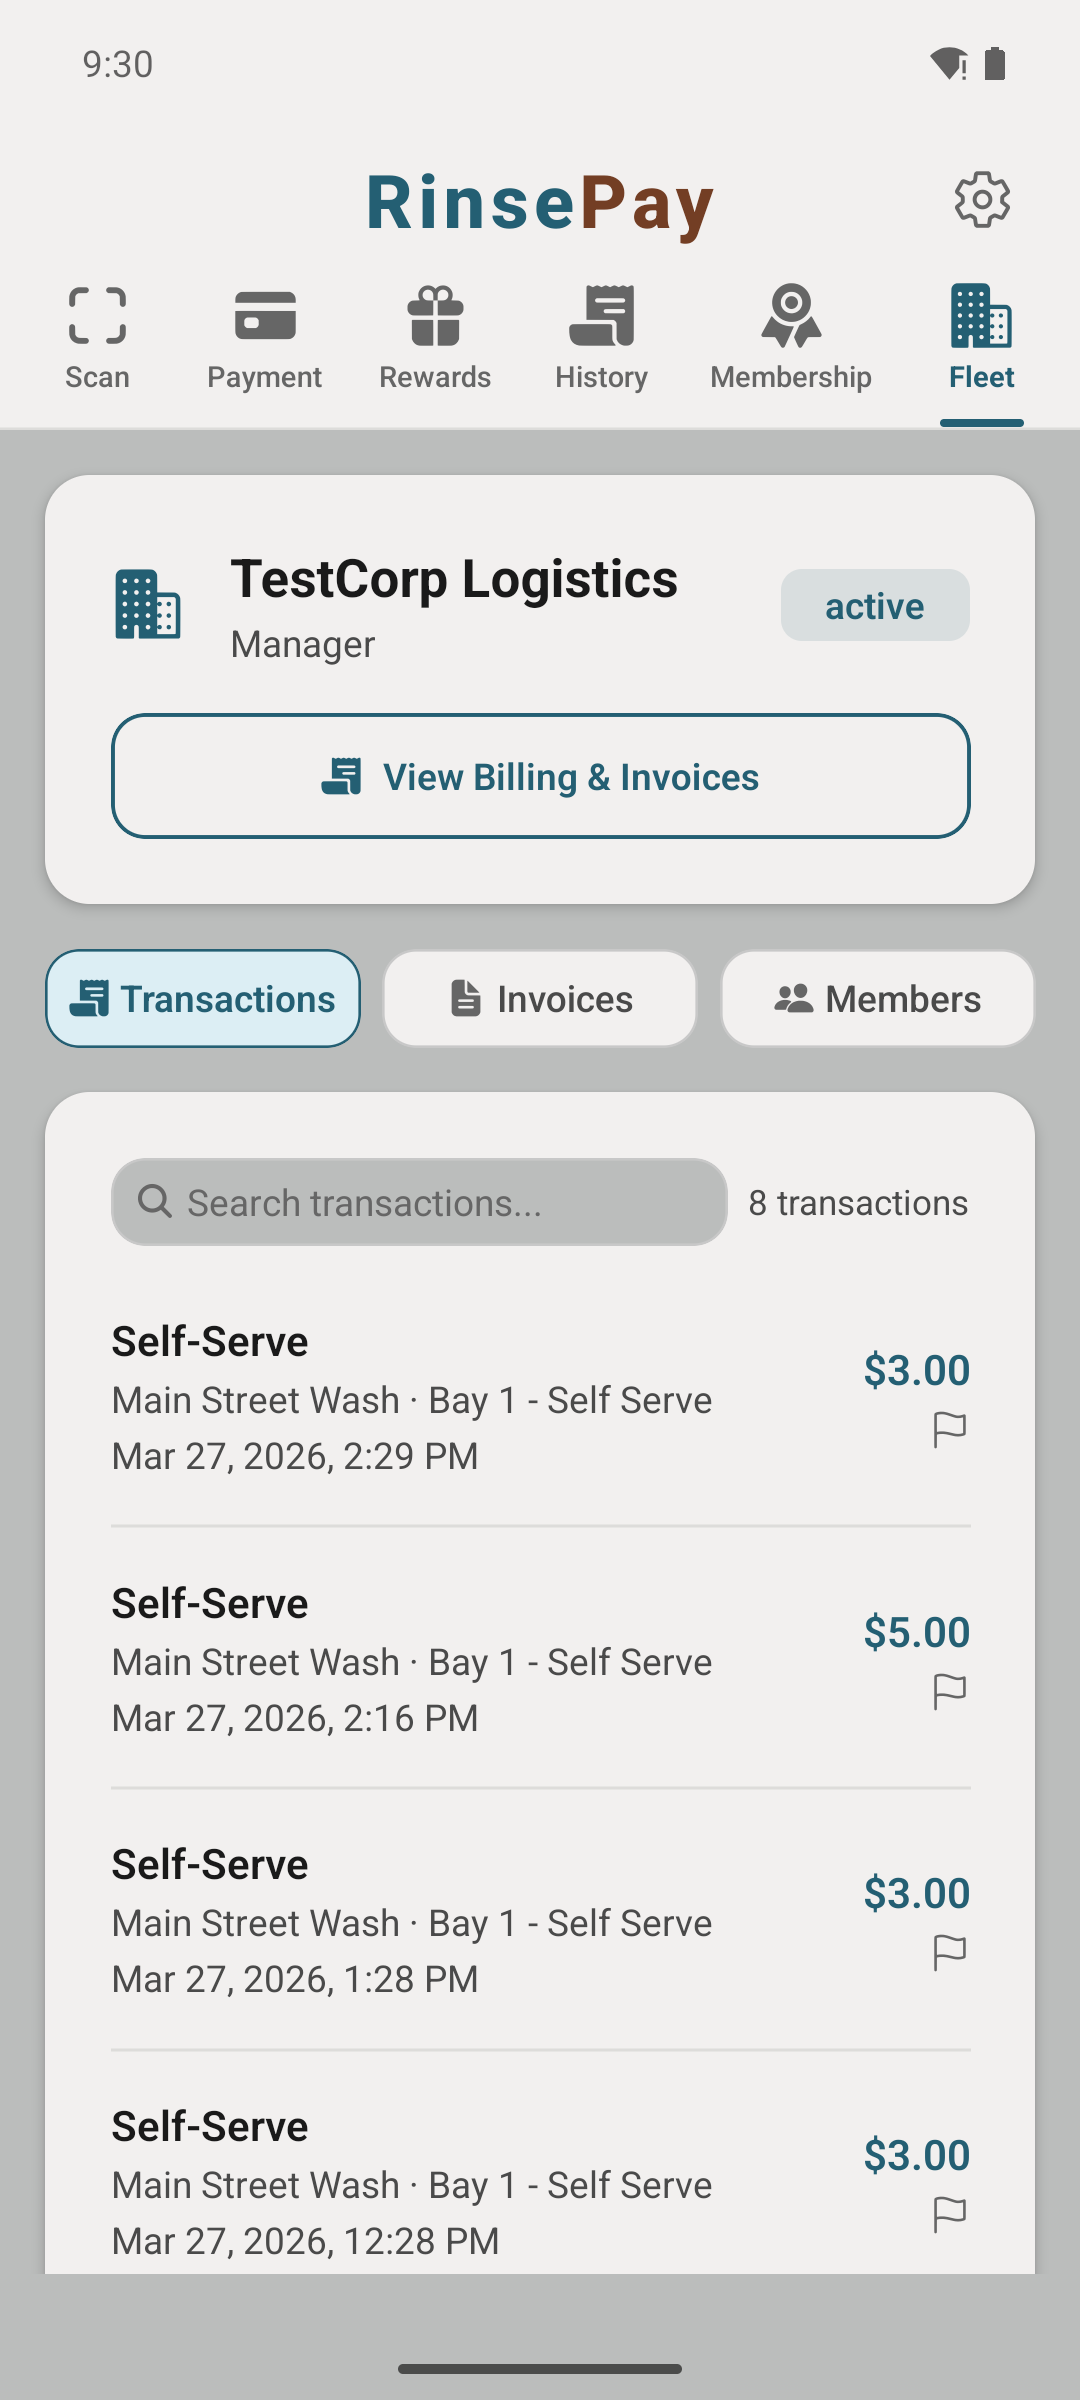
Under Members, enter each teammate's email — the one they signed up with as a customer. Each teammate then has the option to charge a wash to the fleet at payment — their choice, per wash.
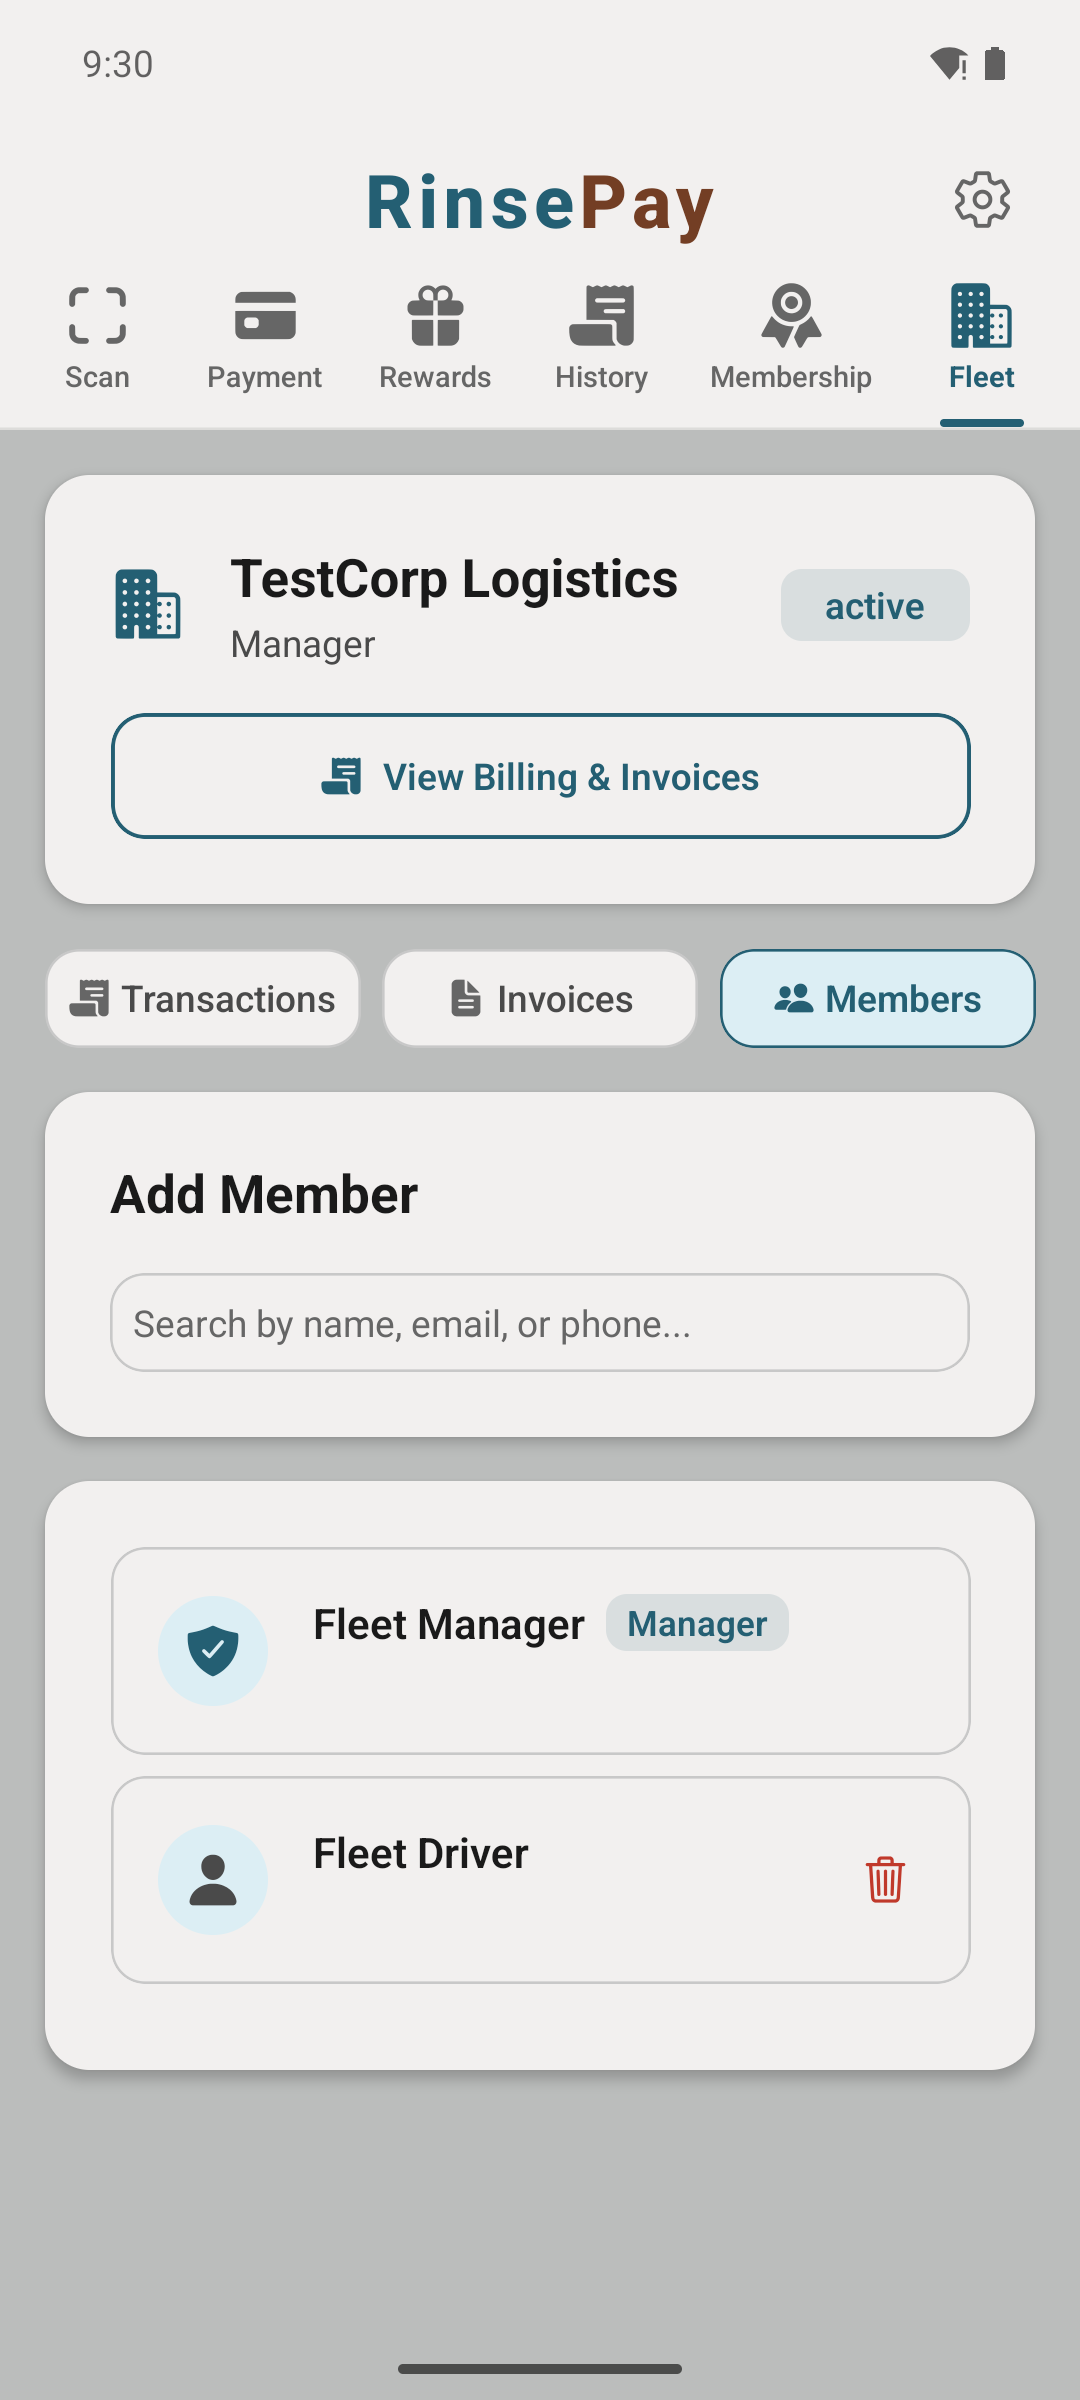
The Transactions view shows every wash charged to the fleet — driver, bay, duration, amount. Check it whenever you want to sanity-check usage before the monthly invoice.
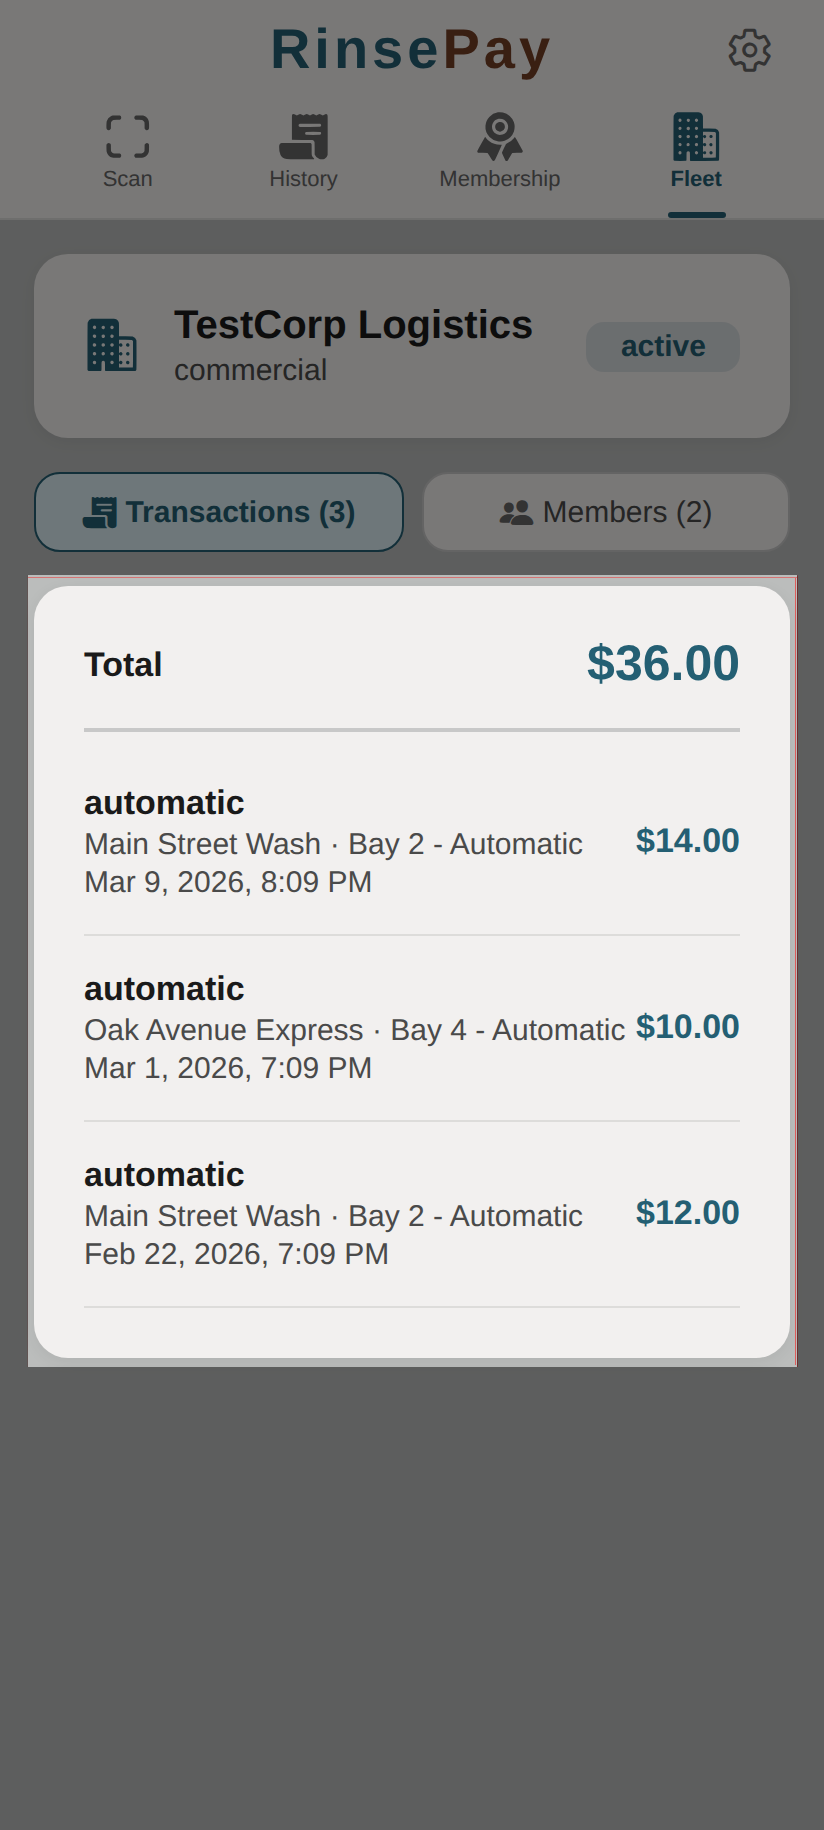
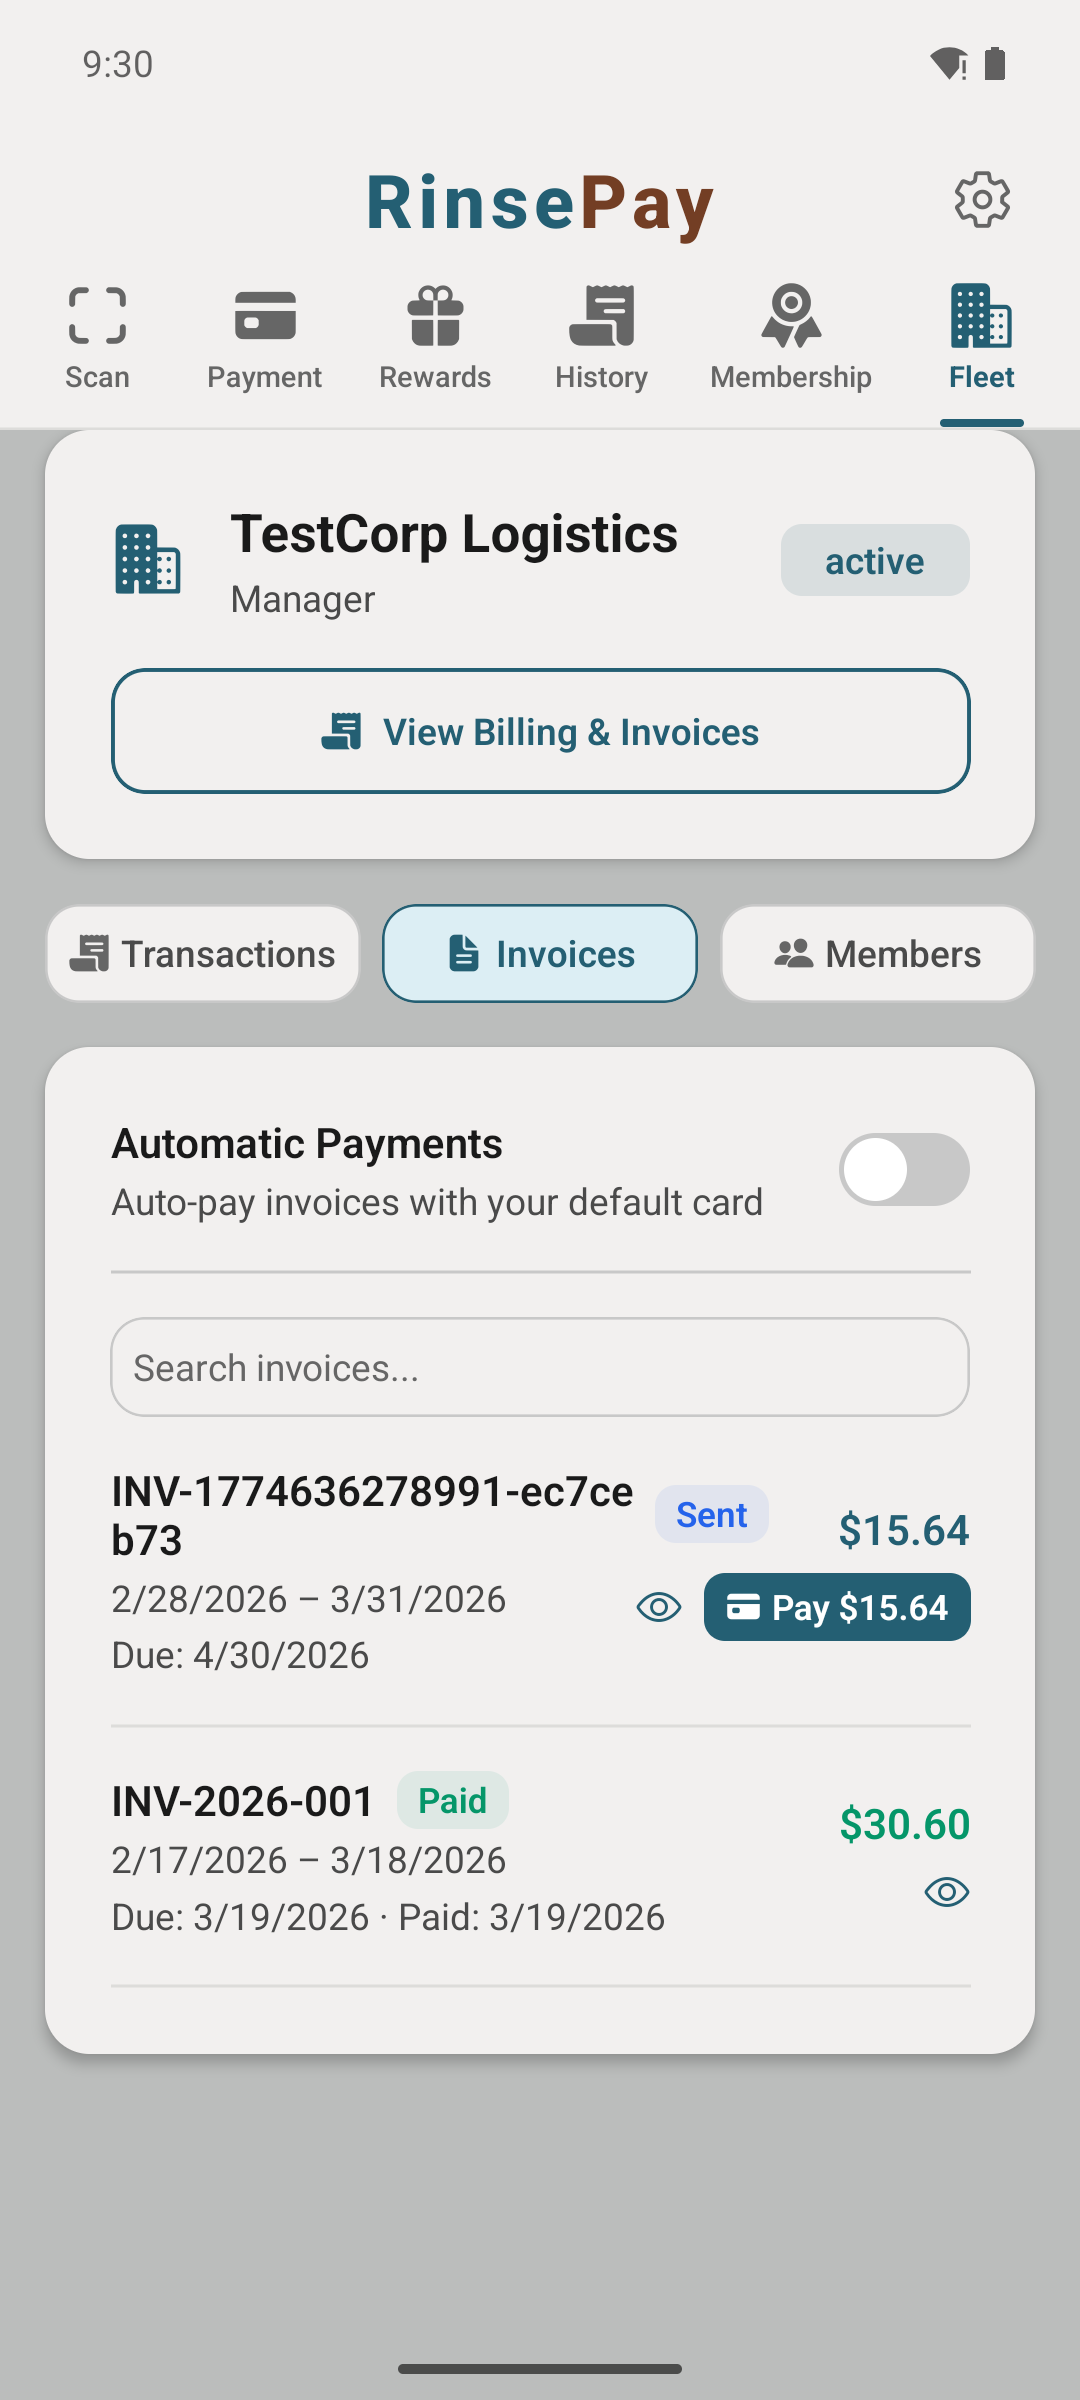
At the end of each month, the wash owner generates your invoice and emails it to the billing contact on file. One invoice, every wash rolled up.
You're working at a location for a RinsePay car wash owner. Here's how the attendant app works — start free washes and vacuums, push vending credit, hand out reward QR codes, issue refunds, report problems, track your hours.
Download RinsePay and create a regular customer account with your email. Attendants use the same app as customers — the owner flips on the attendant features after you sign up.
The owner adds you to Staff, assigns you to a role (which determines what you can do — refund limit, equipment control, etc.), and you're live. No code or invite needed.
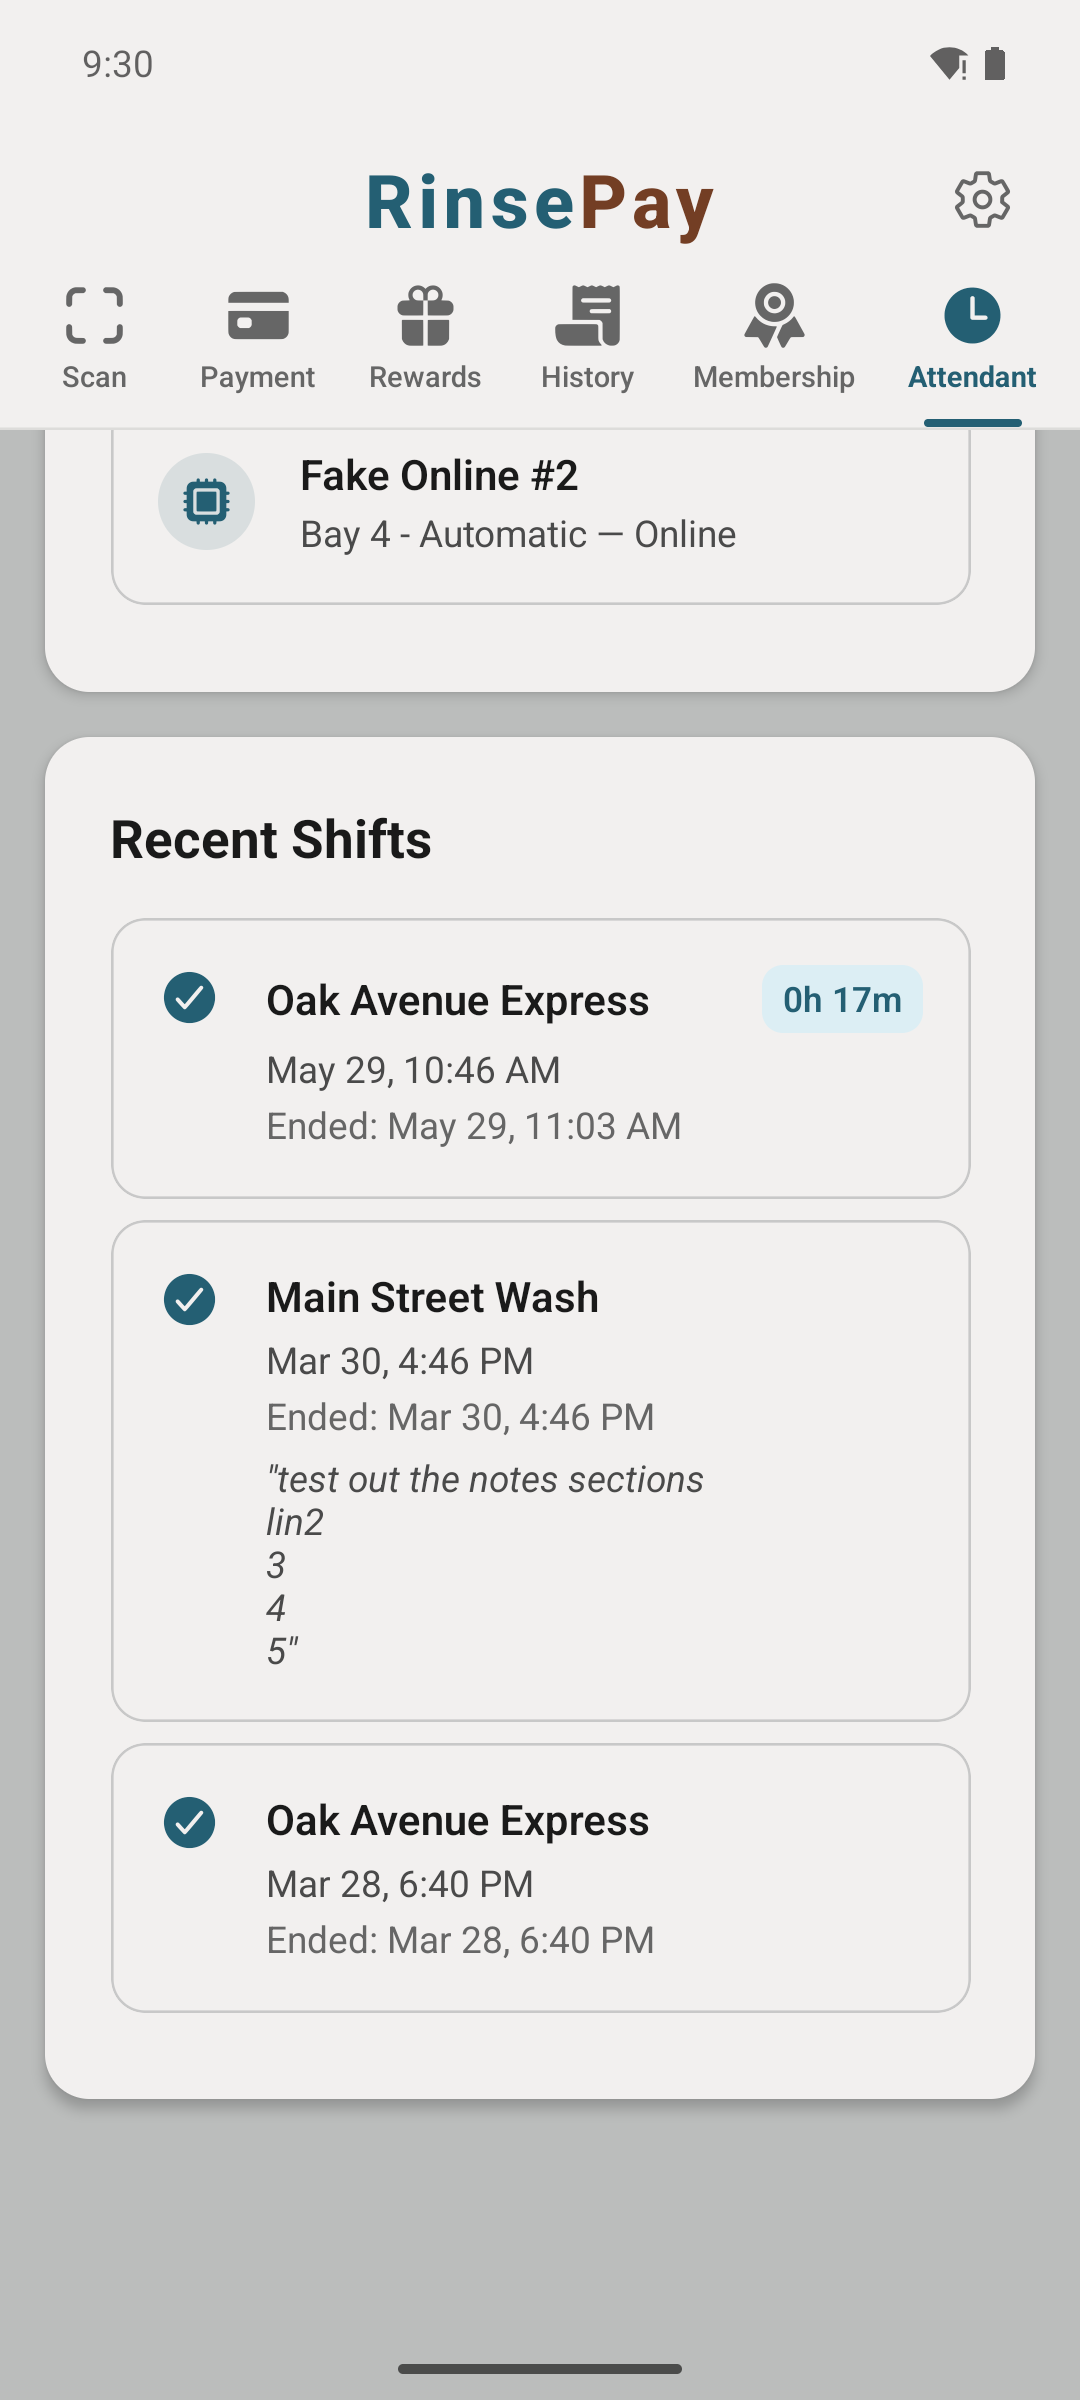
After the owner adds you, an Attendant tab appears in your app next to your existing tabs. It shows your working location, a Start Wash button, and a list of recent transactions at your location.
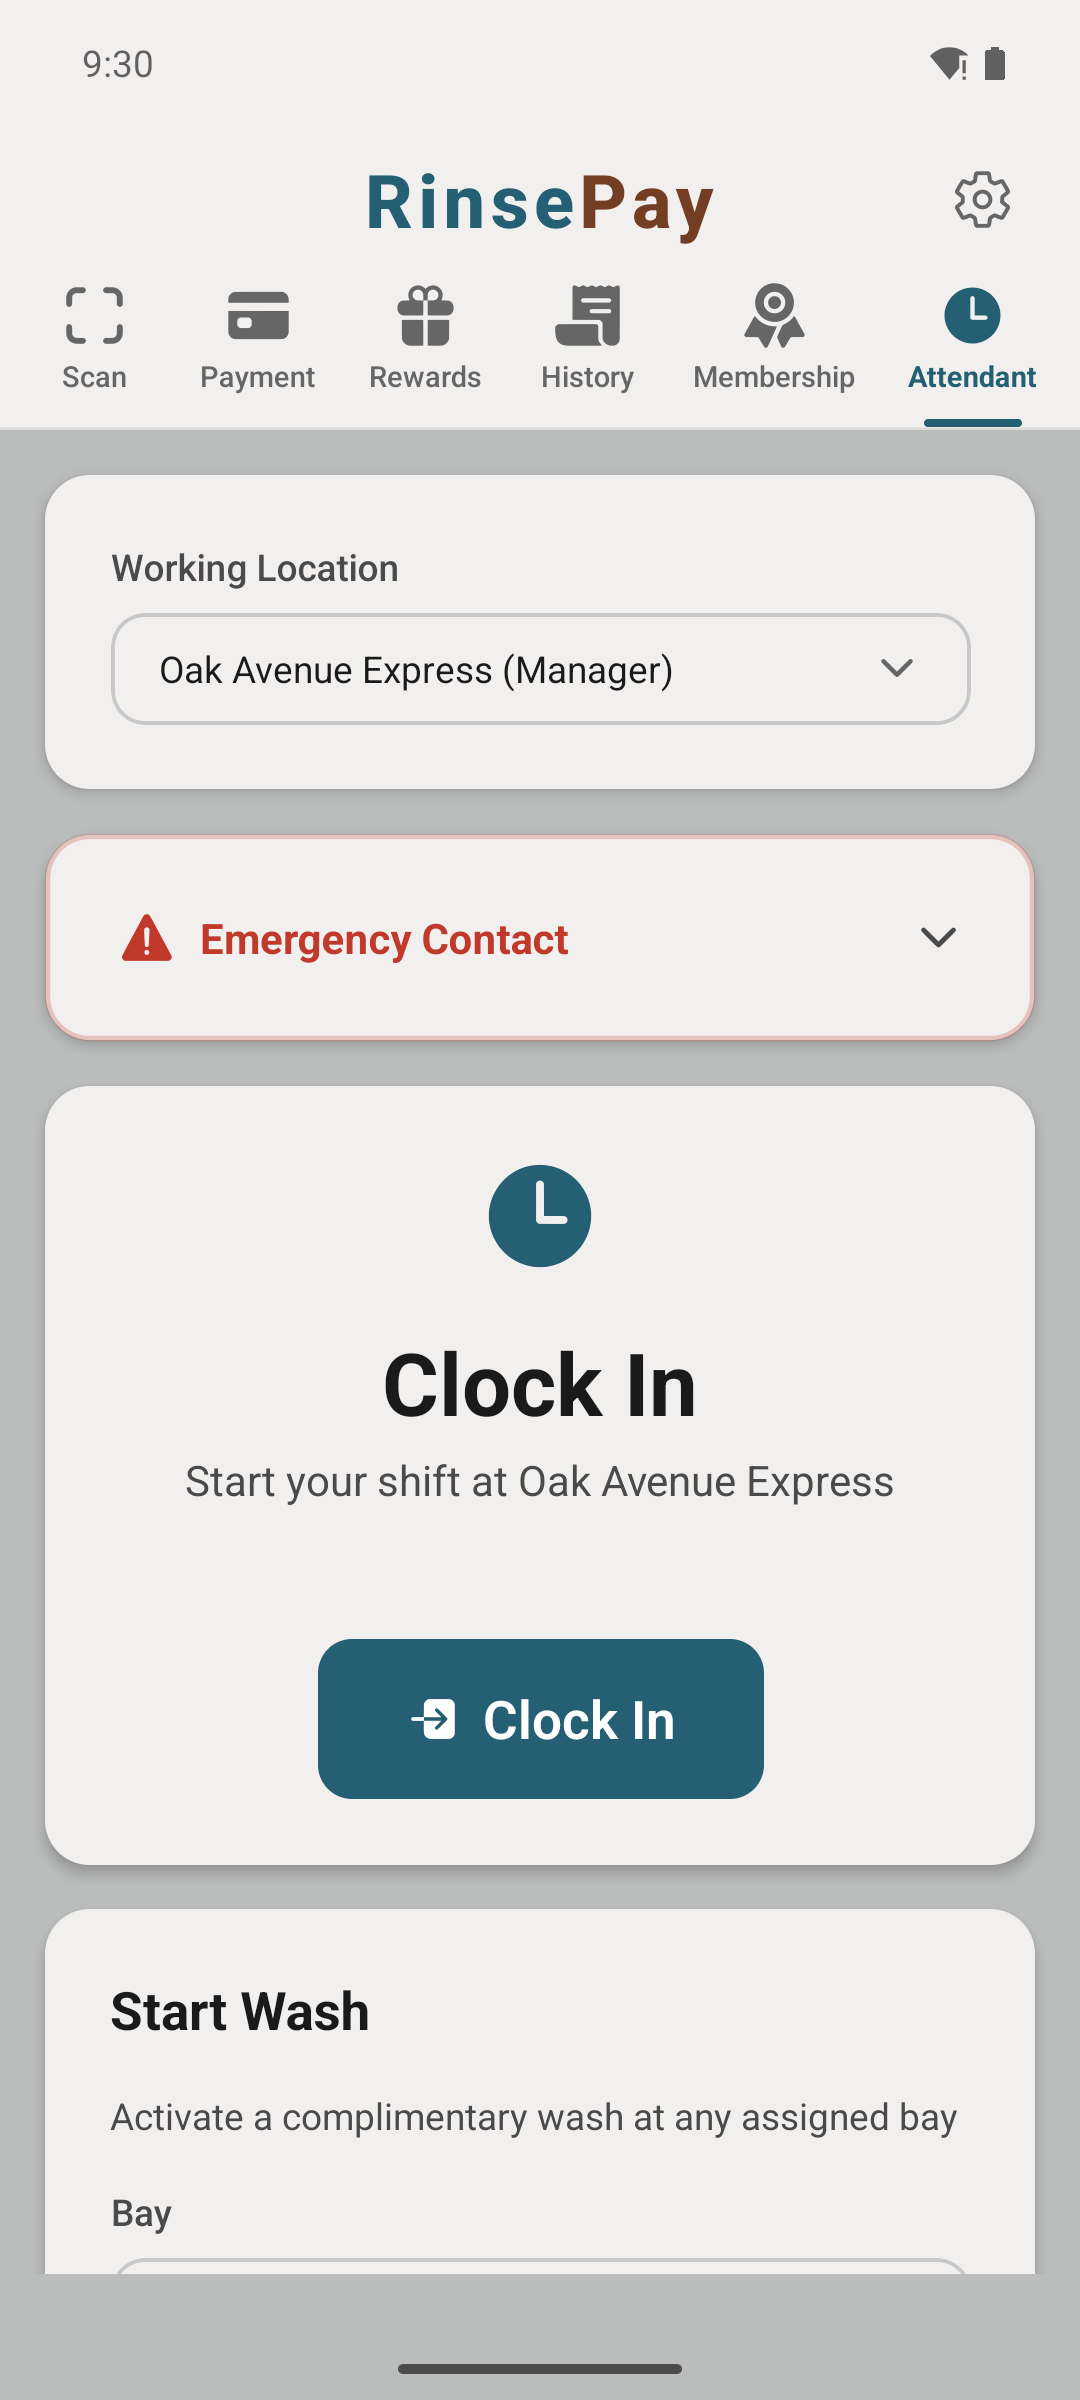
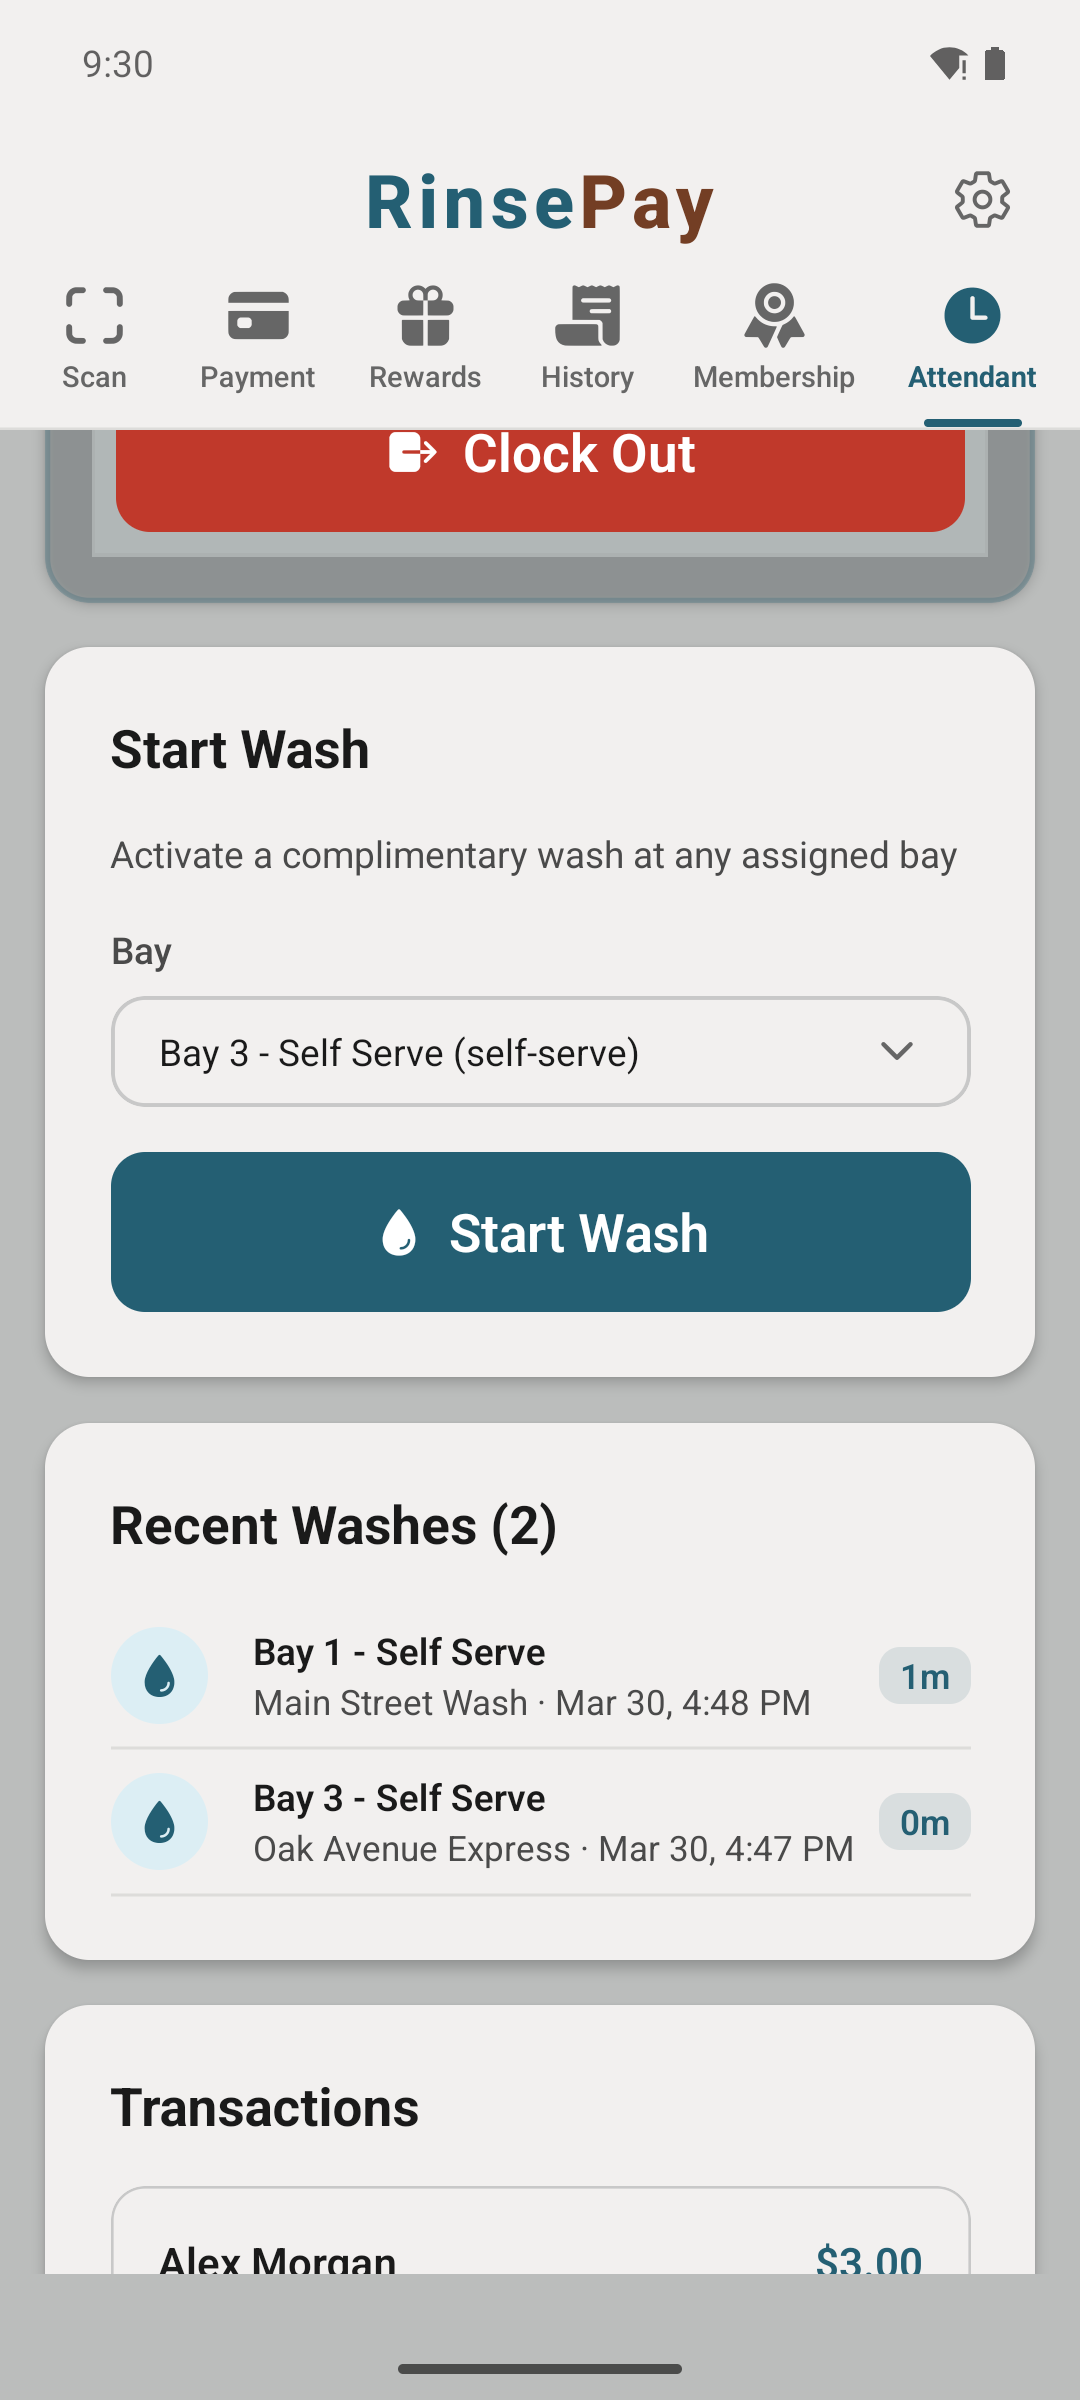
Pick a bay or vacuum from the dropdown, then tap Start Wash — it activates with no charge. On a package vacuum you pick the timed package to comp; on a metered vacuum a free session starts and stops like normal. Use this to test equipment or comp a stuck customer.
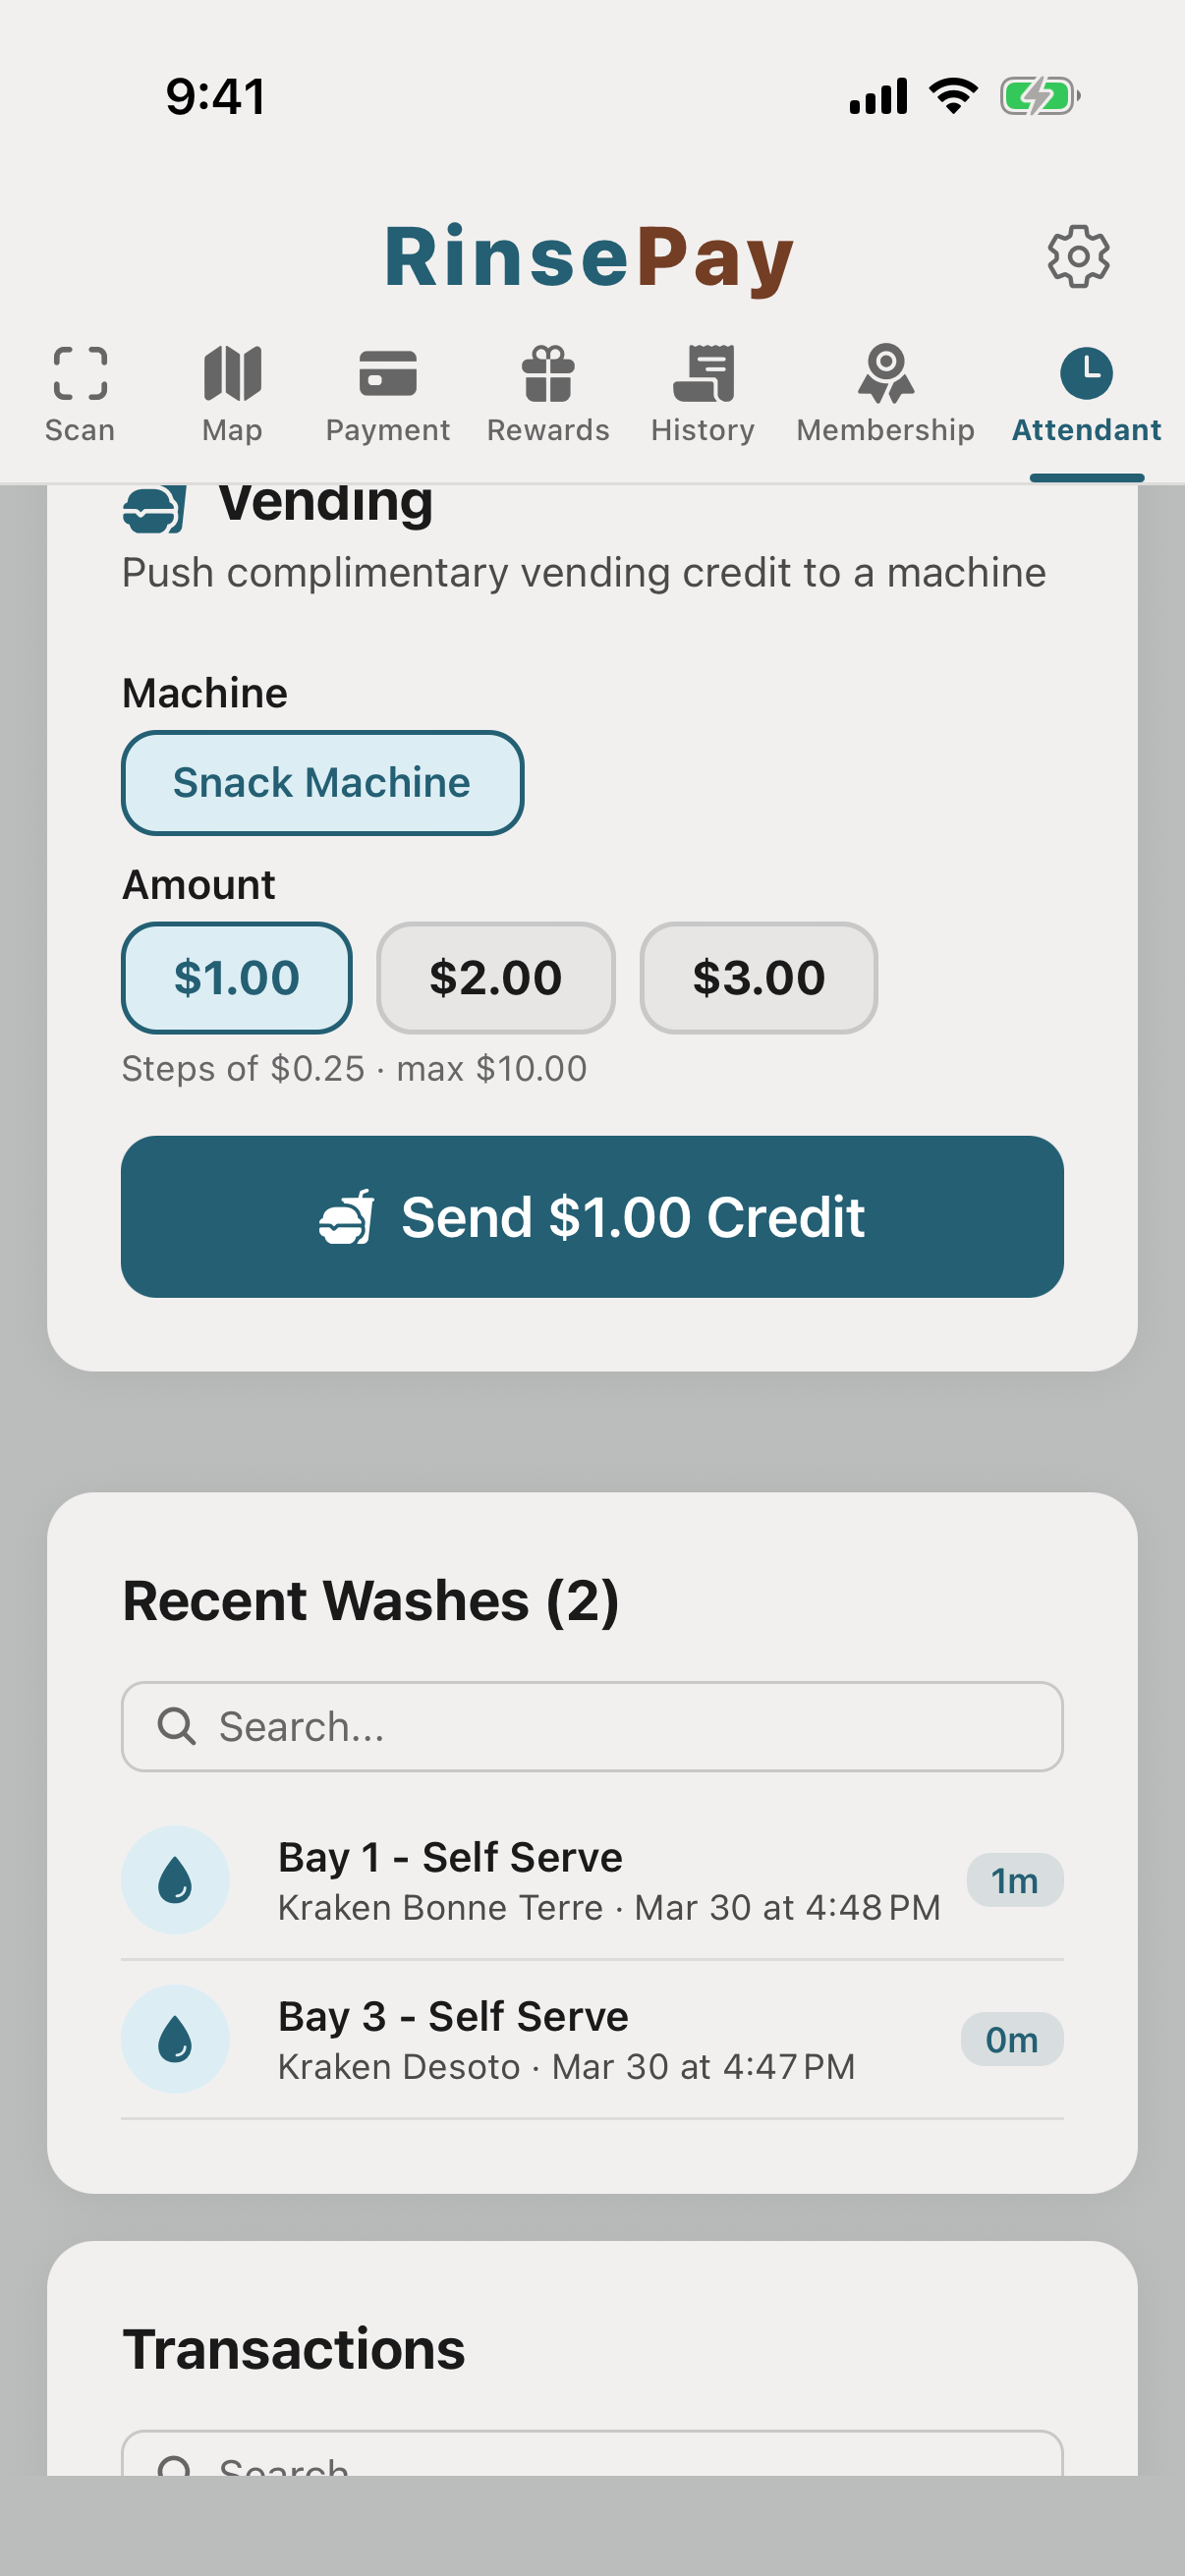
Machine ate a customer's money, or you just want to make someone's day? Pick the vending machine and an amount, and the credit pulses straight to the machine — same as coins — while the customer stands in front of it. Logged as a $0 comp so the owner sees exactly what was given away.
If the owner has set up reward templates (e.g. "Service recovery — 25% off", "Free basic wash", "10 free minutes", "$2 vending credit", "$5 gift credit"), you can generate a one-time QR from any of them on the spot. The customer scans it with their phone and the offer lands on their account — no email addresses, no typing.
Scroll down to Transactions. Find the wash, tap Refund, confirm. If your role has refund limits, you'll send a request to the owner instead — they approve with one tap.
Bay out of soap? Door sensor failing? Add a note on your current shift to log the issue for the owner. If it's urgent (bay down, safety), tap Emergency Contact from the Attendant tab to reach the owner directly.
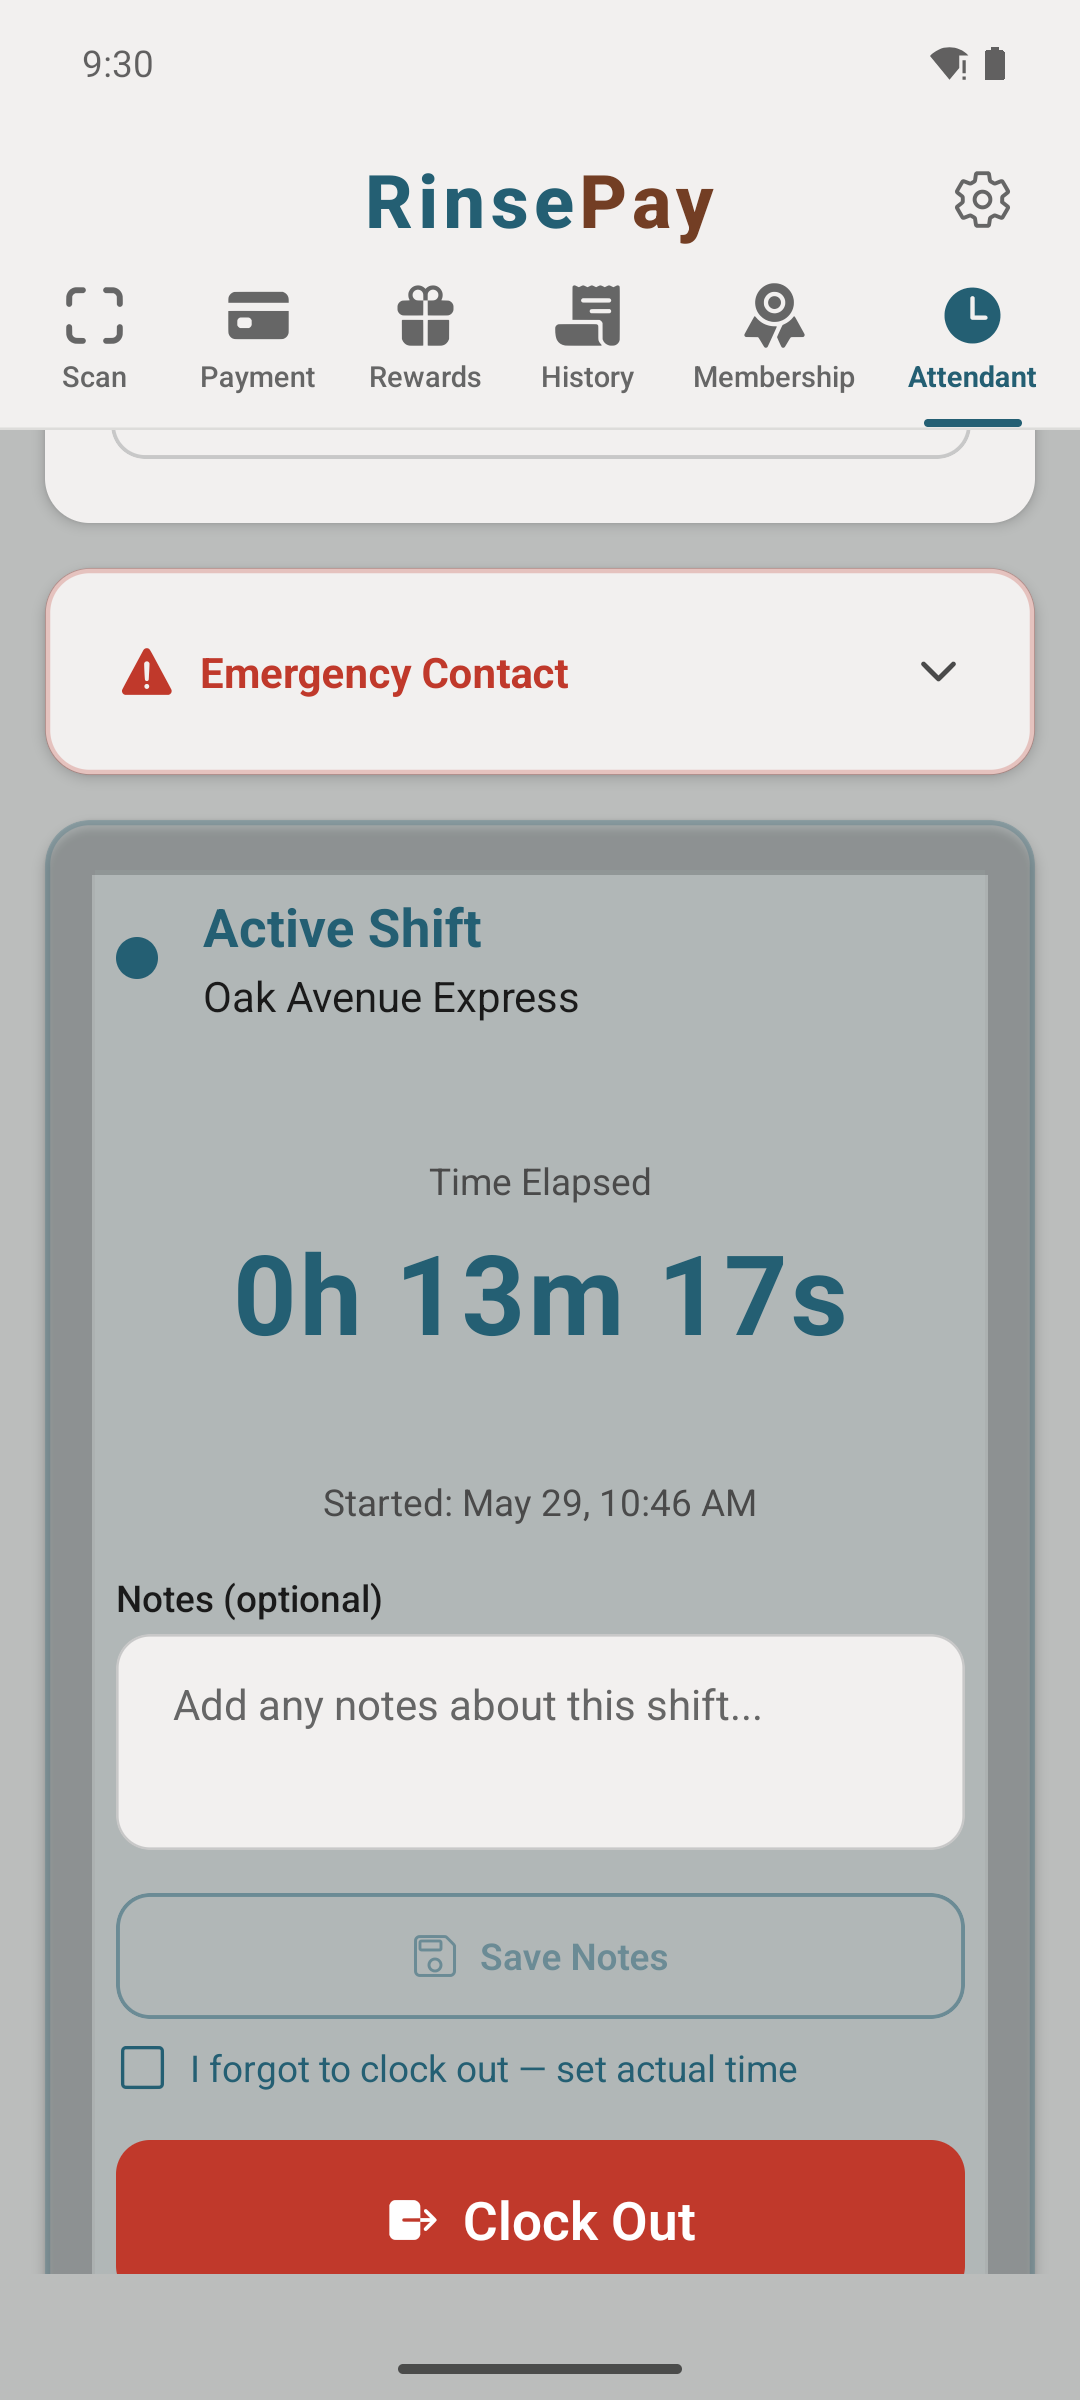
Your shifts are logged automatically based on actions you take on the bay. Pull up your timeclock anytime to see your hours for the pay period.